5
Owner’s manual
EN
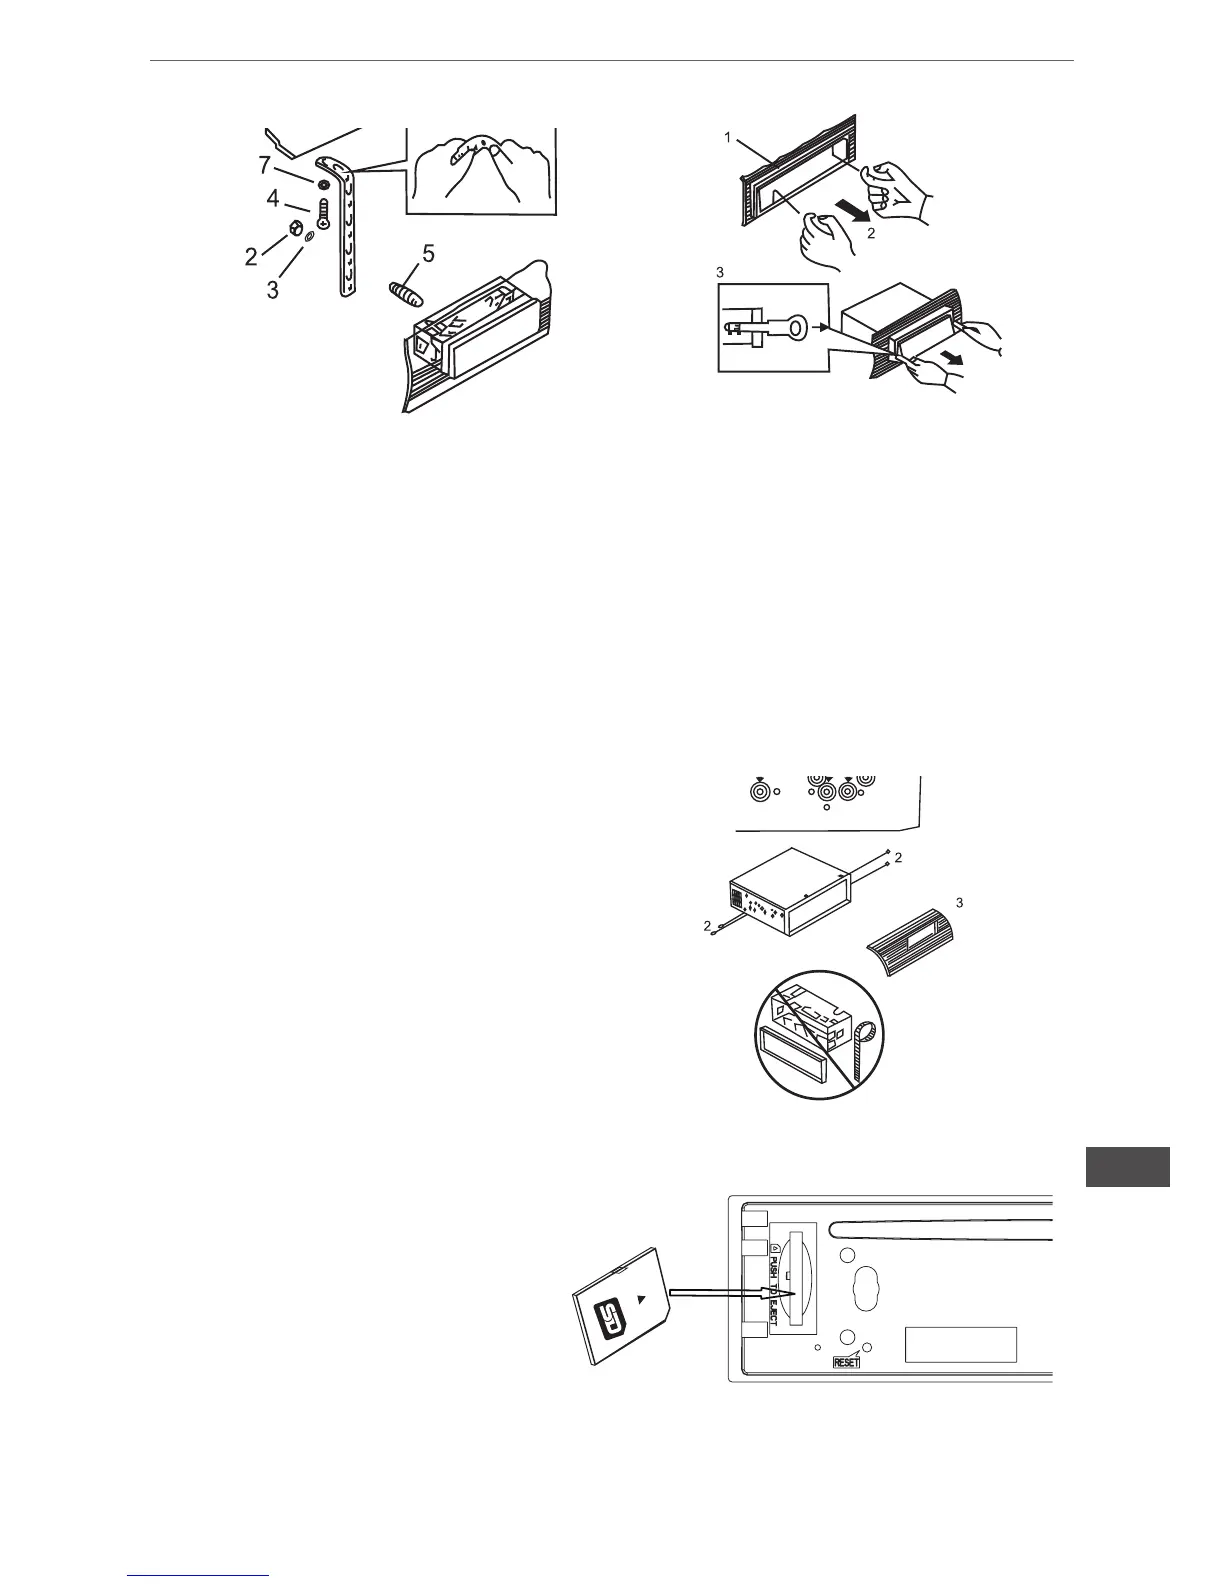
1. Dashboard
2. Nut(5 mm)
3. Spring Washer
4. Screw (5x25rnm)
5. Screw
6. Strap
Be sure to use the strap to se-
cure the back of the unit in place.
The strap can be bent by hand to
the desired angle.
7. Plain Washer
1. Frame
2. Insert ngers into the groove in the front
of frame and pull out to remove the frame.
(When reattaching the frame, point the side
with a groove downwards and attach it.)
3. Lever
Insert the levers supplied with the unit into
the grooves at both sides of the unit and
shown in gure until they click. Pulling the
levers makes possible to remove the unit
from the dashboard.
DIN REAR-MOUNT (Method B)
Installation using the screw holes on the
sides of the unit
Fastening the unit to the factory
radio mounting bracket:
1. Select a position where the screw holes
oft he bracket and the screw holes of the
main unit become aligned (are tted), and
tighten the screws at 2 places on each
side. Use either truss screws (5 >< 5mm)
or ush surface screws (4 x 5mn1)
2. Screw
3. Dashboard or Console
INPUT THE SD CARD
The SD oblique angle keeps
Rightward exposure, put into the
SD slot and press it again to eject.
Fig.2
Fig.3