Press SETTINGS->Misc->Auto Trig Low Freq.
Use the UP/DOWN arrow keys or the numeric input keys to change the low frequency limit to be used during
the trigger level calculation, (default 100 Hz).
Confirm your choice and leave the SETTINGS menu by pressing EXIT/OK three times.
4.1.6. Trig
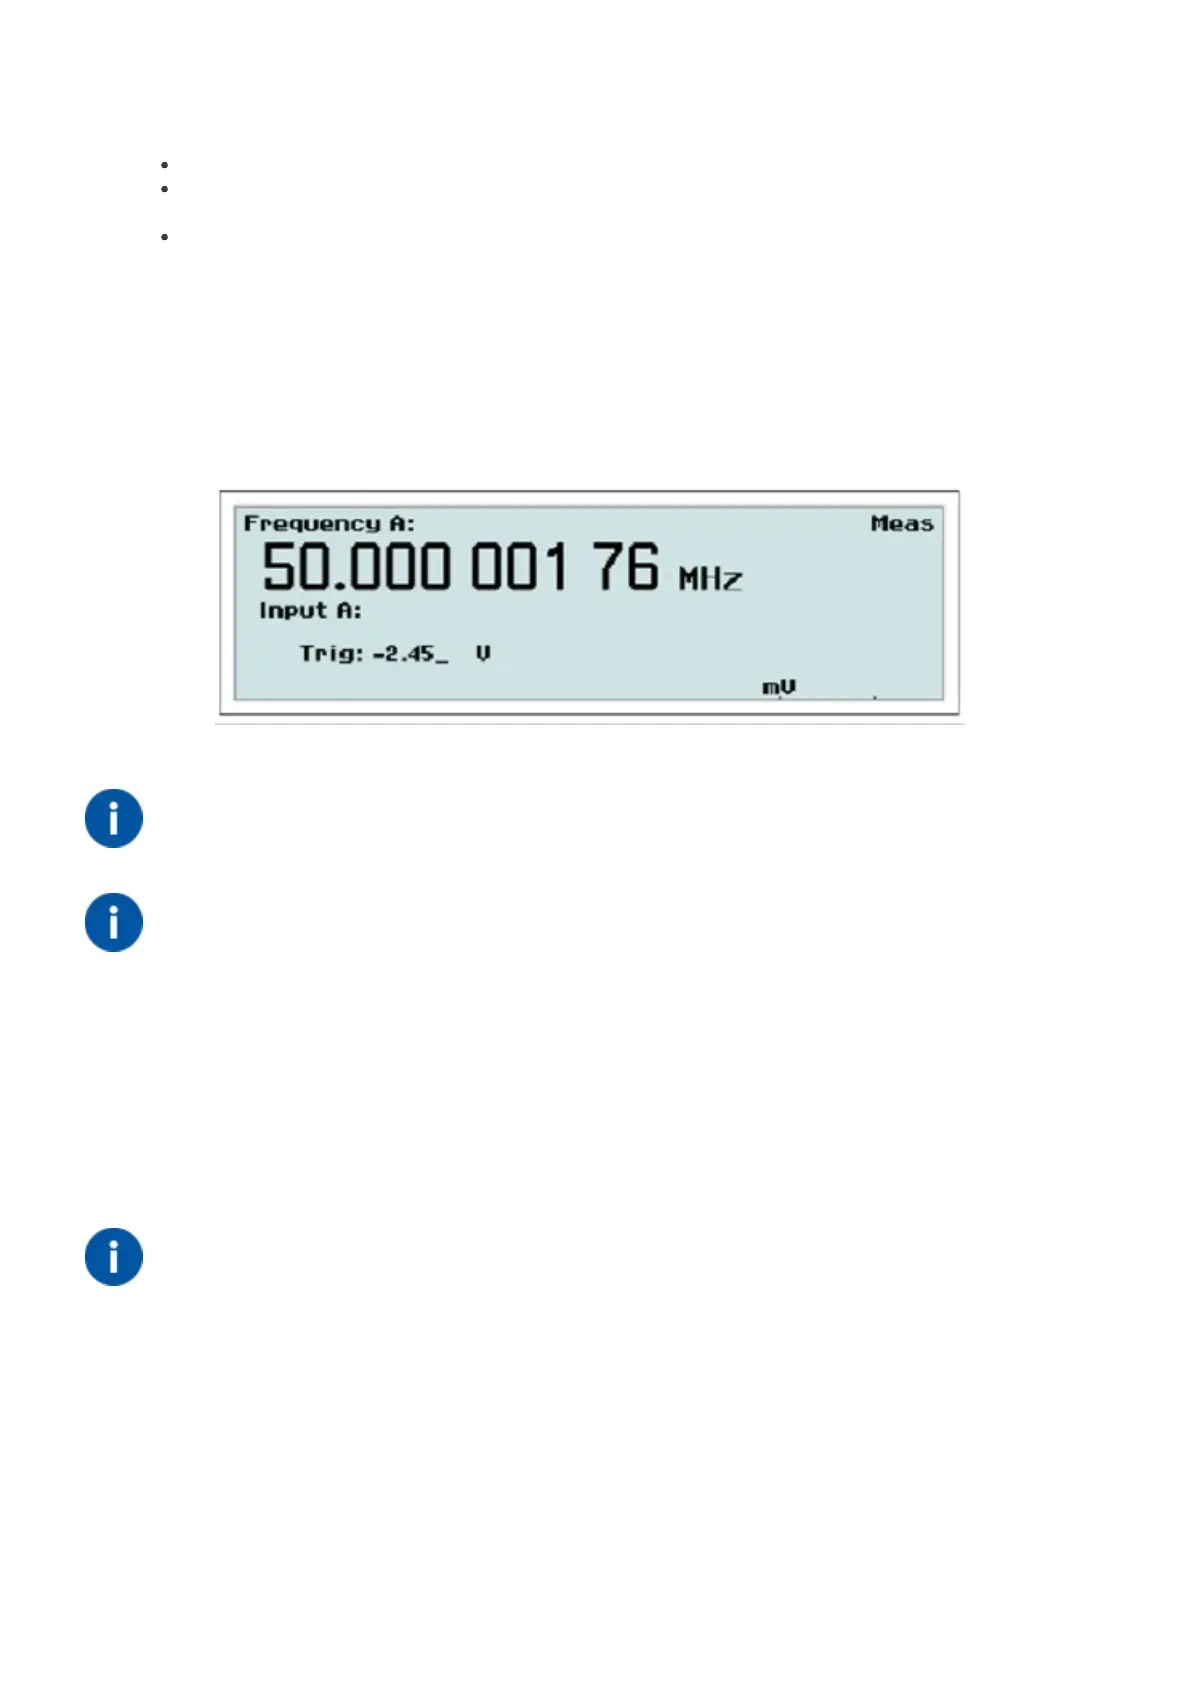
Value input menu for entering the trigger level manually.
Use the UP/DOWN arrow keys or the numeric input keys to set the trigger level. A blinking underscore indicates the
cursor position where the next digit will appear. The LEFT arrow key is used for correction, i.e. deleting the position
preceding the current cursor position.
Fig. 3-9 Value input menu for setting the trigger level.
NOTE: It is probably easier to make small adjustments around a fixed
value by using the arrow keys for incrementation or decrementation. Keep
the keys depressed for faster response
NOTE: Switching over from AUTO to MAN Trigger Level is automatic if
you enter a trigger level manually.
Auto Once
Converting “Auto” to “Fixed”
The trigger levels used by the auto trigger can be frozen and turned into fixed trigger levels simply by toggling the
MAN/AUTO key. The current calculated trigger level that is visible on the display under Trig will be the new fixed
manual level. Subsequent measurements will be considerably faster since the signal levels are no longer monitored by
the instrument. You should not use this method if the signal levels are unstable.
NOTE: You can use auto trigger on one input and fixed trigger levels on
the other.
4.2. How to Reduce or Ignore Noise and Interference
Sensitive counter input circuits are of course also sensitive to noise. By matching the signal amplitude to the counter’s
input sensitivity, you reduce the risk of erroneous counts from noise and interference. These could otherwise ruin a
measurement.
45 / 50