Arctica 4806xp switch Installation Guide Chapter3 Device Installation
1
3. Device Installation
3.1.Installation Preparation
3.1.1.Verify the Package Contents
Please unpack the shipping package and verify carefully the contents inside.
3.1.2.Required Tools and Utilities
The required tools and utilities are shown below:
■ Cross screwdrivers
■ Flat-blade screwdriver
■ ESD wrist strap
■ Antistatic uniform
Caution!
Users should prepare the required tools and utilities by themselves.
3.2.Device Installation
3.2.1.Installing the Switch
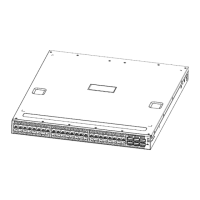
Figure 3-1 Arctica 4806xp switch install sketch map on the rack using stock
Please mount Arctica 4806xp on the 19’’ rack as below:
1. Attach the 2 brackets on the Arctica 4806xp with screws provided in the accessory
kit.
2. Put the machine on the stock of the rack when installing because the machine is
quite heavy.
3. Put the bracket-mounted switch smoothly into a standard 19’’ rack. Fasten the Arctica
4806xp to the rack with the screws provided. Leave enough space around the switch
for good air circulation.
Caution!
The brackets are used to fix the switch on the rack. They can’t serve as a bearing.
Please place a rack shelf under the switch. Do not place anything on top of the switch.