Arctica 4806xp switch Installation Guide Chapter3 Device Installation
5
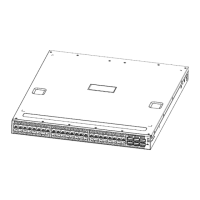
Figure 3-5 Connecting Console to Arctica 4806xp 10Gb Routing switch
The connection procedure is listed below:
1. Find the console cable provided in the accessory kit. Attach the console cable end to
console port of the switch.
2. Connect the other side of the console cable to a character terminal (PC).
3. Power on the switch and the character terminal. Configure the switch through the
character terminal.
3.2.5.SFP/SFP+/QSFP+ Transceiver Installation
Arctica 4806xp provides 48 SPF+ and 6 QSFP+ ports.
The procedure for installing the SFP/SFP+/QSFP+ transceiver is shown below:
Step 1: Put on a ESD wrist strap (or antistatic gloves)
Step 2: Insert the SFP/SFP+/QSFP+ transceiver to the guide rail inside the
SFP/SFP+/QSFP+ port. Do not put the SFP/SFP+/QSFP++ transceiver up-side-down.
Step 3: Push the SFP/SFP+/QSFP+ transceiver along the guide rail gently until you feel
the transceiver snap into place at the bottom of the SFP/SFP+/QSFP+ port.
Note: the SFP/SFP+/QSFP+ transceiver is hot swappable.
Caution!
Do not stare directly at the 2 fiber bore in the SFP/SFP+/QSFP+ transceiver when
the switch is in operation, otherwise the laser may hurt your eyes.
3.2.6.Copper Cable/Fiber Cable Connection