Rev. G 1-22-04 P/N 471048
15
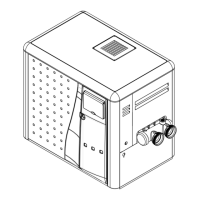
Installation (contd.)
WATER CONNECTIONS
QUICK-FLANGE INSTALLATION INSTRUCTIONS
Each MiniMax Plus Quick-Flange Accessory Kit contains the following items:
One (1) Quick-Flange unit Two (2) 2 in. Rubber gaskets
Four (4) 3/8 Bolts Four (4) 3/8 in. Washers
Two (2) Plastic sleeves
FOR 1½ & 2 in. SCHEDULE 40 PVC PIPE
1. Insert plastic sleeves into the “Quick-Flange”
inlet/outlet openings.
2. Slip the 2 in. rubber gaskets over the plastic
sleeves.
3. Bolt the “Quick-Flange” to the header.
NOTE
Tighten the bolts evenly! Do not over tighten!
4. Use plumbers roll or medium grit sand paper and
clean the inlet/outlet openings of the “Quick-
Flange”. Use the same method to clean the 2 in.
PVC pipe. The sand paper will break up any
grease or contaminant that may not be cleaned
away with a primer.
5. Use 711 PVC glue (or equivalent) and follow the
manufacturer’s recommendations. Apply to the
inlet opening of the “Quick-Flange”. Do the
same to the PVC pipe and quickly insert the
pipe into the “Quick-Flange” and twist the pipe
a 1/4 turn. Do the same to the other opening of
the “Quick-Flange”.
6. For 1½ in. PVC pipe installations, first glue a 1½
in. X 2 in. sch 40 PVC bushing (not supplied or
shown) to the end of the pipe prior to gluing to
the “Quick-Flange”.
Figure 13.
NOTE
You “DO NOT” need the plastic bushings.
1. Insert pipe into the inlet/outlet openings of the
“Quick-Flange”
2. Slip the rubber gaskets over the pipe, using the
supplied 2 in. rubber gasket for 2 in. copper pipe
or the 1½ in. rubber gasket (not supplied,
available from the factory) for the 1½ in. copper
pipe.
3. Bolt the “Quick-Flange” to the header.
Figure 15.
FOR 1½ & 2 in. COPPER PIPE
Gasket
Figure 14.
*
*
Pipe
Plastic Bushing
Gasket/Sleeve

 Loading...