9
CHALLENGER
®
Centrifugal Pump Installation and User’s Guide
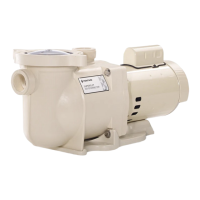
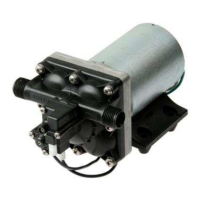
Pump Reassembly
1. Use the 9/16 inch wrench to remount the seal plate to the motor via the four (4) bolts that hold the motor to
the seal plate.
2. Reseat the spring seal on the white ceramic seal. Ensure that the carbon face of the spring seal contacts the
ceramic face of the stationary seat.
3. Grease the motor shaft thread and screw the impeller onto the motor shaft.
Note: Use the 1/4 inch flat blade screwdriver to hold the motor shaft in place when screwing down the impeller.
The motor shaft is accessible through the back of the motor.
4. Using a 1/4 inch flat blade screwdriver, screw in the impeller lock screw.
Note: The impeller screw is a left-handed thread and tightens in a counter-clockwise direction.
5. Remount the diffuser spacer and diffuser using a 1/4 inch flat blade screwdriver and the three (3) diffuser screws.
6. Reseat the pump housing (strainer pot/volute) onto the rear sub-assembly.
7. Place the band clamp around the pump housing an rear sub-assembly. Tighten with the band clamp knob.
Note: The band clamp knob should be parallel to the floor of the equipment pad when the clamp is installed
properly.
8. Reinstall the drain plugs. Hand tighten only!
9. Fill the pump strainer pot with water.
10. Refer to page 4 “Initial Start-Up” procedures to restart the pump.
Drain Plugs
(2x)
Band
Clamp
Band
Clamp Knob
Pump Housing
Rear
Sub-Assembly
Diffuser Holidng
Screws (3x)
Diffuser
Impeller
Screw
Impeller
Seal
Diffuser
Spacer
Seal
Plate
Motor-to-Seal
Plate Screws
(4x)
Motor
Figure 4

 Loading...