4
PoolShark
®
Installation and User’s Guide
Hose Assembly
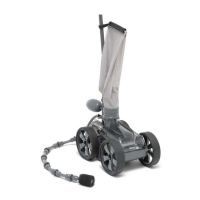
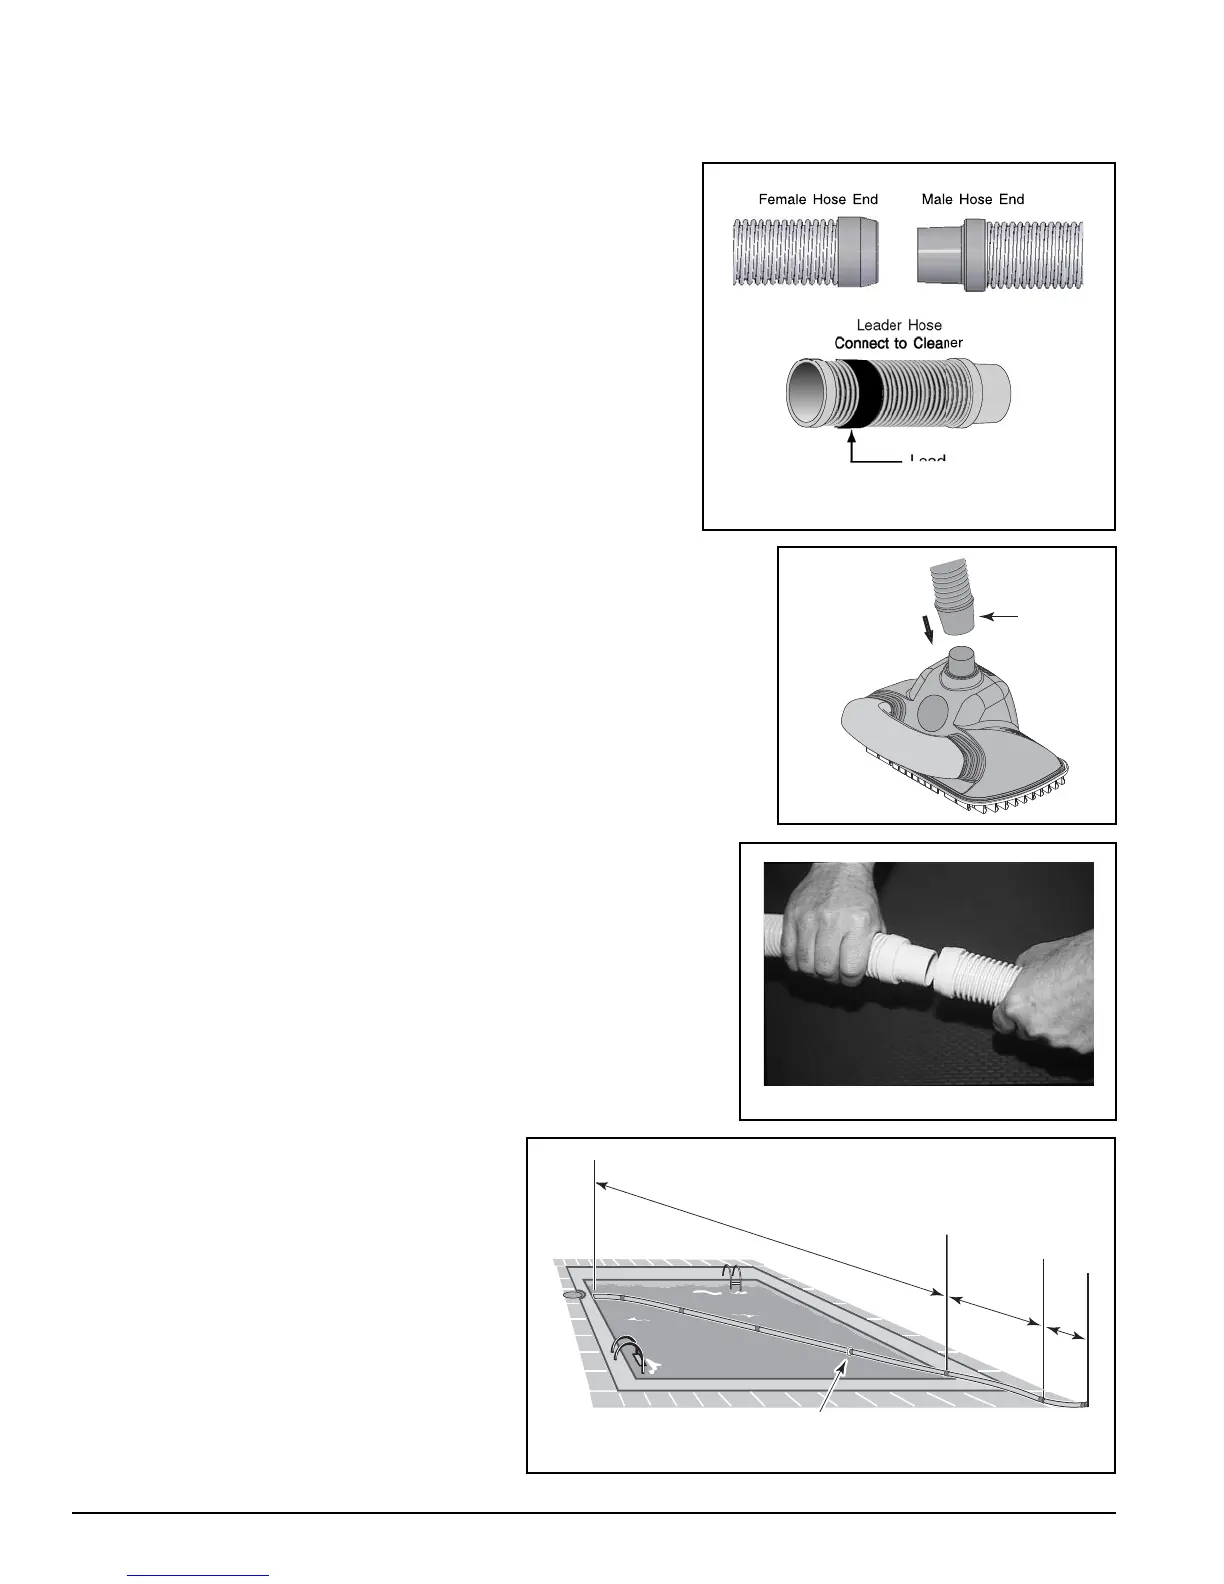
Connect the Hose Sections (Figures 3 and 4).
For best results and to maintain proper operation, use only original
hoses, or direct replacements, (see Replacement Parts page).
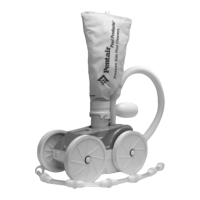
1. A special “leader” hose section (12 inches long) is
designed to connect to the cleaner and is marked with a
red label, (see Figures 3 & 4). Failure to use this leader hose
section to attach the hose to the cleaner will hinder your
cleaner’s performance.
2. Connect the hose sections by twisting and pushing the female
ends onto the male ends after wetting the ends in the pool,
(see Figure 5).
3. Make sure the connections are snug. The number of lengths
that you will need depends on the size of your pool.
4. The overall length of hose needed will be the distance from:
(a) the point at which you will attach the hose to the suction
connection, to (b) the furthest point in the pool from, (c) plus
one hose length, (d) plus leader hose, (see Figure 6).
5. Submerge the hose so it fills with water and expels air from the
hose. Attach one end of the hose to the vacuum source as
described in Section 3, Installation. Keep the other end of
the hose accessible.
with red label marked
"Connect to Cleaner"
Figure 3.
Figure 5.
Hose must equal longest stretch
—
—
plus one length
leader
hose
Add one hose weight to the third cuff from the PoolShark
®
Figure 6.
Leader Hose
marked
"Connect
to Cleaner"
Figure 4.