8
PoolShark
®
Installation and User’s Guide
Optional Installation,
cont’d.
Adjust Flow
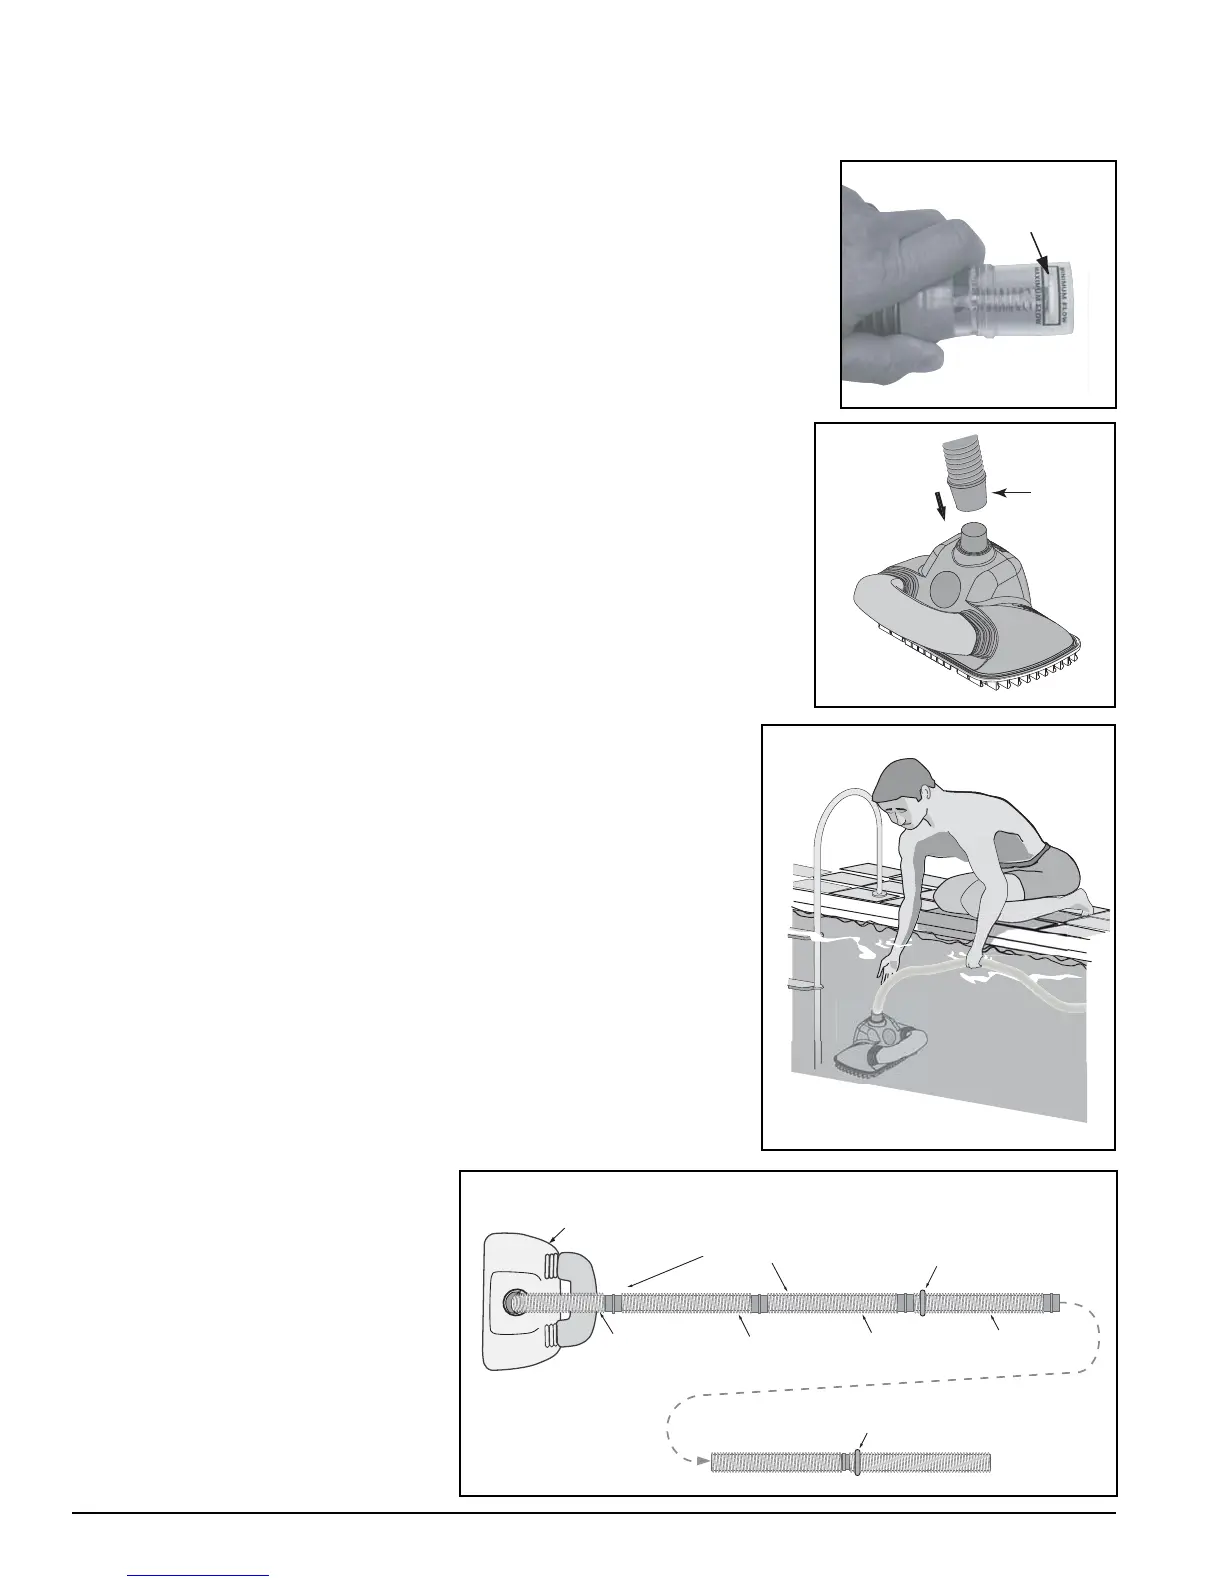
1. With the main drain closed, and one end of the hose attached to the vacuum
regulator installed in the skimmer, insert the flow gauge into the other end of
the hose (the end with the “leader” hose attached).
2. Keep the hose and flow gauge underwater.
3. Turn on the pump. With the pump running, adjust the vacuum regulator
(in your skimmer) until the indicator on the flow gauge is between minimum and
maximum flow (Figure 20).
NOTE: The flow gauge is calibrated for use with the “Y” shaped regulator
valve. The flow gauge will not indicate the correct flow for the cleaner if you
are not using the “Y” shaped regulator valve.
4. Remove the flow gauge from the end of the hose (the end with the “leader”
hose attached) and attach the “leader” hose to the cleaner’s swivel.
5. Observe the cleaner performance.
NOTE: If you have a very strong pump and the flow is still too fast, slightly
open the main drain.
6. Increase the flow through the cleaner to improve the cleaner ‘s ability
to climb the pool walls.
7. Decrease the flow to stop the cleaner from drawing air when it
climbs to the water surface.
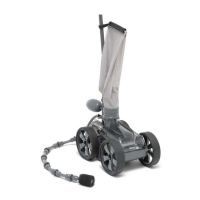
Connect the Hose to the Cleaner
1. Connect the leader hose cuff of the 14" (0.36 m) leader hose to the
cleaner (correct end of hose is marked), (see Figure 21).
2. Fill the cleaner with water and let it sink to the bottom, (see Figure 22).
3. Verify hose connections as shown in Figure 23, and that gate
valves are fully open in the suction line.
Balancing the Hose
It may or may not be necessary to add weight to your hose, depending
on your pool’s size, shape, and depth.
Try the cleaner first without any hose
weights. If the hose is too buoyant,
add the weight as shown in Figure 23.
Turn the Pool Pump on
After completing the installation, turn
the pool pump on and allow it to run
for a couple of minutes to ensure that
all air cycles out of the system.
Disc Indicator
Figure 20.
Flow Indicated on Flow Gauge.
Leader Hose
marked
"Connect
to Cleaner"
Figure 21.
Figure 22.
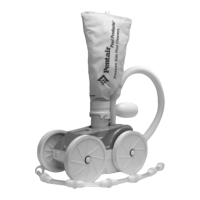
PoolShark cleaner
Attach second hose weight 1" back from the
end of the fifth section for pools deeper than 6 feet.
Short leader Second hose
Section
Third hose
Section
Fourth hose
Section
Attach first hose weight
1" back from the end of
the third hose section
No weight on these
hose cuffs.
Figure 23.