12
PoolShark
®
Installation and User’s Guide
Disassembly
1. With a screwdriver, carefully work the rubber vacuum pad down over the
lip of the Outer Housing, (see Figure 25).
2. Lift the Outer Housing straight up off of the chassis. Squeeze the tabs on the
Bumper/Height Limiter Clips (inside the housing) to remove the Bumper/
Height Limiter. The Bumper/Height Limiter, Bumper/Height Limiter Boots,
and Bumper/Height Limiter Clips pull apart, (see Figure 26).
3. Squeeze and pull the Sprocket Clips to release the Drive Shaft Assembly
and Center Sprocket, (see Figure 27).
4. Pull the Oscillator Straight out from the bottom of the Outer Housing.
Be careful not to lose the Sliding Seals, (see Figure 28).
5. Squeeze the latching tabs and pull up on the Swivel Housing and Swivel.
The assembly will come up, releasing the Swivel Sprocket. Squeeze the
latching tabs to remove the Clutch Clip, (see Figure 29).
6. Remove the Shaft Plug with the stainless steel shaft and the Large
Steering Drive Assembly, (see Figure 30).
7. Remove the Oscillator Sleeve, releasing the Oscillator Sleeve Bushing
and the Clutch assembly, (see Figure 31).
Reassembly
To reassemble the PoolShark
®
, reverse the steps above.
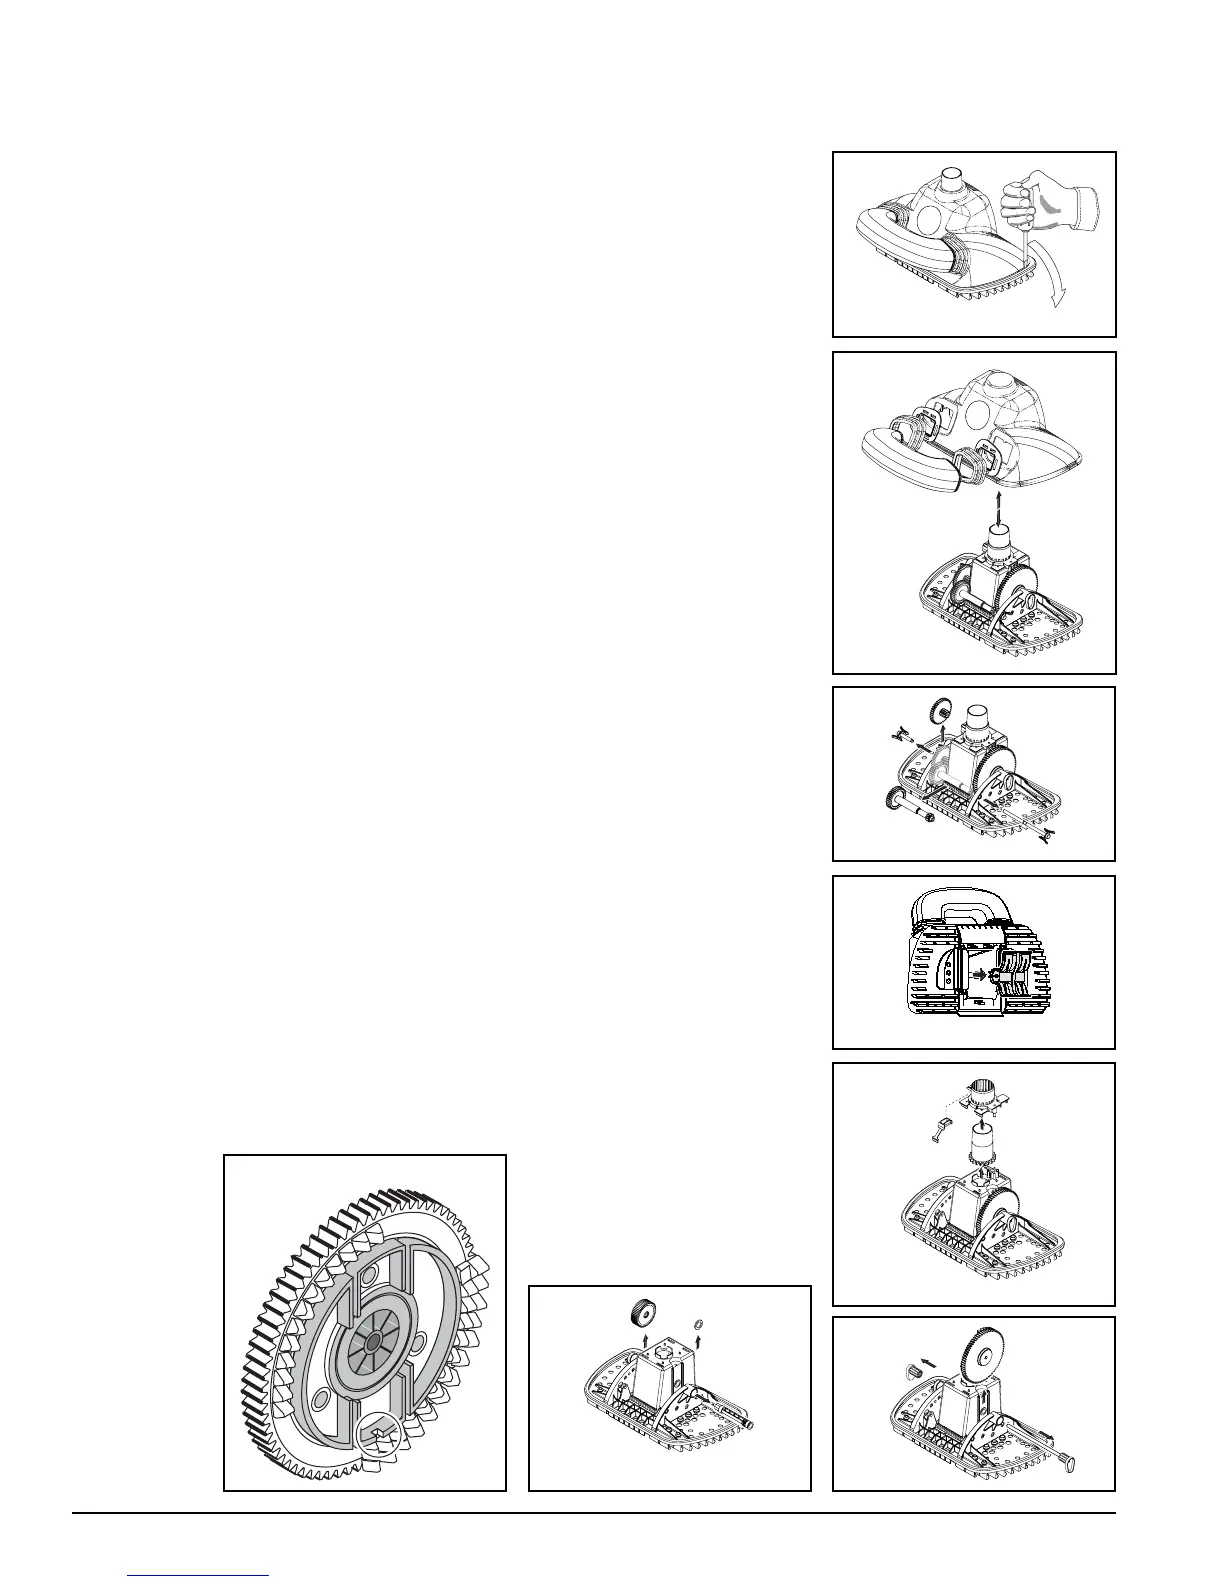
NOTE: The notch on the center disk of the Large Steering Drive Assembly
must be down (as shown in Figure 32) for assembly.
Figure 25.
Figure 26.
Figure 27.
Figure 28.
Figure 29.
Figure 30.Figure 31.
Figure 32.