WHISPERFLO
®
VS and WHISPERFLO
®
VST Variable Speed Pump Installation and User’s Guide
17
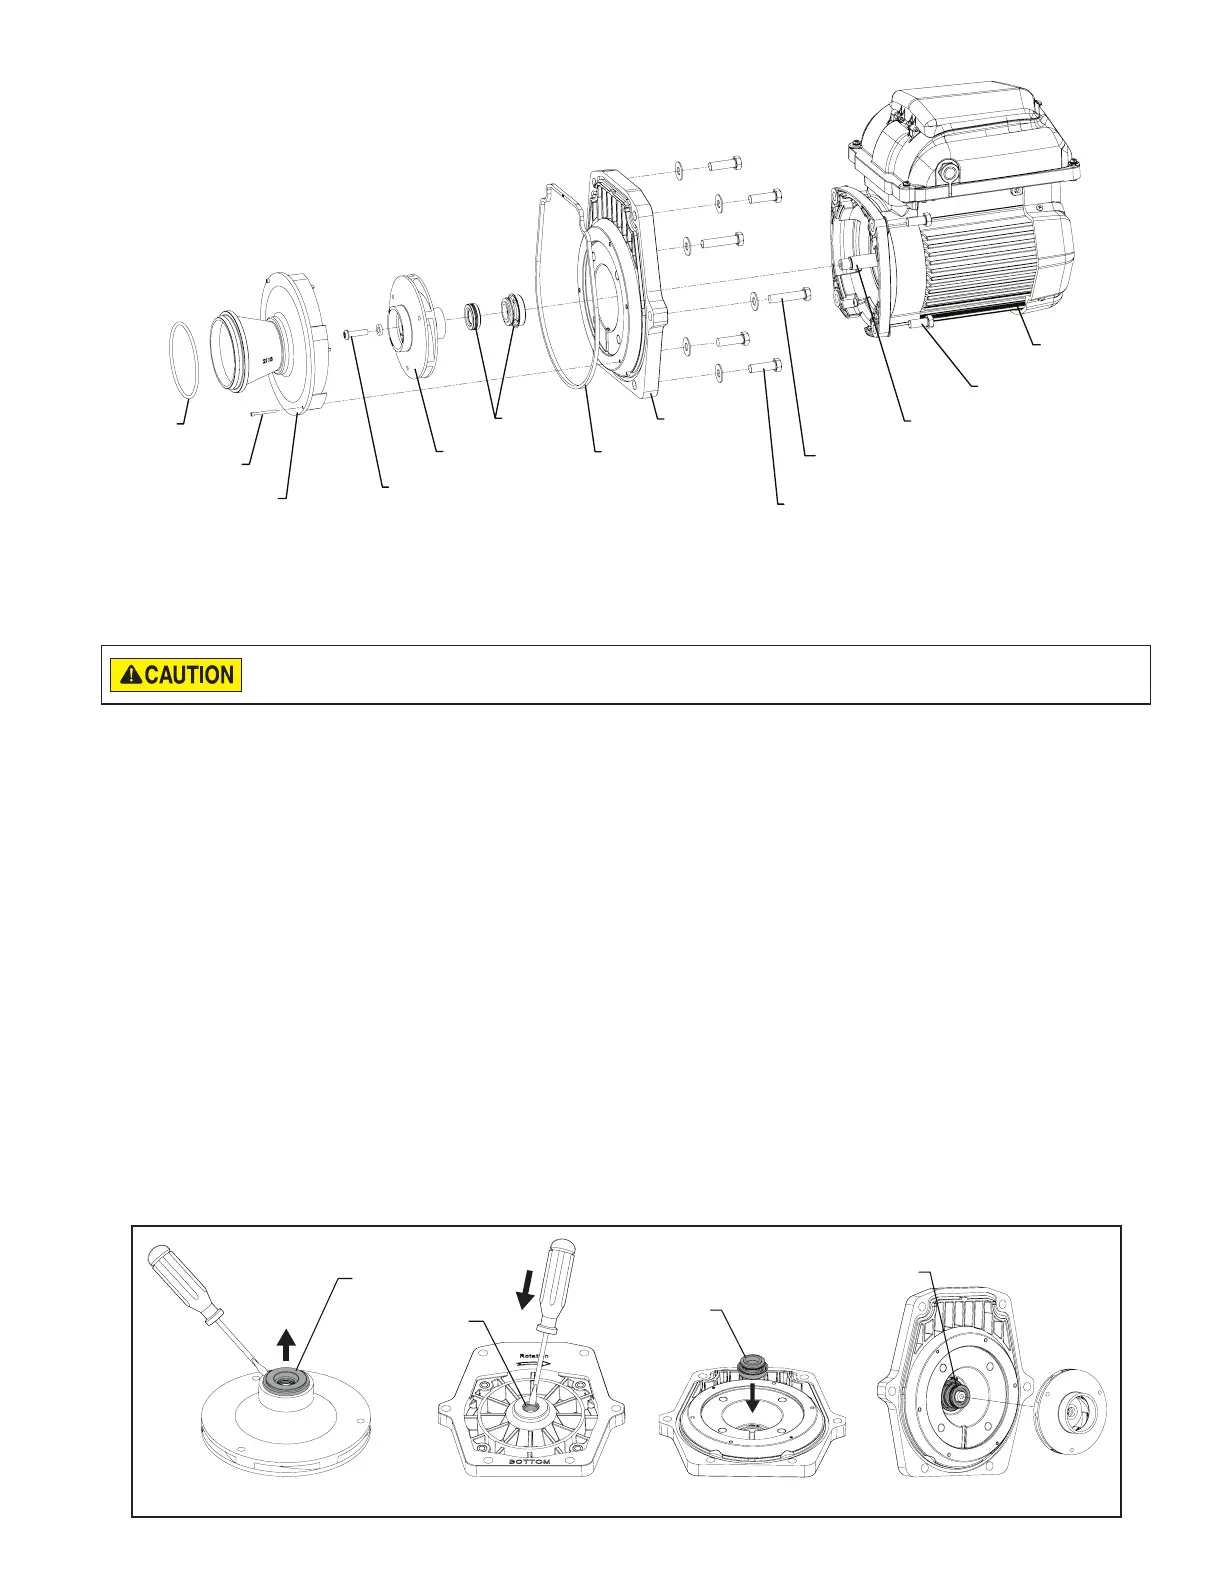
MOTOR/DRIVE
ASSEMBLY
MOTOR/SEALPLATE
BOLTS (x4)
SHAFT SEAL
SEAL PLATE
SEAL PLATE
GASKET
IMPELLER
IMPELLER SCREW
AND WASHER
DIFFUSER
DIFFUSER
SCREWS (x2)
DIFFUSER
O-RING
MOTOR SHAFT
STRAINER POT BOLTS (x4)
STRAINER POT
THROUGH-BOLTS (x2)
Motor/Hydraulics Assembly Diagram
Shaft Seal Replacement
The Shaft Seal consists of two halves, a rotating spring seal and a xed ceramic seal. The shaft seal may occasionally
become damaged and require replacement.
1. Ensure you have completed all pump disassembly instructions on the previous page.
2. Using a small at-blade screwdriver, gently pry the old Ceramic Seal out of the Impeller (Figure A).
Note: The impeller seal cavity can be damaged if too much force is used when removing the Ceramic Seal.
3. Place the Seal Plate face down on a at surface and tap out the old Spring Seal with at-blade screwdriver (Figure B).
4. Remove the old Spring Seal from the seal plate with a pair of pliers.
Note: When removing the spring seal the inner sleeve of the seal may stick to the seal plate. Ensure it is removed
before installing the new spring seal.
5. Thoroughly clean both seal cavities.
6. Using a silicone sealant, lightly coat the metal ange of the new Spring Seal.
7. Carbon Face outwards, position the new Spring Seal inside the seal cavity (Figure C).
8. Place a clean piece of 1-1/4 in. PVC or deep-well socket over the Spring Seal face and gently tap it into the seal plate.
9. Using a clean cloth, thoroughly clean the seal face.
10. Using water, lightly lubricate the outside rubber surface of the new ceramic seal.
11. White Face outwards, rmly press the ceramic seal into the impeller with your thumbs.
12. Using a clean cloth, thoroughly clean the seal face.
13. Reassemble the pump according to the instructions given in Pump Reassembly, page 16.
Scratching, marring or otherwise damaging the polished shaft seal faces will cause the seal to leak. Always handle the shaft seal with care
and thoroughly clean seal faces anytime they may have come in contact with dirt, grease, oils or other contaminants throughout installation.
New
Spring
Seal
Carbon Face
Upwards
FIGURE C
FIGURE A
Old
Spring
Seal
FIGURE B FIGURE D
New Spring
Seal
(Installed)
Old
Ceramic
Seal
 Loading...