77420 - 29/107 -
15. [Adjustment] Positioning 0-O100 (Viewfinder indications)
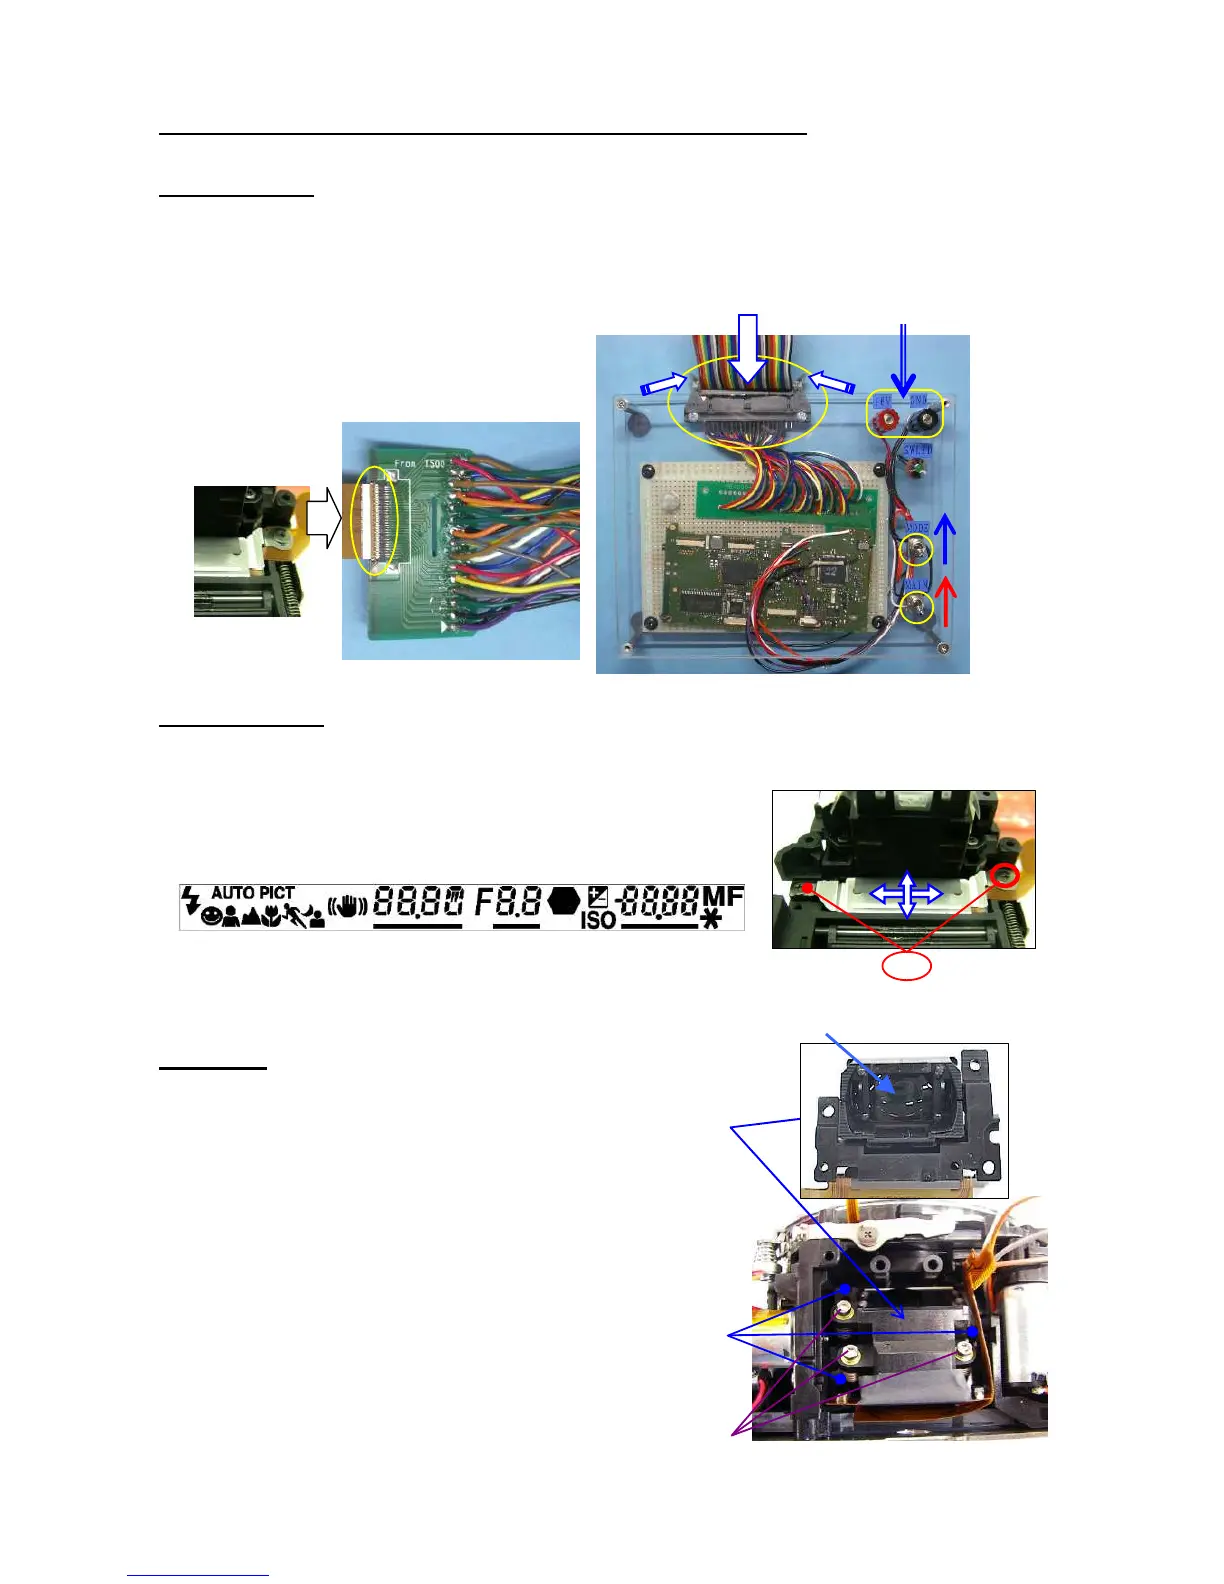
[Preparation] O100 cable for 77170, O100 positioning jig for 76700, Power supply (8V,3A)
15-1. Preparation
①Connect the O100 cable for 77170 to the jig as shown figure.
②Connect the flex board of O100 to the cable.↓ (Flip lock)
③Apply 6.0 V to the jig
④Turn the main switch ON.
⑤Turn the mode switch ON.
*Indication of O100 is display.
15-2. Adjustment
① [Confirmation] Check whether the position of the display is straight.
② [Adjustment] Loosen the screw and change the position.
③ After adjustment is done, apply screw lock.
16. 0-M100
[Preparation] Hexagonal screwdriver 1.5mm.
① M100
[CAUTION] There is no dust and stain on the surface of lens.
② TY-CNL-D1.7x4.0 (x3)
③ [Adjustment] Temporary adjustment of AF block.
--- Screw in 3 adjusting screws until they stops,
then screw back two turns.
[Note] After sensor position adjustment with programmed
Software is done, apply screw-lock agent to between the
head of adjustment screws and washers.
①

 Loading...