30
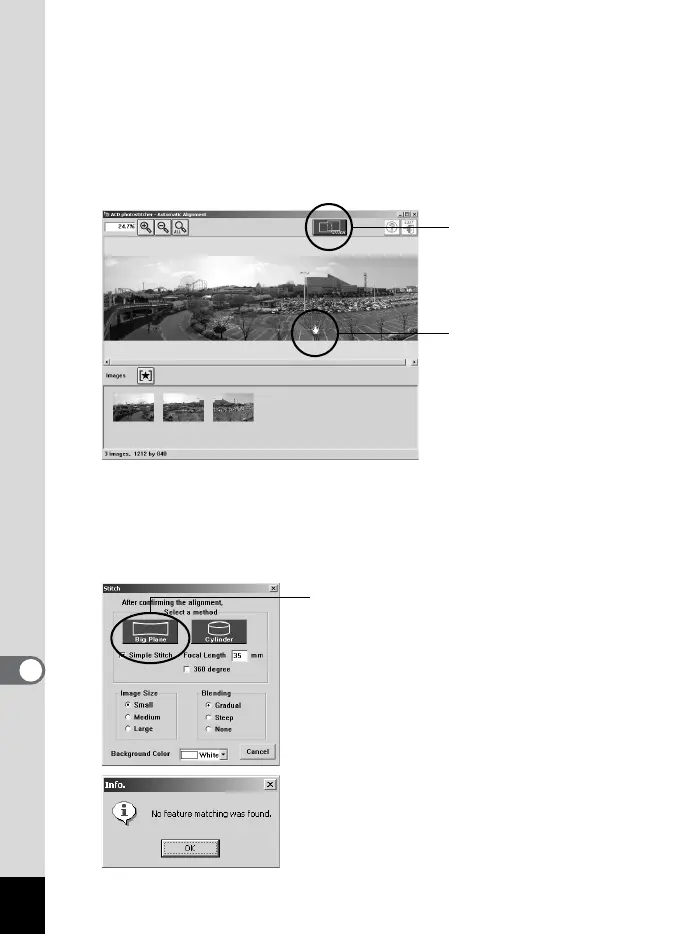
3 Correct the image positioning.
[ACD photostitcher] starts, and the selected images are displayed
in panorama format.
Move the mouse pointer onto the image. It changes into a
e
symbol.
Hold down the left mouse button and drag the images to adjust the
stitching position.
When the position is adjusted, click the [STITCH] button.
4 Select the stitching method.
You can choose the stitching method from [Big Plane] and [Cylinder].
Here, you will create a flat panorama. Click the [Big Plane] button.
A confirmation message is displayed. Click [OK].
2 Click the
[STITCH] button.
1 Click and drag to
adjust position
Click [Big Plane].
• Click [OK] and continue if a screen like
the one shown left is displayed.
 Loading...