Operator’s manual Pentruder RS2 wall saw and Pentpak 3 HFi power pack – Original instructions Page 22
3.5.5 Mounting the saw blade with flange on the machine spindle
When the blade is securely fitted on the blade flange, it can be fitted on to the machine spindle.
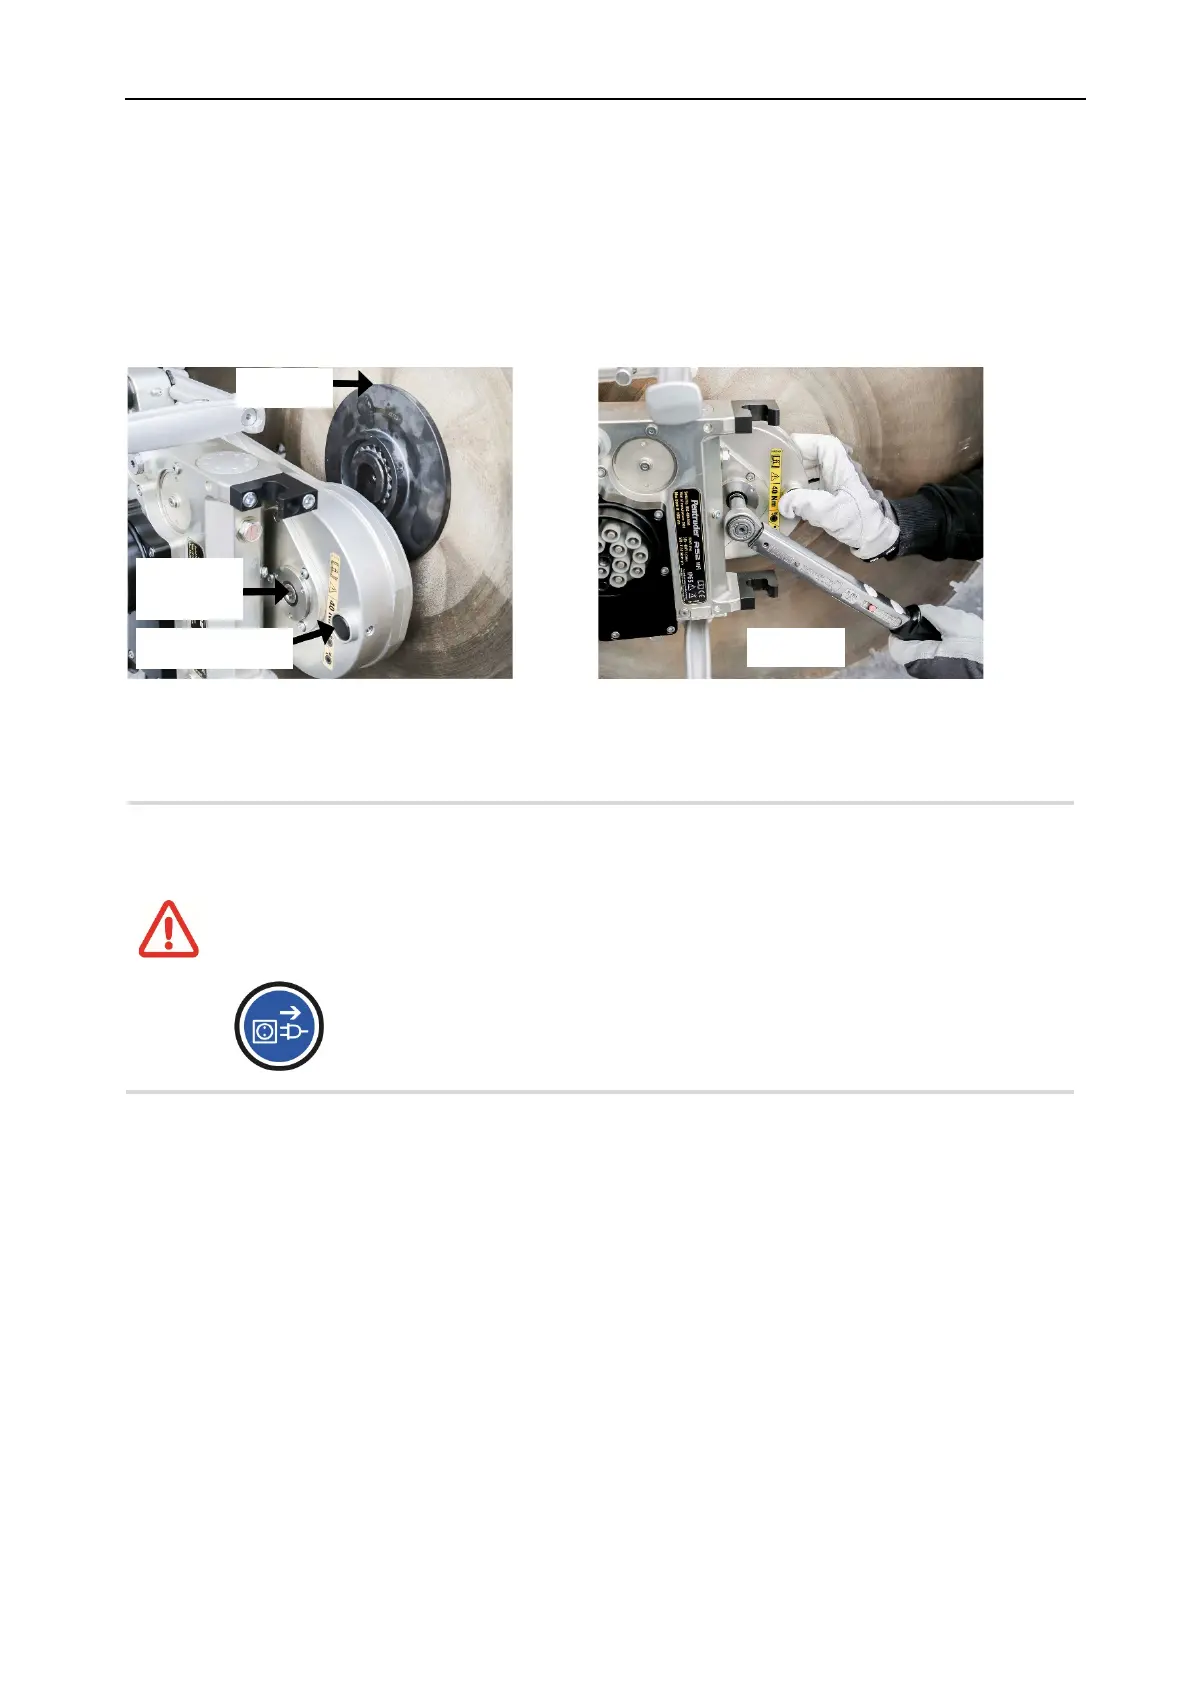
1. On the opposite side of the flange T-slot there is a groove, and this groove should be positioned upwards
when the blade flange is mounted on to the saw head spindle / pull stud. See picture below.
2. To lock the blade flange coupling,
a. rotate the saw blade slowly while pressing the detent button, until the spindle is blocked.
b. turn the clamping screw clockwise to lock the blade flange coupling.
Use a torque wrench to tighten the clamp screw to 40 Nm. Do not overtighten!
3. To unlock the flange coupling
a. Rotate saw blade slowly while pressing the detent button, until the spindle is blocked.
b. Turn the clamping screw CCW to open the coupling.
WARNING!
• Always keep all part of the coupling clean and lubricated! The safe operation of
the coupling depends on cleanliness of all coupling parts on the machine, and the
blade flange!
• Do not use the machine if any part of the quick disconnect coupling is corroded
or damaged.
• Failure to follow the assembly instructions above may result in coupling overload
and a failure can result in serious injury and even to fatal injuries to the operator
or persons in the surroundings of the machine.
• Before any kind of service, maintenance or mounting on the machine is
commenced, the machine must always be disconnected from the electric power
supply.
 Loading...