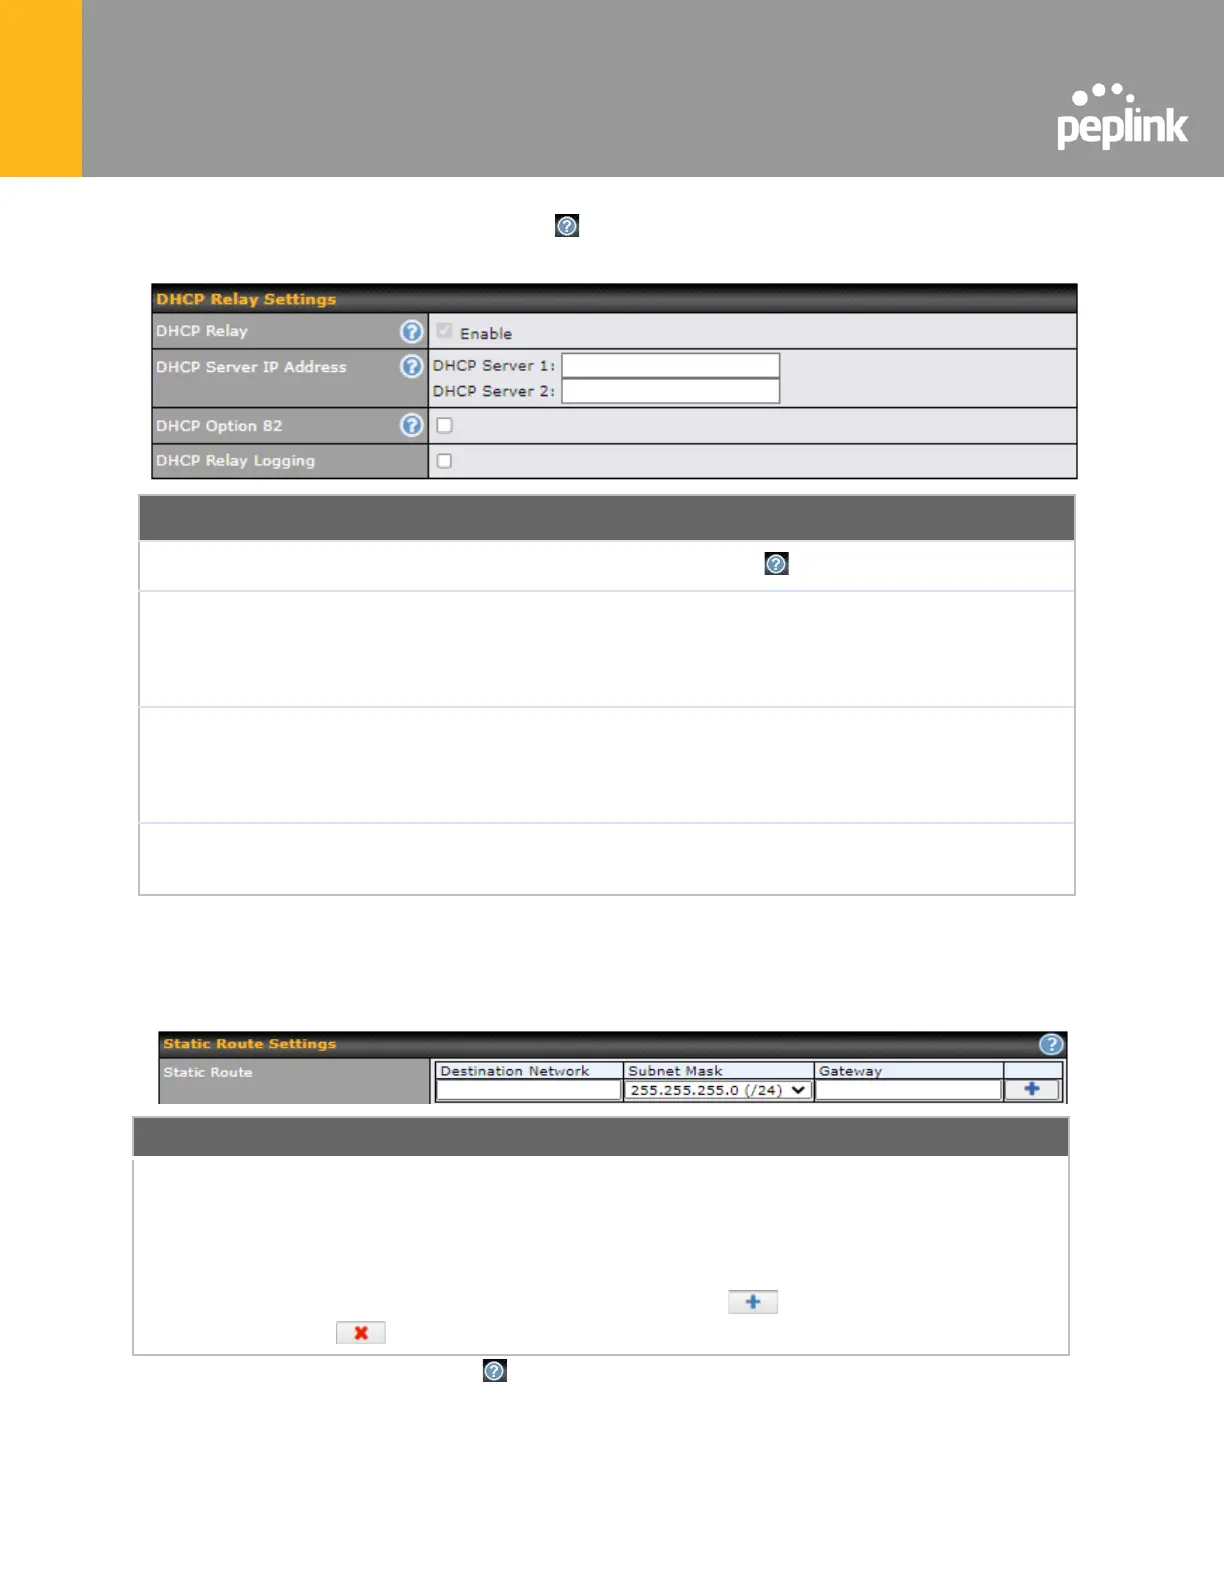
To configure DHCP relay, first click the button found next to the DHCP Server option to
display the settings.
Check this box to turn on DHCP relay. Click the icon to disable DHCP relay.
Enter the IP addresses of one or two DHCP servers in the provided fields. The
DHCP servers entered here will receive relayed DHCP requests from the LAN. For
active-passive DHCP server configurations, enter active and passive DHCP server
relay IP addresses in DHCP Server 1 and DHCP Server 2.
DHCP Option 82 includes device information as relay agent for the attached client
when forwarding DHCP requests from client to server. This option also embeds
the device’s MAC address and network name in circuit and remote IDs. Check this
box to enable DHCP Option 82.
Enable logging of DHCP Relay events in the eventlog by selecting the checkbox.
Once DHCP is set up, configure LAN Physical Settings, Static Route Settings, and DNS
Proxy Settings as noted above.
This table is for defining static routing rules for the LAN segment. A static route
consists of the network address, subnet mask, and gateway address. The
address and subnet mask values are in w.x.y.z format.
The local LAN subnet and subnets behind the LAN will be advertised to the VPN.
Remote routes sent over the VPN will also be accepted. Any VPN member will be
able to route to the local subnets. Press to create a new route. Press
to remove a route.
A
- Advanced feature, please click the button on the top right hand corner of the Static Route section
to activate and configure Virtual Network Mapping to resolve network address conflict with remote peers.

 Loading...