BTC12N-*
Installation
2020-05
25
Commissioning
1.
Remove the dummy plugs from the ports where connections are to be made. To prevent dust
ingress, leave the dummy plugs in ports that are not in use.
2.
Connect the BTC12 to the network via the Ethernet port.
3.
Connect the BTC12 to the mouse and keyboard via the USB 2.0 port.
4.
Connect the BTC12 to the display via a DisplayPort™. The DisplayPort™ interface provides
mechanical strain relief to protect against vibration. Locking mechanisms are available as
accessories for additional strain relief.
5.
Optional strain-relief locking mechanisms can also be attached to the USB ports.
6.
Connect the BTC12 to the AC/DC power supply (e.g., FSP065-REBN2).
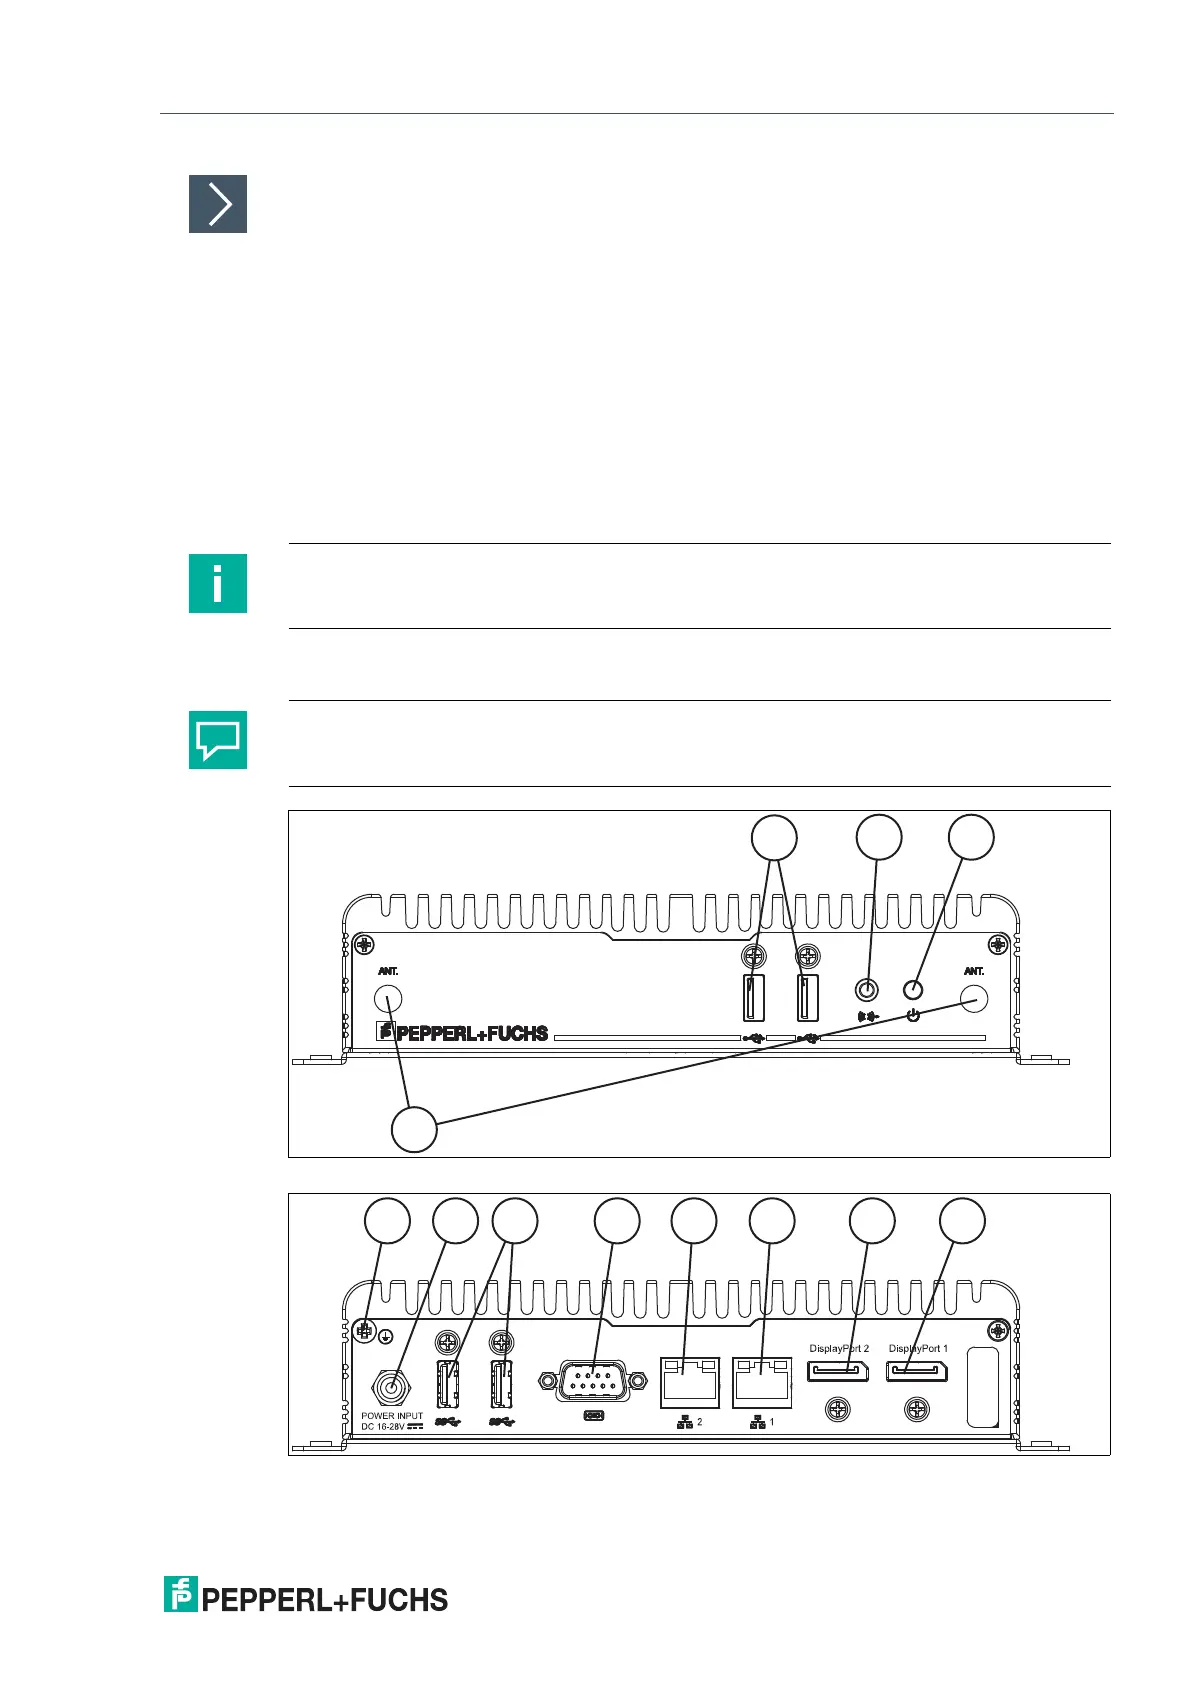
3.3 I/O Connection
Figure 3.13 BTC12 ports, front
Figure 3.14 BTC12 ports, rear
Note
Strain-relief locking mechanisms are available as accessories. The screws required to secure
the locking mechanisms are supplied in the scope of delivery for the BTC12.
Tip
Connnections should be mechanically secured by e.g. the "yellow" cable retainer and/or the
screws for each type of connection.