1/01 E Service Instructions 7
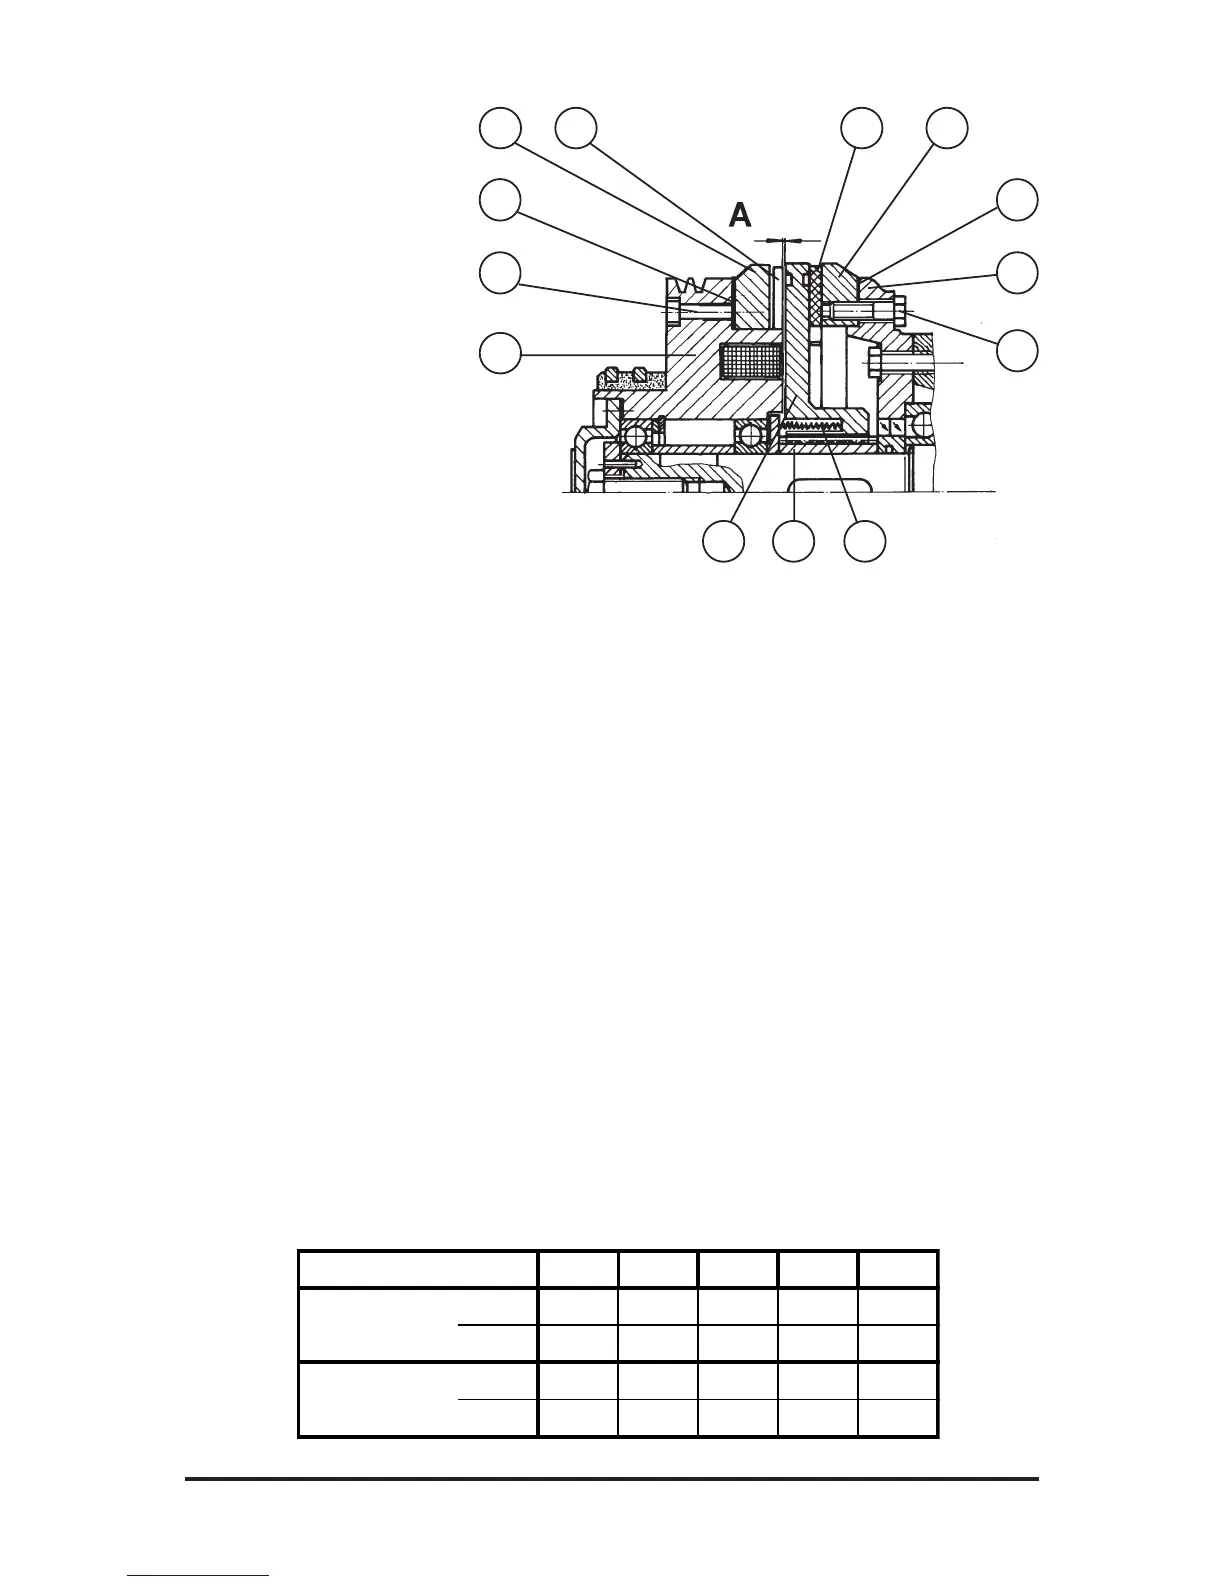
Checking and Setting the Air
Gap
Under normal operating condi-
tions, the air gap should be
checked once per year.
For air gap A, refer to the Table
(Fig. 5).
• Engaged state (clutch "ON"):
If air gap A min is smaller than
specified in the Table, Fig. 5,
shims 10 of uniform thickness
should be inserted
between coil body 7 and friction
ring 8 (Fig. 4) for
machine sizes 76 and 92, or
between friction ring 8 and
spacing segment 9 (Fig. 3) for
machine sizes 115 and 132.
For this purpose, slacken screws
11 around the circumference and
then re-tighten them uniformly.
The shims are available in vari-
ous thicknesses. Refer to the
Spare Parts Catalogue in the
Operating Instructions manual.
After the successful installation
of the shims, make sure that air
gap A max specified in the Table
is not exceeded (use thinner
shims) and air gap A min in the
braked state (clutch "OFF") is not
undercut.
Checking the Bearing Play
For machine sizes 115 and 132
only.
De-energize the clutch.
No perceptible play in the bear-
ing must appear when the fly-
wheel rim top is pulled and pushed
by hand.
In case of evident play, replace
the antifriction bearings.
Caution!
Bring the knife beam to its low-
ermost position prior to dis-
mantling the clutch/brake as-
sembly, as the brake becomes
ineffective when the compres-
sion springs are relieved.
Fig. 4
8
7
2 1 6
3 4 5
Fig. 5
Knife Drive Clutch/Brake Assembly Air Gaps ( mm )
Braked state (clutch "OFF")
If air gap A max is wider than
specified in the Table, shims 12
of the same thickness should be
inserted between brake ring 6
and gearbox cover 14. For this
purpose, energize the clutch as
described in the Operating In-
structions manual under "Manual
Cranking", slacken screws 13
around the circumference, and
then re-tighten them uniformly.
1411
10
13
12
Machine Size
76 92 115 132 168
Clutch "ON"
A min 0,2 0,2 0,2 0,2 0,2
A max 0,4 0,5 0,5 0,5 0,6
Clutch "OFF"
A min 0,6 0.7 0,7 0,7 0,7
A max 0,8 1 1,2 1,2 1,4