Page 15
ASSEMBLY
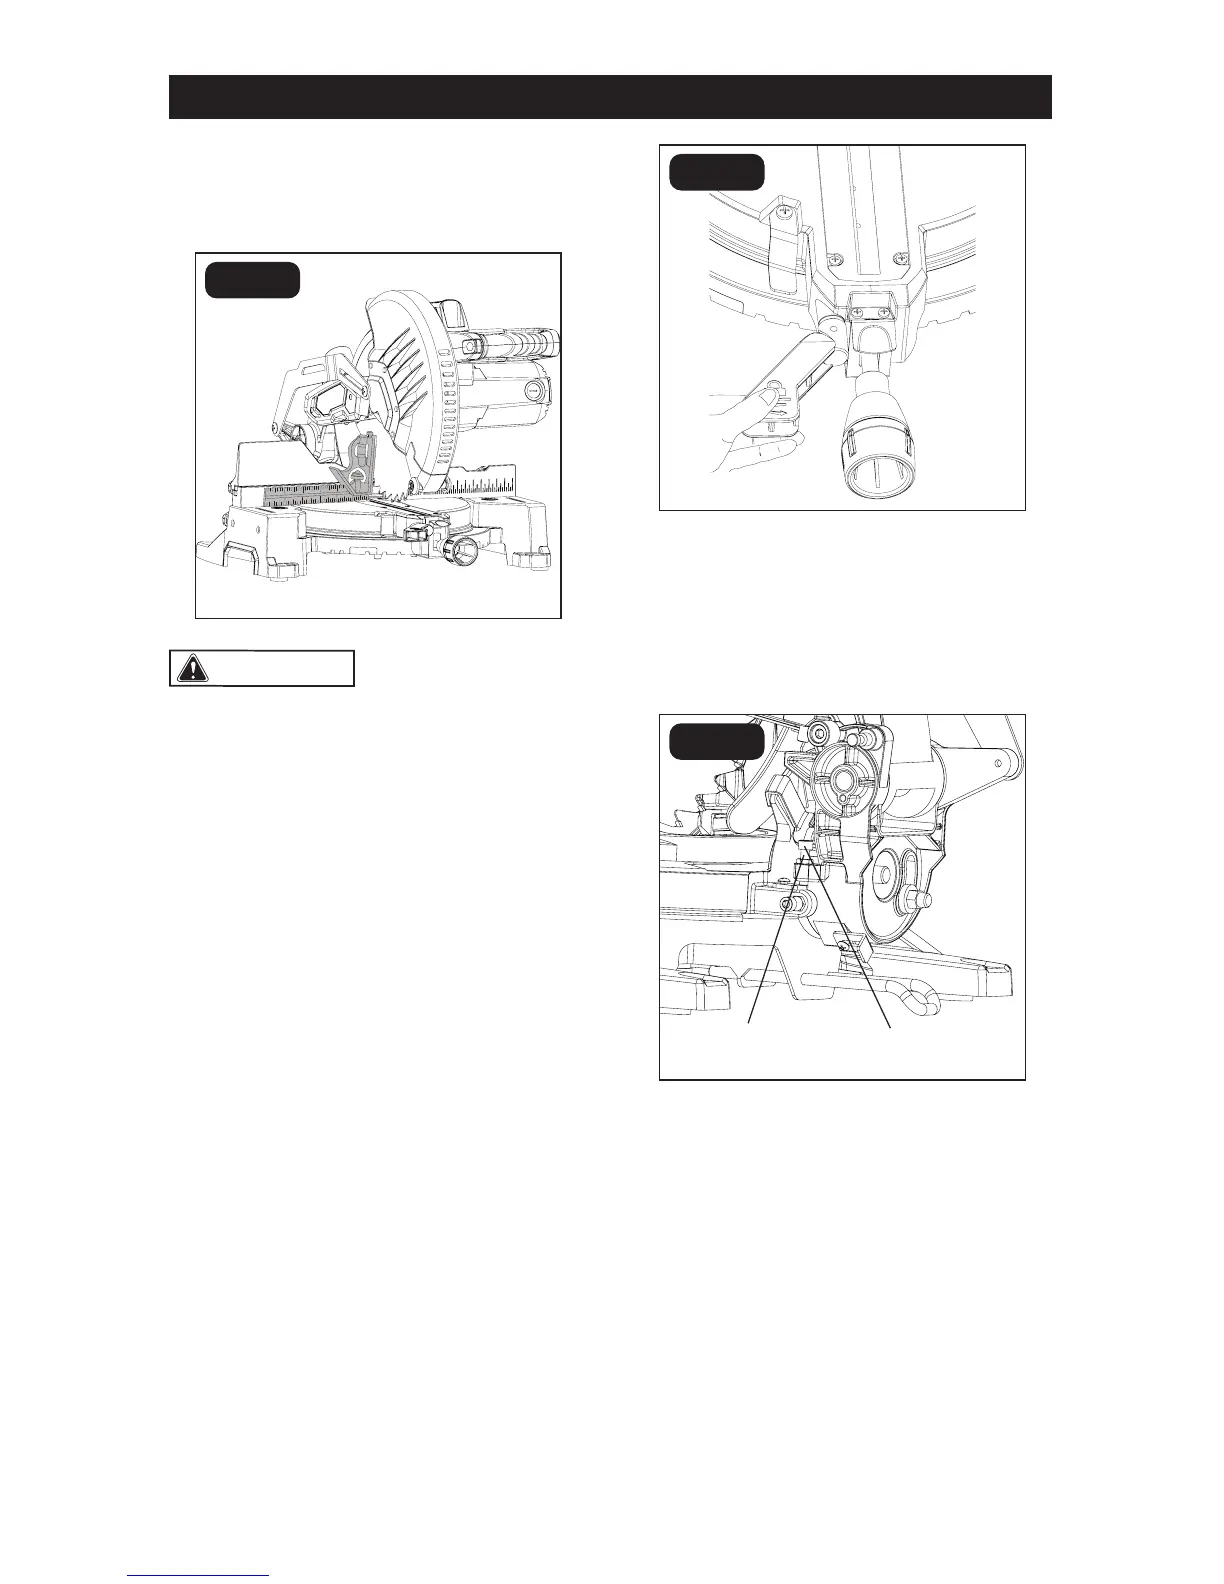
SQUARING THE BLADE TO THE
MITER TABLE (FIG. 6A - 6B)
Failure to unplug your
saw could result in accidental starting
causing serious injury.
1. Unplug the saw.
2. Set the bevel angle to 0°.
3. Lower and lock the saw arm into
the “DOWN” position.
4. Place a combination square on the
miter table with the rule against the
table and heel of the square against
the saw blade (Fig. 6a).
NOTICE: Be sure to rest the square
against the body of the blade and not
against the teeth of the blade.
5. Lift the bevel locking lever to release the
saw head assembly (Fig. 6b).
WARNING:
FIG. 6a
6. Loosen the lock nut with a hex wrench
(available separately) as shown in
Fig. 7. Adjust the setting bolt in or out
until the leg of the square is ush with
the saw blade over its entire length.
7. When the angle is set, tighten all the
bolts and the bevel locking lever.
NOTICE:If the bevel-lock lever does not
secure the saw arm when it is tightened,
please refer to BEVEL-LOCK TENSION AD-
JUSTMENT.
FIG. 6b
FIG. 7
Lock nut
Setting bolt
 Loading...