PART 7: STARTING & OPERATING THE VEHICLE
PB1319 (CAT. NO. 5296 ) —89— 22-01691 (R02/02)
Setting Ride Height
Vehicles equipped with rear air suspensions have their ride height
and axle (pinion) angle(s) preset at the factory. These are precision
settings and should not be altered. Incorrectly adjusted ride height
may result in improper interaxle U-joint working angles. This can
result in premature driveline wear and driveline vibration. If your vehi-
cle is equipped with a Peterbilt rear air suspension, and if it becomes
necessary to reset the ride height, you may temporarily set it by fol-
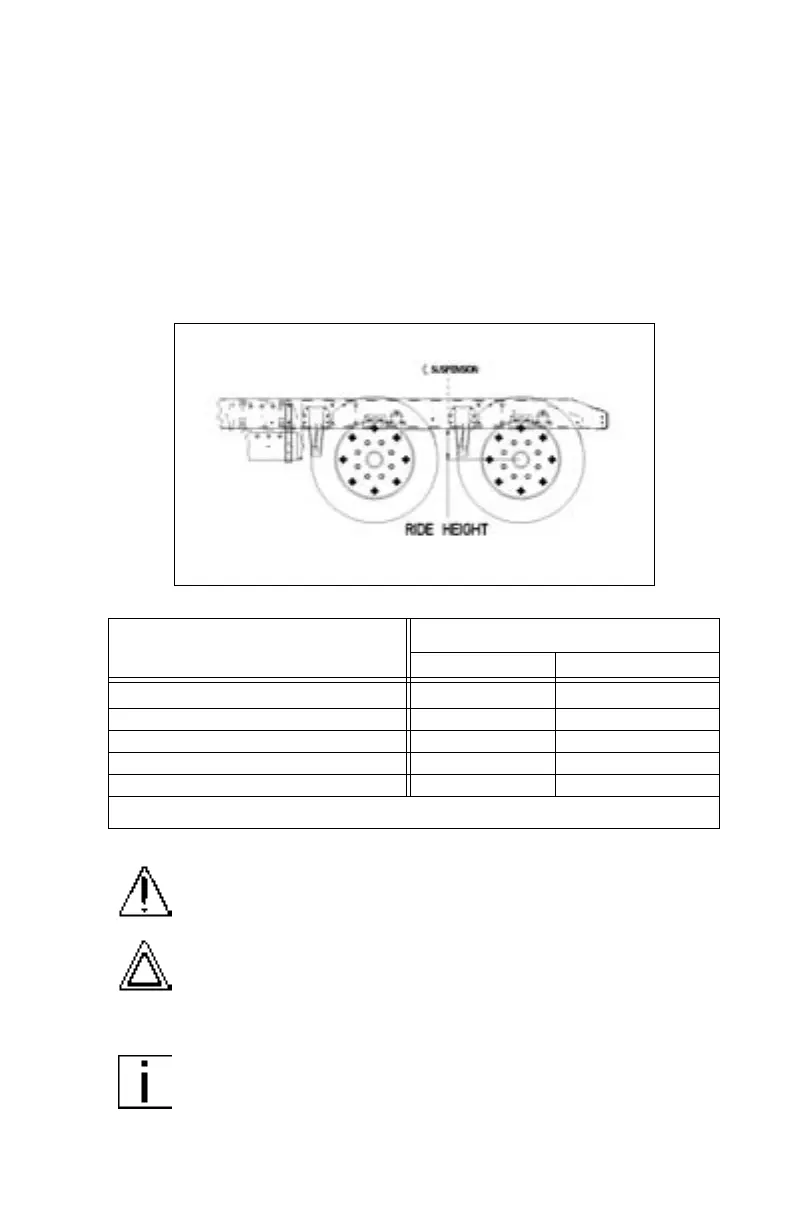
lowing the next procedure. Proper ride height measurement and val-
ues are shown in the illustration and table below.
Ride Height Measurement (Location for Tandem Axles Shown)
Follow this procedure to temporarily set ride height.
1. Ensure that the air supply and delivery plumbing of the height con-
trol valve is consistent with the illustration on the next page.
Proprietary Rear Air Suspension
Ride Height [inches (mm)]*
Single Drive Tandem Drive
Air Leaf N/A 11.70 (297)
Air Trac 11.00 (279) 11.00 (279)
Low Air Leaf 8.50 (216) 8.50 (216)
Low Low Air Leaf N/A 6.50 (165)
FLEX
Air N/A 8.50 (216)
*These values are for a fully laden vehicle
WARNING! To prevent possible injury and damage to
property, ensure that a vehicle is parked and the wheels
chocked before beginning this procedure.
CAUTION: Completing this procedure will enable you to
safely reach the nearest authorized Peterbilt repair facil-
ity to have ride height and pinion angle reset using the
proper equipment and technique. Do this as soon as
possible to avoid potential driveline damage.
NOTE: Suitable wheel chocks are at a minimum an 18-inch
(46 cm) long 4x4.