16 Customer Care Center 1-800-732-2677
Begging
Begging can be annoying and disruptive. If you don’t want your pet to beg, then friends or members of the
family should not encourage this behavior. This means every time your pet begs, he should be reprimanded or
redirected to an alternate and acceptable behavior, for which he can receive praise.
1. Ensure the Treat Dispenser is on and ready to use.
2. As soon as your pet begins to beg, press the Handheld Remote button and dispense the treats/kibble.
3. Immediately praise him after he eats the treats/kibble.
4. Practice this several times. Be consistent. Your dog will learn to redirect his focus from begging to the
Treat Dispenser.
NOTE: Ensure you ignore your dog at the table. Don’t make eye contact when he is begging. Keep the
remote with you each time you are going to be in situations where your dog begs.
Optional Treat Dispenser Wall Mounting
A mounting template is located on the back cover of this guide. In order
to ensure stability when mounting the Treat Dispenser, be sure to follow
all instructions. Note: It is important that the Treat Dispenser is level when
mounted. Follow leveling instructions if mounting about floor level. Be sure to
use the included anchors if there is no stud to avoid damage to your wall or the
Treat Dispenser.
1. If mounting the Treat Dispenser at floor level, fold at the line shown on the
template (located on the back cover of this guide).
2. Place the fold flush with the floor and place removable tape on the template
so it doesn’t move during drilling.
3. If mounting on the wall above floor level, pick your desired location.
Hold a level at the top of the template and lightly mark with a pencil. Align
the template top to the pencil marks and use removable tape to keep the
template in place during drilling.
4. If mounting the Treat Dispenser into a stud, use a 3/32” drill bit.
5. If using the included wall anchors to mount the Treat Dispenser, use a 1/4”
drill bit.
6. Remove the template and install wall anchors in the holes.
7. Tap wall anchors flush with a hammer if necessary.
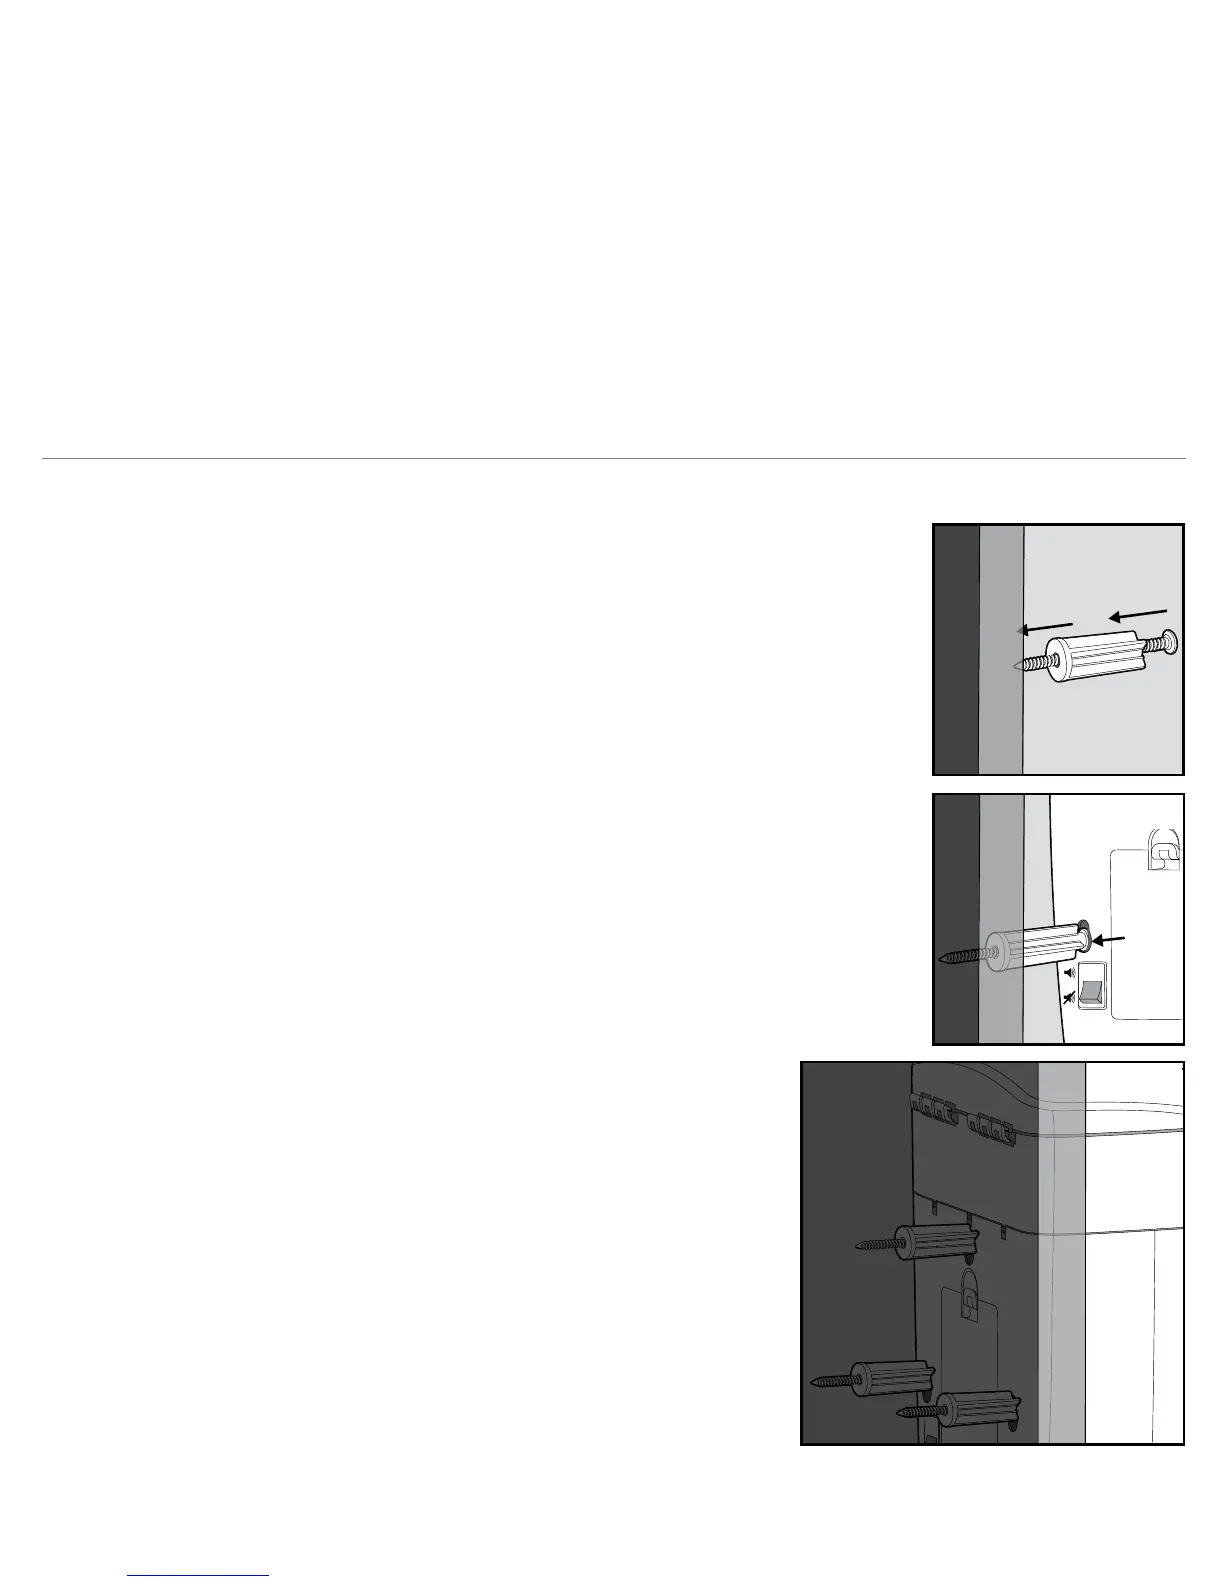
8. Place the screw in the standoff and screw into the anchors or
wall stud (3A), making sure the standoff is flush against the wall.
Note: It is necessary to use the screws AND the standoffs to
allow enough space for the Hopper lid to open when filling the
Treat Dispenser.
9. Align the screw heads with the lower portion of the
mounting keyholes on the Treat Dispenser (3B). When all three
are aligned, gently slide the Treat Dispenser onto the screw
heads and then slide downward to secure the screw heads into
the smaller upper portion of the mounting keyholes (3C).
WALL
3A
WALL
3B
WALL
3C