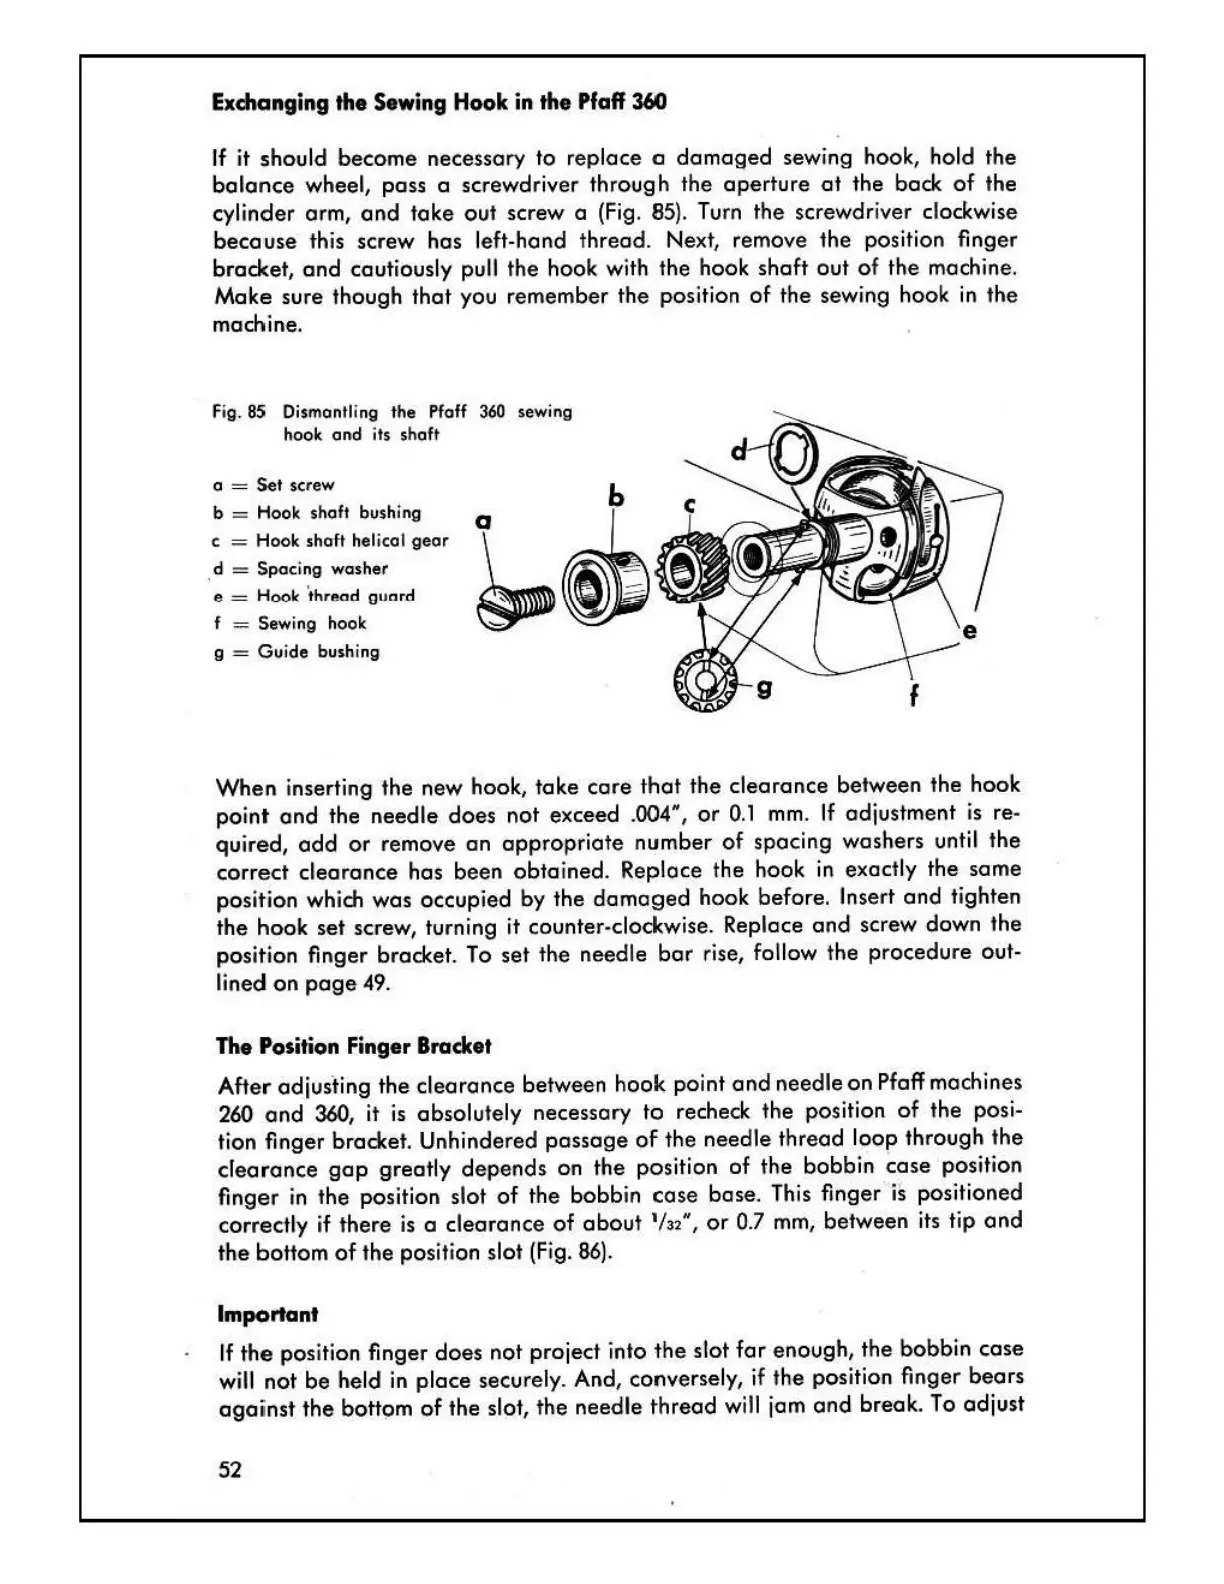
Exchanging
the
Sewing
Hook
in
the
Pfaff
360
If
it should become necessary to replace a
dama~ed
sewing hook, hold the
balance
wheel, pass a screwdriver through
the
aperture
at
the back
of
the
cylinder arm,
and
take
out
screw a
(Fig
.
85)
. Turn the screwdriver clockwise
because
this screw has left-hand thread. Nex
t,
remove
the
position finger
bracket,
and
cautiously pull the hook with the hook
shaft
out
of
the machine.
Make sure though
that
you remember the position
of
the sewing hook
in
the
machine.
Fig. 85 Dismantling the Pfaff
360
sewing
hook
and
its
shaft
o = Set screw
b
= Hook shaft bushing
c = Hook shaft helical
gear
. d = Spacing washer
e =
Hook
'thrl!!od
gunrd
f = Sewing hook
g
=
Gu
i
de
bushing
When
inserting the new hook, take
care
that
the
clearance
between the hook
point
and
the needle does not exceed .004",
or
0.1
mm.
If
adjustment is re-
quired,
add
or
remove
an
appropriate
number
of
spacing washers until the
correct
clearance
has
been
obtained. Replace the hook in exactly
the
same
position which was occupied by the
damaged
hook before. Insert
and
tighten
the
hook set screw, turning it counter-clockwise. Replace
and
screw down the
position finger bracket. To set the
needle
bar
rise, follow the procedure out-
lined
on
page
49.
The
Position
Finger
Bracket
After adjusting
the
clearance between hook point
and
needle on Pfaff machines
260
and
360, it
is
absolutely necessary
to
recheck
the
position
of
the posi-
tion finger bracket. Unhindered
passage
of
the
needle thread loop through
the
clearance
gap
greatly
depends
on
the
position
of
the bobbin case position
finger
in
the position slot
of
the bobbin
case
base. This finger is positioned
correctly
if
there
is
a
clearance
of
about
1
/n",
or
0.7
mm,
between its tip
and
the
bottom
of
the
position slot
(F
ig.
86).
Important
If
the
position finger
does
not project into
the
slot
far
enough,
the
bobbin
case
will not
be
held
in
place securely. And, conversely, if the position finger bears
aga
inst
the
bottom
of
the slot,
the
needle
thread
will
jam
and
break
. To adjust
52