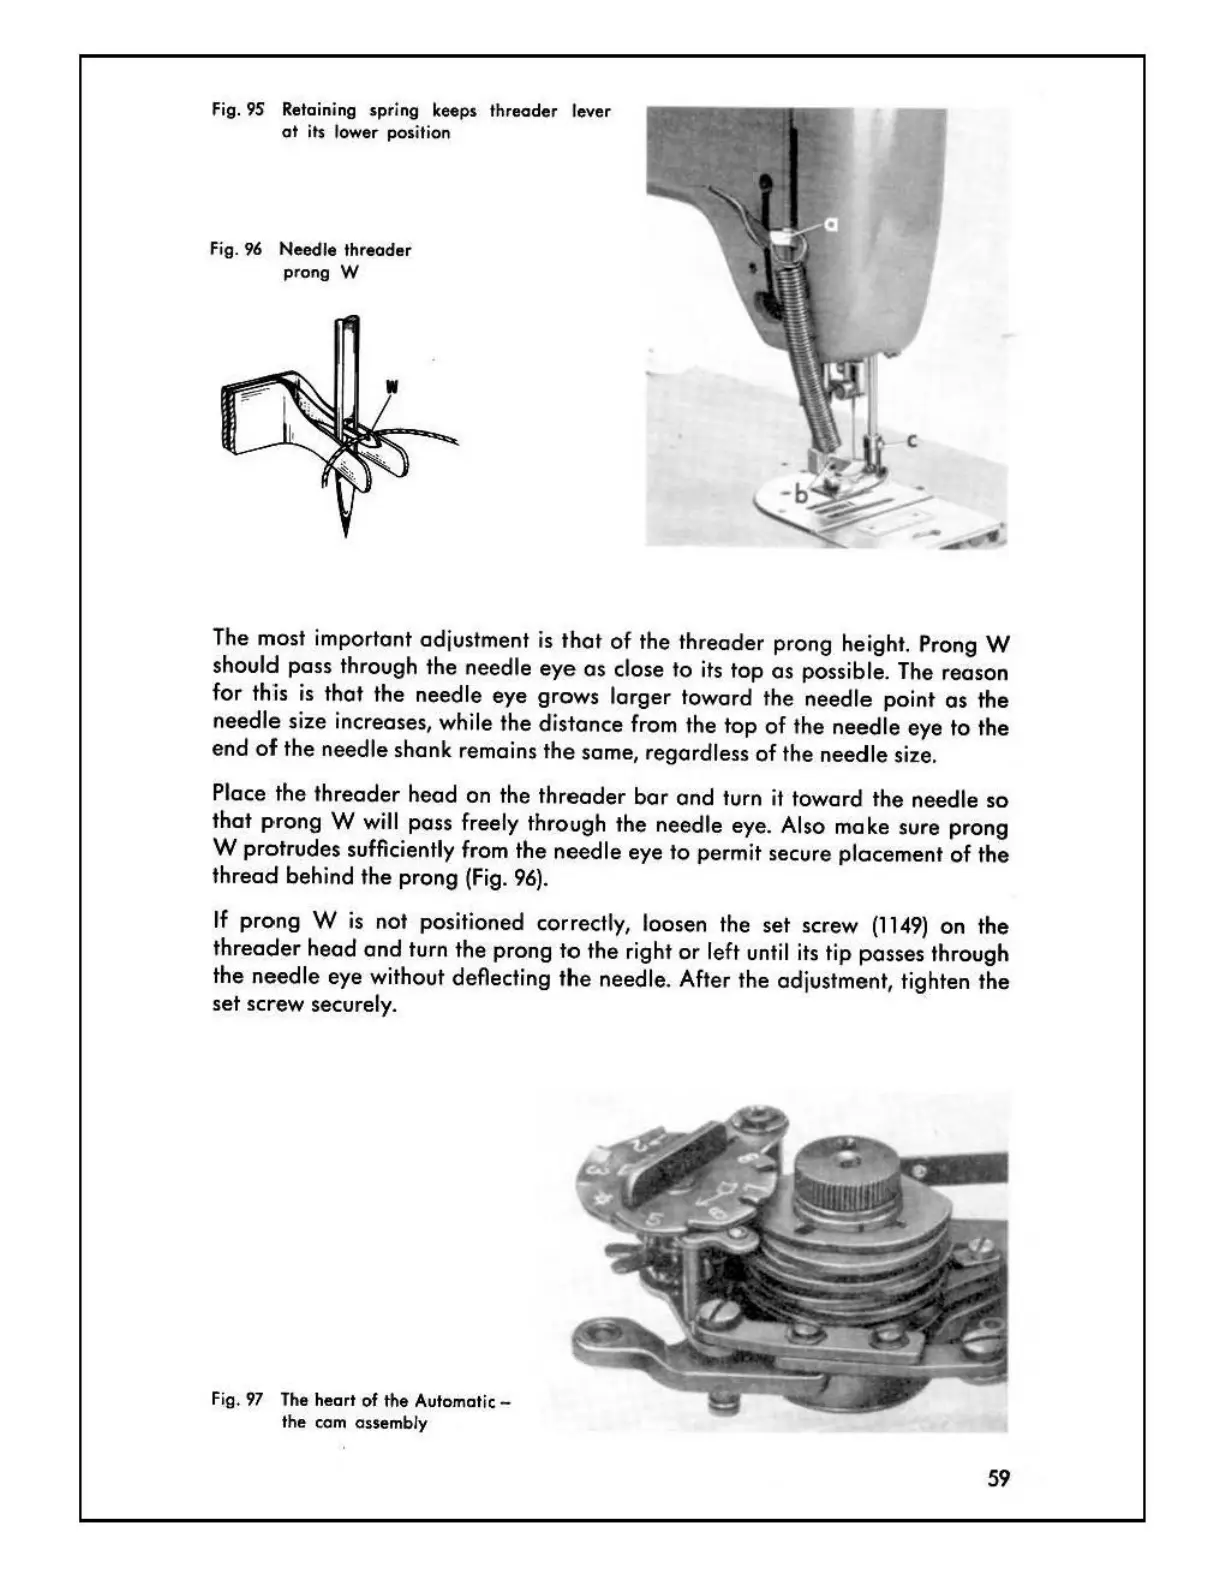
Fig.
95
Retaining spring keeps threader l
ever
at
its lower position
Fig.
96
Needle threader
prong W
The most important adjustment is
that
of
the threader prong height. Prong W
should pass through the needle
eye
as
close to its top
as
possible. The reason
for this
is
that the needle
eye
grows larger toward the needle point
as
the
needle size increases, while
the
distance from the top
of
the needle eye
to
the
end
of
the needle shank remains
the
same, regardless
of
the needle size.
Place
the
threader
head
on the
threader
bar
and
turn
it
toward the needle
so
that
prong
W will pass freely through the needle eye. Also make sure prong
W protrudes
sufficiently from
the
needle eye to permit secure plocement
of
the
thread
behind the prong
(Fig.
96}.
If
prong W
is
not positioned correctly, loosen the set
scr.ew
(1149)
on
the
threader
head
and
turn the prong
to
the
right
or
left until its tip posses through
the
needle eye without deflecting
the
needle. After the adjustment, tighten the
set screw
securely.
Fig.
97
The heart
of
the
Automatic-
the com assembly
59