A
B
C
D E
10 – ABOUT YOUR MACHINE
Needle Information
• Use HA-1 SP #14 or #11 needles or system Stretch 130/705 H-S, size #11/75 or #14/90.
• HA-1 SP #11 needles are set on the machine.
You can sew using one or two needles depending on what stitch to use. The left needle and needle clamp screw are
marked “L”, the right needle and needle clamp screw are marked “R”.
Note: When using both needles, the left needle is positioned a little higher up than the right needle (they are not supposed to be ‘level’,
like a twin needle).
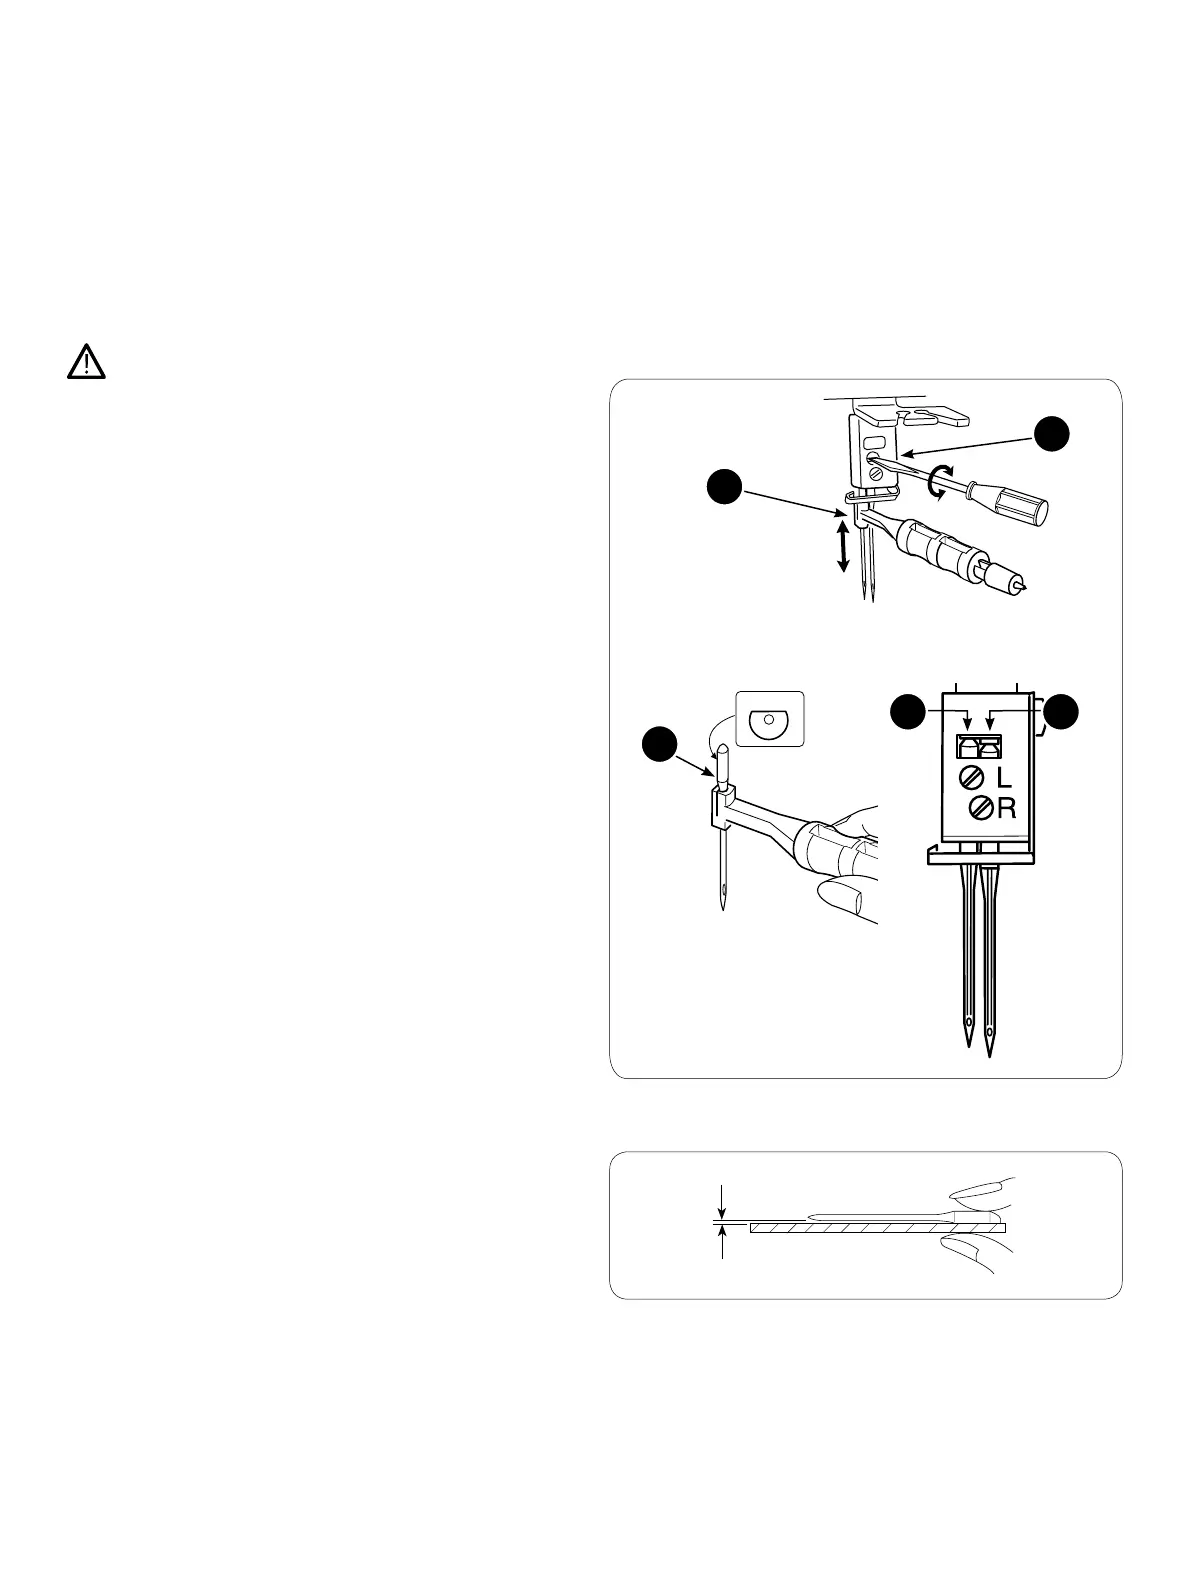
Changing the Needles
Turn off the main power switch and unplug the machine.
• Turn the handwheel toward you until the needles are
at the highest position.
• Insert the needle attached to the machine into the hole
of the needle holder (A).
• Loosen, but do not remove the needle clamp screw (B)
with the small screwdriver.
• Remove the selected needle.
Note: When using only one needle, slightly tighten the other
needle clamp screw. This is to prevent loosing the needle clamp
screw.
• Insert a new needle into the needle holder with the
flat side to the rear (C).
• Insert the needle into the needle clamp as far as it will
go. The top of the left needle should touch the edge
of the needle bar (D) and the top of the right needle
should touch the bottom of the needle bar (E).
• Securely tighten the needle clamp screw using the
small screw driver.
• Pull the needle holder down to remove it from the
needle.
Note: Do not over-tighten the screw as this may cause the nee-
dle clamp to be damaged.
Checking the Needle
To make sure the needle is not bent, place the at side of
the needle onto something flat (needle plate, glass etc.).
The gap between the needle and the at surface should be
consistent. Never use a bent or blunt needle.
 Loading...