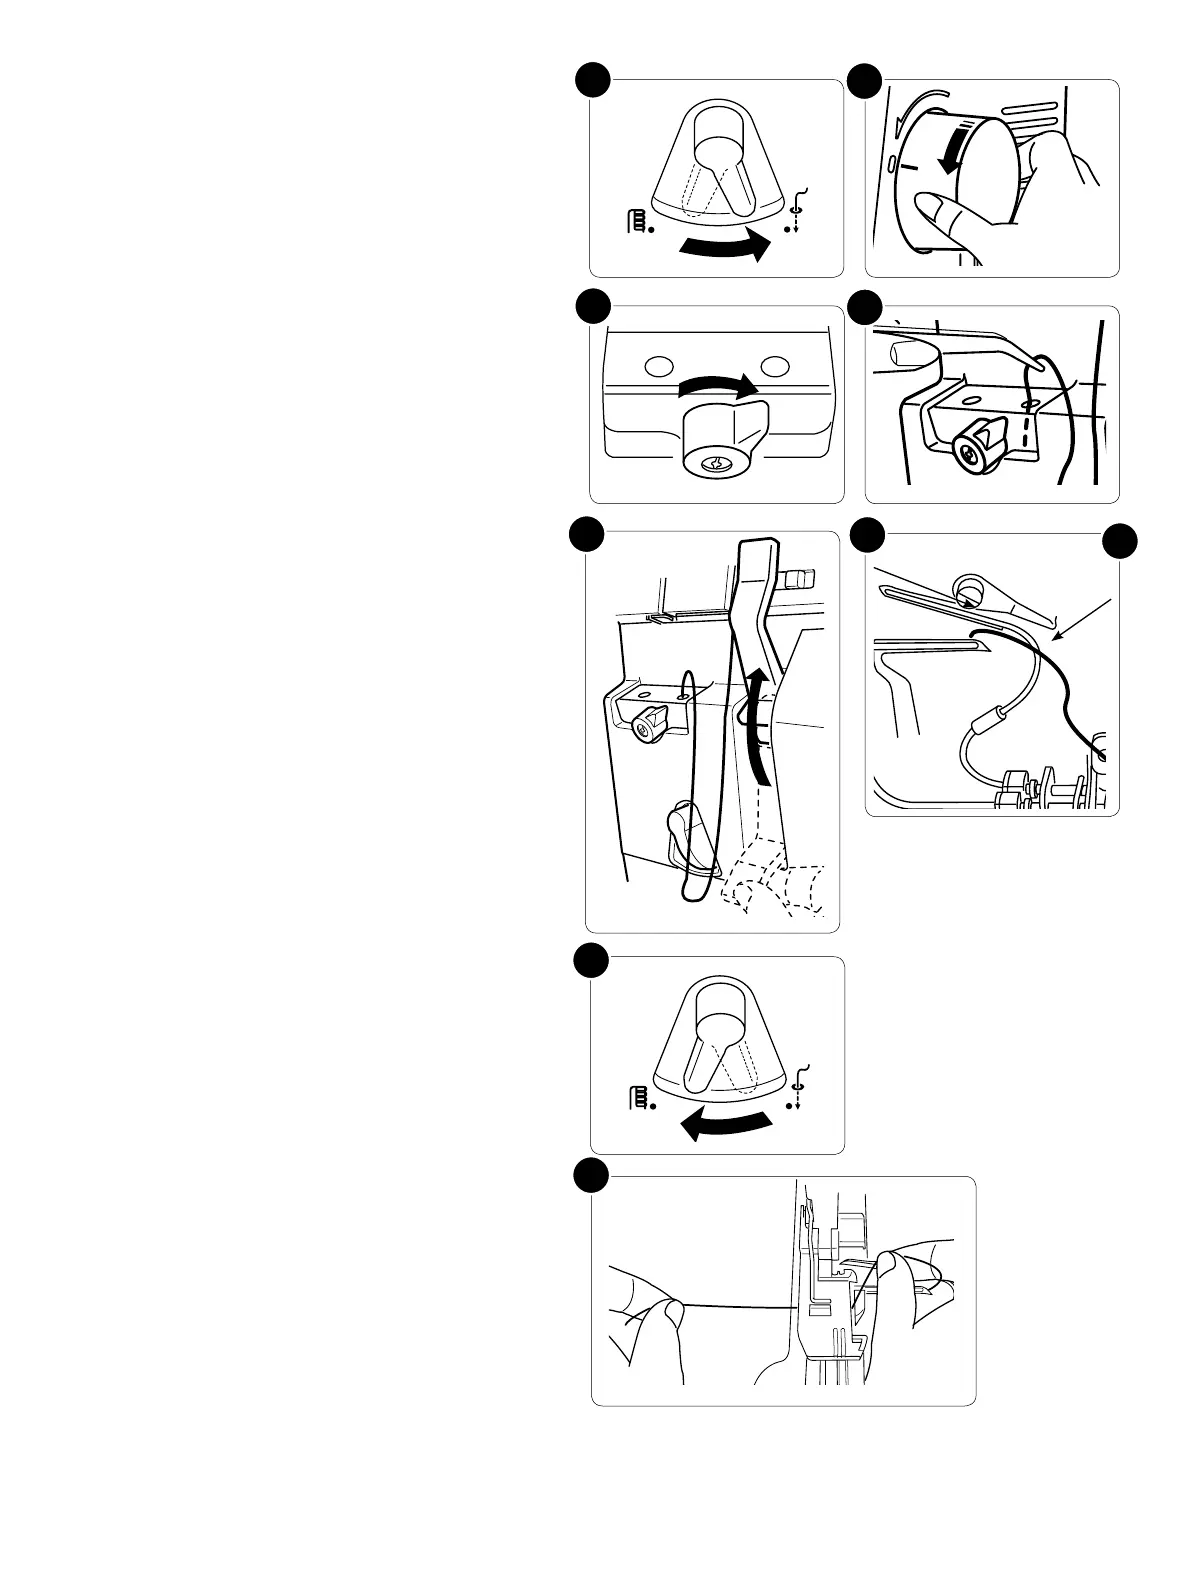
K
L
M
O
N
G
H
I J
GETTING READY TO SEW – 15
Set the Threading/Sewing switch to “Threading” posi-
tion (G) by turning it to the right.
Turn the handwheel slowly toward you until the mark
on the wheel matches the mark on the cover (H). The
hand wheel will click and is locked in threading posi-
tion.
Turn the looper selection lever to the right (I) to acti-
vate the lower looper threading.
Using the tweezers, insert the end of the thread 2 cm or
more into the lower looper threading hole (J).
Note:
• Trim the thread end so that it can be inserted into the
threading hole smoothly.
• If threading special threads, such as wooly nylon, etc.,
refer to pages 18-19.
Raise the looper threader lever (K) until it clicks into
place. Lower it again until it knocks into place.
Make sure that the thread comes out from the hole of
the lower looper tip (L). The thread shall run in front
of the upper looper threading pipe (M). If the thread
comes out behind the pipe, use the tweezers to posi-
tion the thread in front of the threading pipe.
If the thread does not come out from the hole, follow
the procedure from step ”J” again.
Set the Threading/Sewing switch (G) to “Sewing” po-
sition (N).
Pull 4˝ (10 cm) of the thread under the toe of the foot,
and back between the presser fot foot and the upper
cutter (O).
Close the front cover and lower the presser foot lifter.
 Loading...