5
1
2
3
4
5 6
8
9
10
7
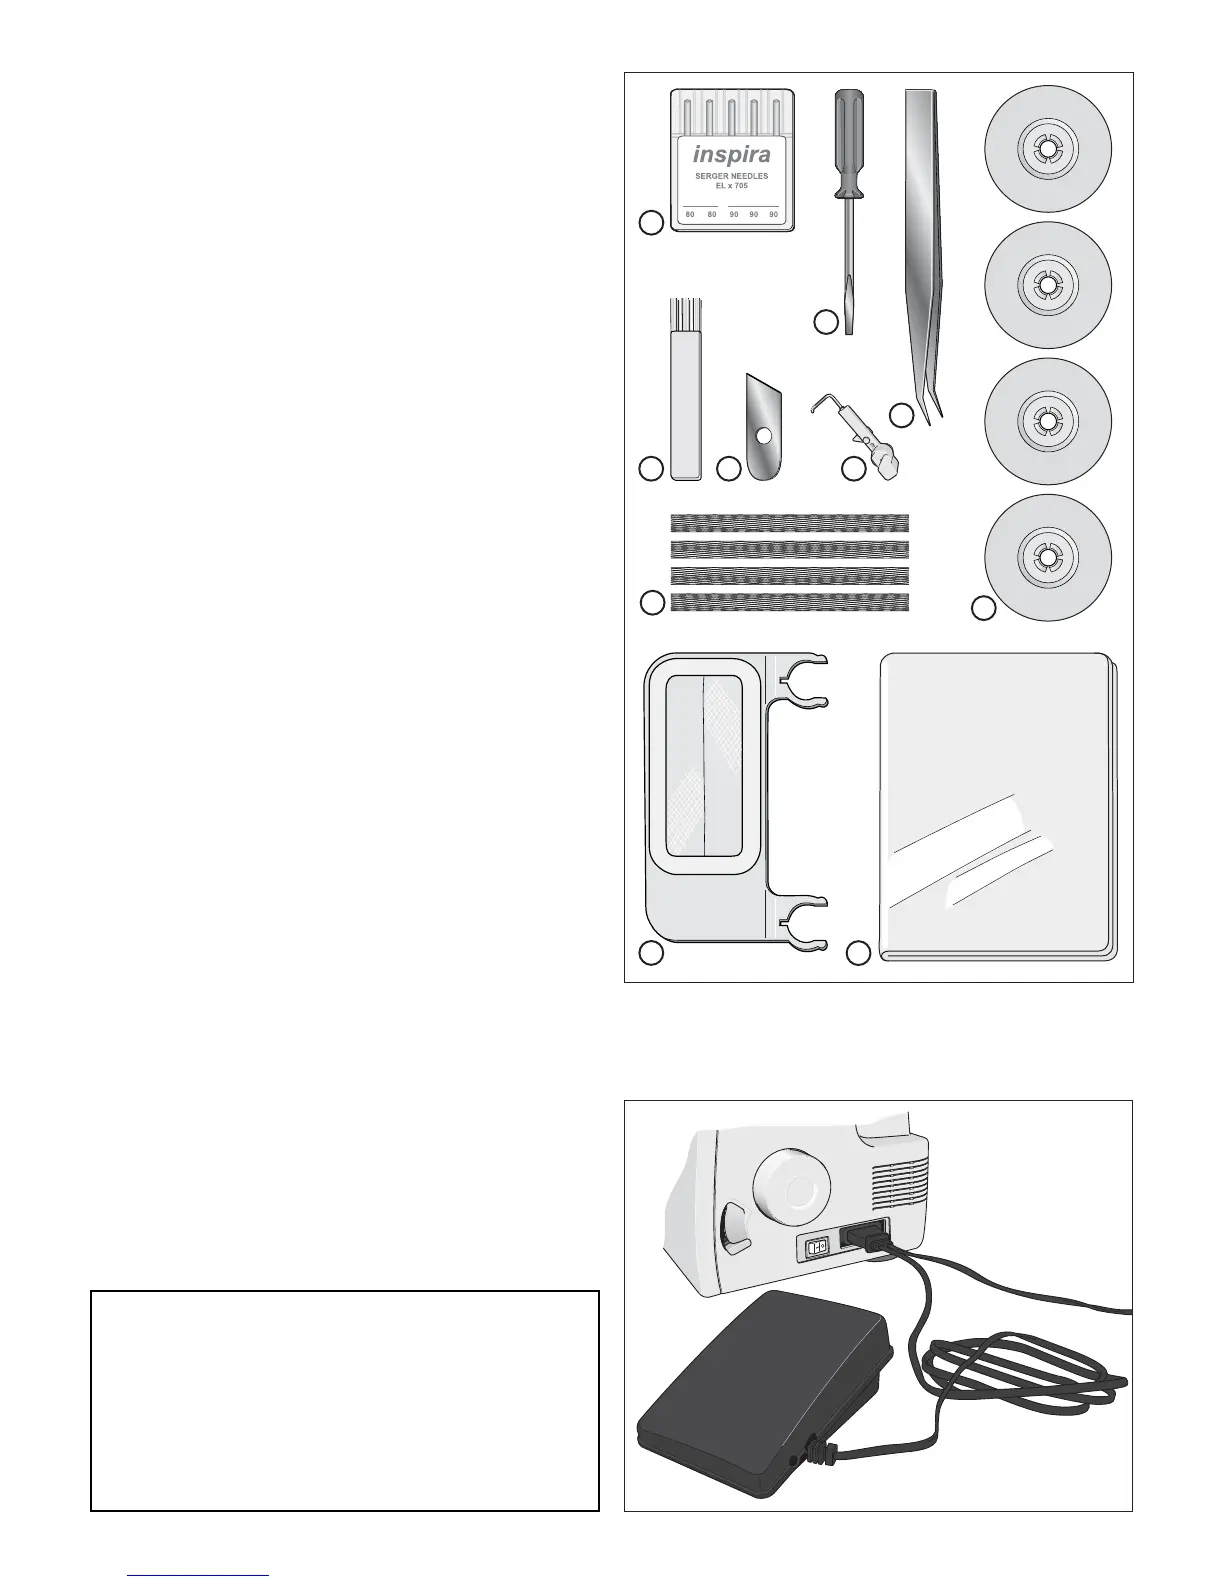
Accessories
1. Needle pack including three needles, size #14/90 and two
needles, size #12/80. Two needles, size #14/90, are in the
machine on delivery.
2. Screwdriver
3. Tweezers
4. Thread unreeling discs (4)
5. Lint brush
6. Knife blade (for the stationary lower cutter)
7. 2-thread converter
8. Thread spool nets (4)
9. Waste tray
10. Dust cover
Connecting the foot control and the
power supply
Foot control to use with this machine:
- Type GTC for 220-240V
- Type GTE for 100-120V
Before plugging your machine in, make sure the voltage is the
same as indicated on the plate under the machine. SpeciÀ cations
vary from country to country.
1. Connect the foot control/electric power cord to the socket
on the machine.
2. Plug the power cord plug into the electric outlet.
3. Push the power switch to “-” to turn on the machine.
4. Press the foot control to start sewing. Use the foot control to
adjust the sewing speed. The harder you press, the faster the
machine will sew. To stop the machine from sewing, remove
your foot from the control.
5. Push the power switch to “O” to turn off the machine.
Note: When the front cover is open the safety switch is
activated and prevents the machine from sewing, even if the
foot control is pressed.
POLARIZED PLUG INFORMATION
(FOR U.S.A. & CANADA ONLY)
This appliance has a polarized plug (one blade wider than
the other). To reduce the risk of electric shock, this plug is
intended to À t in a polarized outlet only way. If the plug
does not À t fully in the outlet, reverse the plug. If it still
does not À t, contact a qualiÀ ed electrician to install the
proper outlet. Do not modify the plug in any way.