EasyManua.ls Logo

Pfister Lita GT533-PF User Manual

Default Icon
4 pages
To Next Page IconTo Next Page
Page #1 background imageLoading...
Page #1 background image
417420300
July 14, 2021
Installation Support • Soporte de Instalación • Support d’Installation
Personal Assistance, Product Specs, &
“How-to” Questions:
Asistencia personal, especificaciones del
producto y preguntas sobre “cómo hacerlo”:
Aide personnelle, spécifications du produit
et questions « pratico-pratiques » :
Installation Videos Available
Videos de instalación a disposición
Vidéos d’installation disponibles
pisterfaucets.com/videos
1800PFAUCET (7328238)
pisterfaucets.com/support
Parts in the Box
Piezas en la caja
Pièces dans la boîte
Quick Installation Guide
Guía de Instalación Rápida
Guide d’Installation Rapide
Pot Filler Faucet
Grifo Rellenador de Ollas
Robinet de Remplissage de Pot
1
Copyright © 2021, Pister™ Inc.
Locate water supply and shut of the water supply valve.
Localice el suministro de agua y cierre la válvula de suministro de agua.
Localisez l'approvisionnement en eau et fermez le robinet d'alimentation en eau.
Additional Helpful Tools
Otras herramientas útiles
Outils supplémentaires utiles
Required Tools
Herramientas necesarias
Outils nécessaires
Flashlight
Linterna
Lampe De Poche
Cloth
Paño
Chion
To reduce the risk of injury or property damage, read all instructions before installing product. Wear safety goggles. Product must be installed in
accordance with all state & local plumbing & building codes. Call a professional if you are uncertain about installing this product.
Para disminuir el riesgo de lesiones o daños a la propiedad, lea todas las instrucciones antes de instalar el producto. Utilice gafas de seguridad. El producto debe
instalarse de acuerdo con la normativa de plomería y construcción estatal y local. Llame a un profesional si no está seguro sobre cómo instalar este producto.
Pour réduire le risque de blessures ou de dommages, lire toutes les instructions avant d’installer le produit. Portez des lunettes de sécurité. Il faut installer
le produit en respectant tous les codes de construction et de plomberie locaux et d’état. Appelez un professionnel si vous n’êtes pas certain de la façon
d’installer ce produit.
Lita
GT533-PF
Turn O Water Supply Cierre el suministro de agua Couper l’alimentation en eau
A
D CB
WARNING / ADVERTENCIA / AVERTISSEMENT
Hex Wrench
Llave hexagonal
Clé hexagonale
E (x4) F (x4)
Adjustable Wrenches
Llaves ajustables
Clés â mollette
Power Drill
Taladro Eléctrico
Foreuse Électrique
Philips Screwdriver
Destornillador de estrella
Tournevis Philips
Safety Goggles
Gafas de seguridad
Lunettes de securité
PTFE plumber's tape
Cinta para plomería PTFE
Ruban PTFE de plombier
Mallet
Mazo
Maillet
Pencil
Lápiz
Crayon
1325621
SAMPLE COPY
Question and Answer IconNeed help?

Do you have a question about the Pfister Lita GT533-PF and is the answer not in the manual?

Pfister Lita GT533-PF Specifications

General IconGeneral
BrandPfister
ModelLita GT533-PF
CategoryPlumbing Product
LanguageEnglish

Summary

General Information and Safety

Safety Warnings

Read all instructions before installing, wear safety goggles, and follow codes. Call a professional if uncertain.

Required Tools

Lists essential tools for installation, including wrenches, screwdrivers, mallet, pencil, and PTFE tape.

Helpful Tools

Lists optional tools that may aid installation, such as safety goggles and a flashlight.

Parts Identification

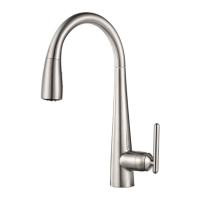
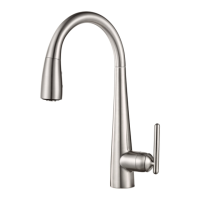
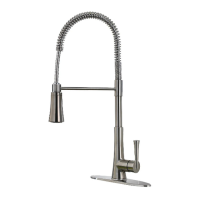
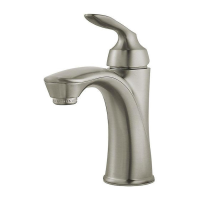
Visual guide to identify all components and hardware included in the faucet box.

Installation Step 1: Water Supply

Turn Off Water Supply

Locate and shut off the main water supply valve before proceeding with installation.

Installation Step 2: Mount Spout Holder

Prepare Mounting Surface

Identify NPT connection and required 3/8" or 9.5mm clearance for spout holder installation.

Assemble Holder Components

Assemble the spout holder using parts C and D, with an illustration showing the correct orientation.

Secure Holder Assembly

Use screws (E) and tape to secure gasket (D) and mount the holder, ensuring correct hole placement.

Final Spout Holder Setup

Final step showing the assembled spout holder ready for the next stage of installation.

Installation Step 3: Attach Spout

Prepare Spout Connection

Apply PTFE plumber's tape or thread sealant to the spout threads according to manufacturer's instructions.

Connect Spout to Faucet Body

Attach the spout to the faucet body using the appropriate hex wrench and ensuring a secure fit.

Check for Leaks

Open the water supply valve and check for any leaks before proceeding with further installation steps.

Installation Step 4: Turn On Water & Confirm

Ensure Valves are Closed

Verify that both water valves are in the closed position before turning on the supply.

Open Water Valves

Slowly open the main valve first, then the end valve to turn on water supply and confirm installation.

Storing the Faucet

Instructions on how to properly fold and store the faucet when not in use.

Related product manuals