27
Chapter 3: Phantom Software
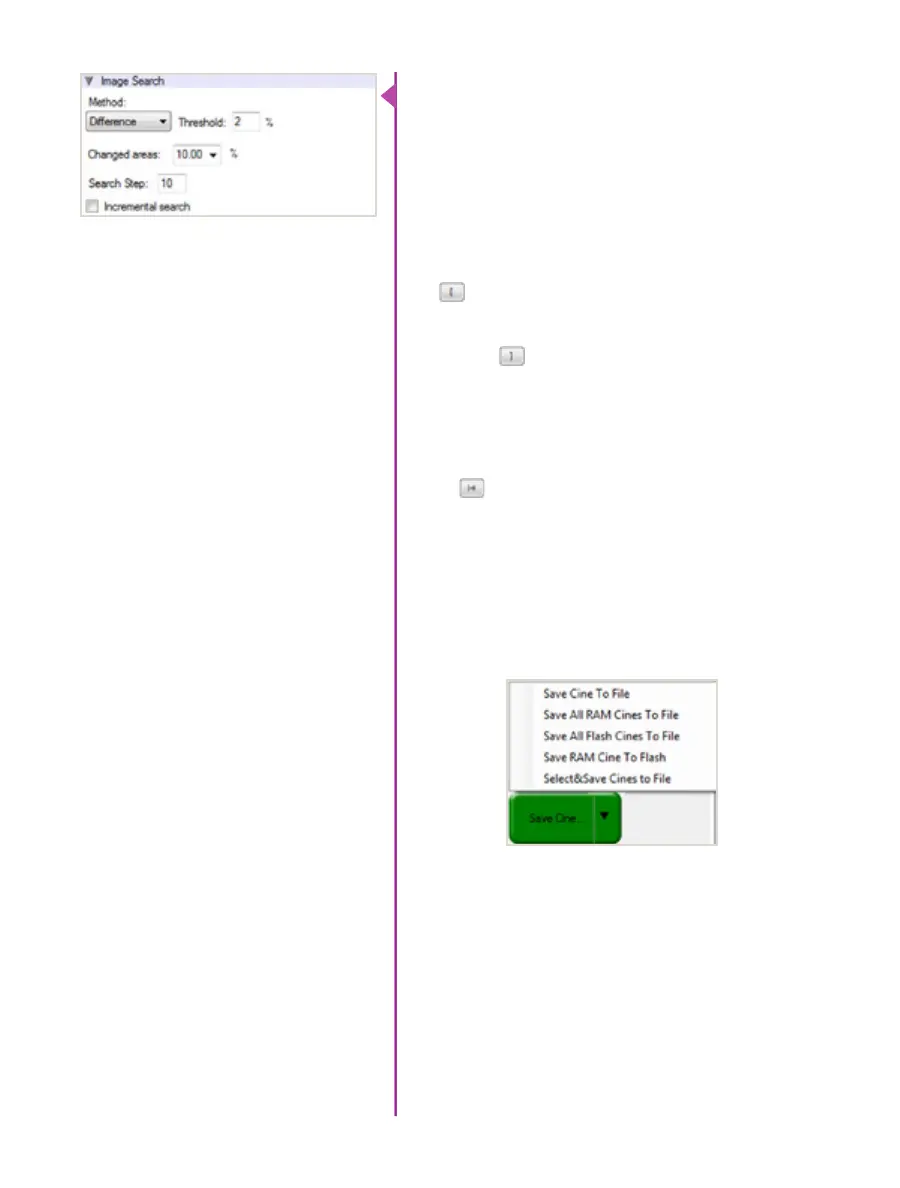
‘Image Search’. The goal is to search or find an image
change in the recording, based on the difference between
image content. Right-Click on the ‘Play’ button to begin
the image search. Besides image content changes, Image
Search can also look for images that are tagged as ‘Event’
images.
Using the following ‘Video Control’ buttons locate the
first image of the cine to be saved and click the ‘Mark-
In’ button.
Locate the last image of the cine to be saved and click the
‘Mark-Out’ button.
Click ‘Play, Speed, & Option’ and enable (check) ‘Limit to
Range’.
Under the ‘Video Control’ buttons click the ‘Jump to
Start’ button, then review the edited cine.
Click the ‘Save Cine...’ button to save the edited cine to
the computer’s hard drive.
If you wish to save the clip to an attached Phantom
CineMag, click the down-arrow to the right of the ‘Save
Cine...’ button and select ‘Save RAM Cine to Flash’.
Editing a Cine
Saving a Cine
For further instructions on working with CineMags, please
see Chapter 7: Phantom CineMag & CineStation IV.