1-6-3 Z11PALEA
4. How to measure the standard
V-ENV value of Digital Studio
Picture Control
Purpose:
To set the recording condition appropriate
for the recording tape.
Symptom of Misadjustment:
Recording or playing
back picture quality may fall. The picture will be tinted.
1. Insert a new tape (type: TDK 180) for the DSPC
alignment into the TV/VCR.
2. Input the black raster signal from the video input
jack (VIDEO-IN).
3. Enter the Service Mode. (See page 1-6-1.)
4. To enter the DSPC mode, press [1] button on the
remote control unit. Recording starts automatically
and “DSPC” appears on the display.
5. Recording continues for 10 seconds in SP mode.
After that, recording starts for 10 seconds in LP
mode.
6. The tape is rewinded to the recording start point.
7. The unit enters the play mode automatically and
the V-ENV levels of each SP and LP modes are
memorized into the EEPROM.
8. "OK" appears on the screen with blueback for 5
seconds, the unit enters the stop mode, and is
gone out from the factory mode.
9. If SYNC. and CTL are none, "NG" appears on the
screen with blueback for 5 seconds, the unit ejects
the cassette and is gone out from the factory mode.
Or, also when the V-ENV level in either of the SP
and LP mode is written, "NG" appears on the
screen with blueback for 5 seconds, the unit ejects
the cassette and is gone out from the factory model
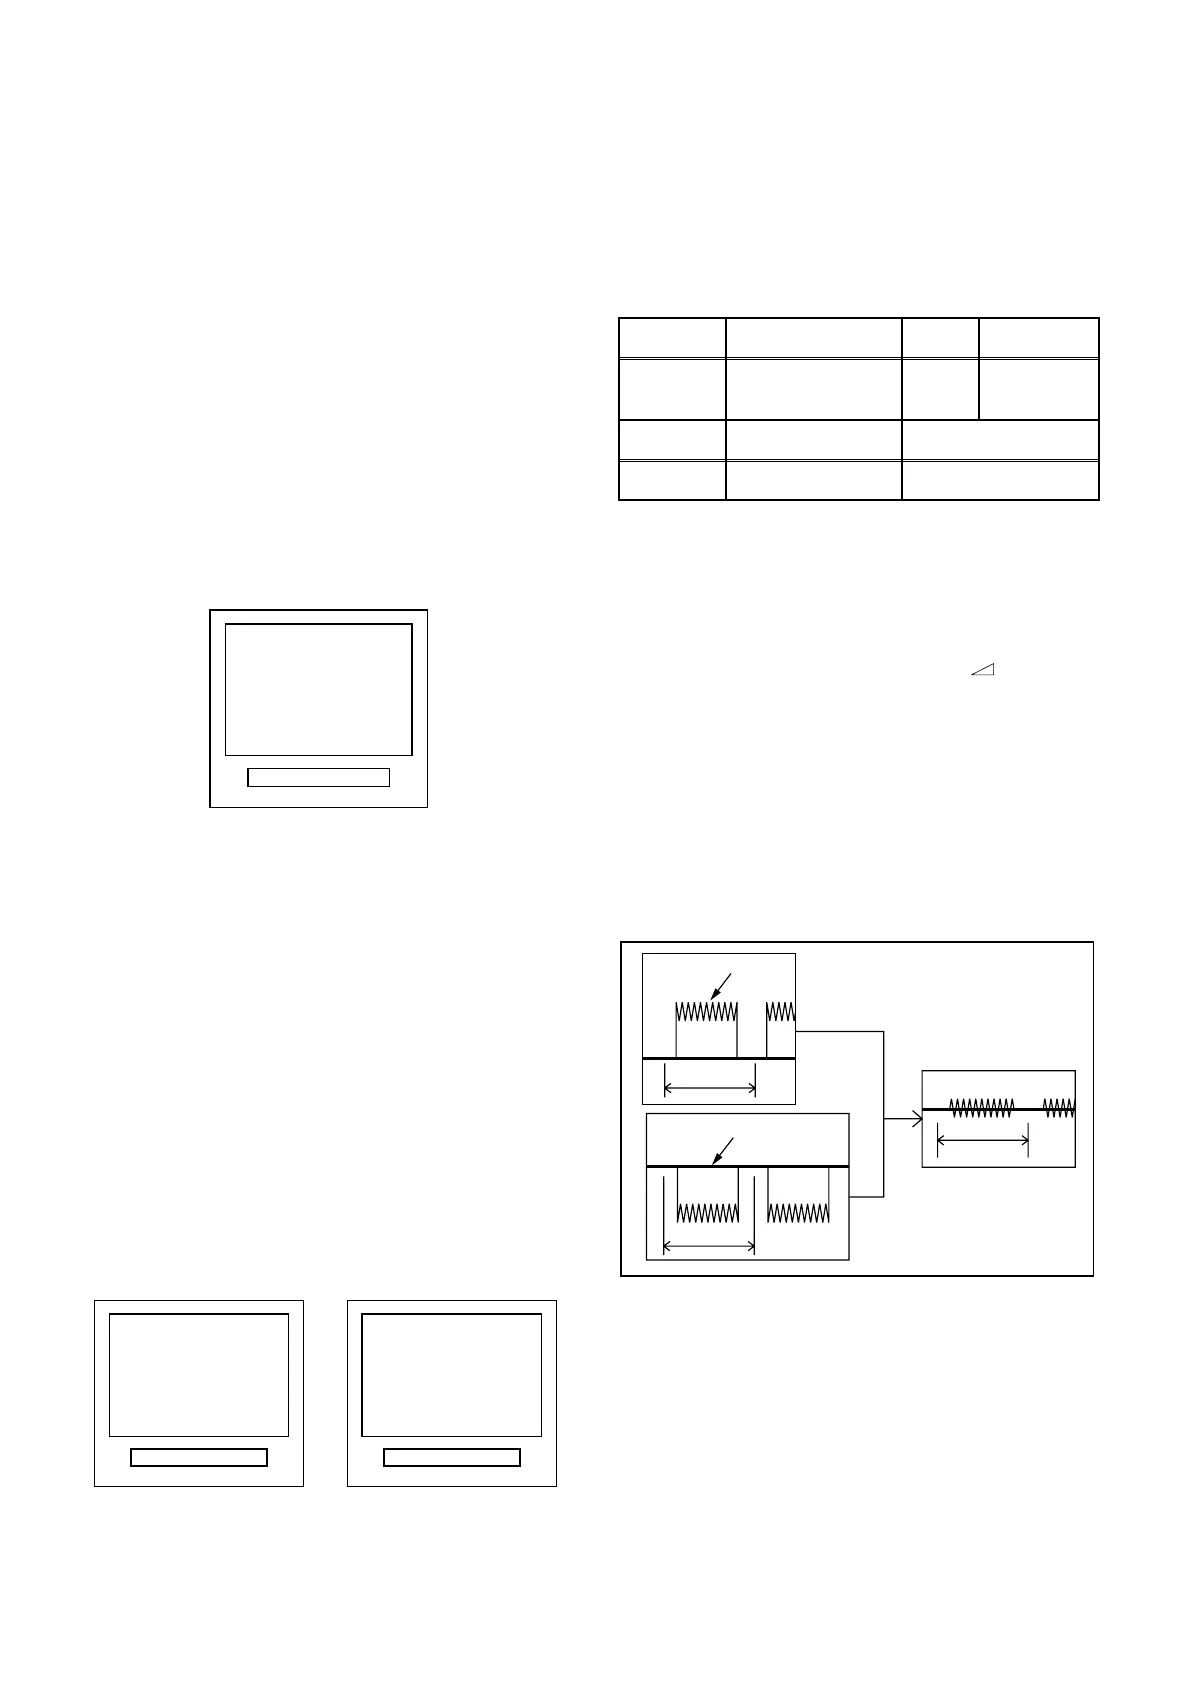
5. SECAM Black Level Adjustment
Purpose:
To set Black Level of the SECAM signal R-
Y/B-Y to Ref. level.
Symptom of Misadjustment:
If Black Level of the
SECAM signal R-Y/B-Y is incorrect, the picture is blu-
ish or reddish in grayscale compared with PAL signal.
1. Degauss the CRT and allow CRT to operate for 20
minutes before starting the alignment.
2. Input the SECAM Gray Scale signal from video
input.
3. Enter the Service Mode. (See page 1-6-1.)
4. To enter the C/D/S mode, press [ p] on the
remote control unit.
5. To select SBR (SECAM Black Level R-Y), press [6]
button on the remote control unit.
6. Press [P+/P-] buttons to adjust Y signal to the black
ref. level.
7. To select SBB (SECAM Black Level B-Y), press [7]
button on the remote control unit.
8. Press [P+/P-] buttons to adjust Y signal to the black
ref. level.
DSPC
TVCR
Fig. 2
NG
Abnormal
OK
Normal
TVCR TVCR
Fig. 3
Test point Adj. Point Mode Input
Pin 1 of
CN303
P+/P-
buttons
---
SECAM
Gray Scale
Tape M. EQ. Spec.
--- Pattern Generator ---
5mV/Div (10:1 Prove)
Y Signal
1H
1H
1H
Black REF. Level
Fig. 4