EasyManua.ls Logo

Philips 170C6FS/00 - User Manual

Philips 170C6FS/00
78 pages
Print Icon
To Next Page IconTo Next Page
Loading...
Horizontal frequencies
30 - 83KHz
Service
Service
Service
TABLE OF CONTENTS
Published by BCU Monitors Printed in Suzhou Copyright reserved Subject to modification S Jun. 16 2005
Description Page
Important Safety Notice ------------------------------2
Technical Data ------------------------------------- 3~4
Front Control & Connections---------------------- 5~6
On-screen Display(OSD)------------------------------7
Factory Mode ----------------------------------------- 8
Aging Mode ------------------------------------------- 9
Pixel Defect Policy------------------------------------10
Smart management --------------------------------- 11
Wiring Message----- ---------------------------------16
Block Diagram----------------------------------------17
Display Adjustments ------------------------------- 12
Mechanical Instructions-------------------------13~14
Safety Test Requirement ---------------------------- 15
Scaler Schematic Diagram & C.B.A ---- -----18~23
Description Page
Control Schematic Diagram & C.B.A. -------------- 24
Power Schematic Diagram & C.B.A ------------25~31
Exploded View--------------------------------------- 32
Spare parts list --------------------------------- -----33
Recommended parts list --------------------------- 34
Warning Message ----------------------------------- 35
Trouble Shooting ------------------------------- 36~37
Repair Tips -------------------------------------- 38~39
Repair Flow Chart ------------------------------ 40~42
ISP Instruction --------------------------------- 43~44
DDC Instructions & Data ---------------------- 45~49
Panel Defect Policy --------------------------------- 50
General Product Specification -----------------51~76
Different Parts List ---------------------------------- 77
Chassis: SH6
REFER TO BACK COVER FOR IMPORTANT SAFETY GUIDELINES
CAUTION: USE A SEPARATE ISOLATION TRANSFORMER FOR THIS UNIT WHEN SERVICING.
ANY PERSON ATTEMPTING TO SERVICE THIS CHASSIS MUST FAMILIARIZE HIMSELF WITH THE CHASSIS
AND BE AWARE OF THE NECESSARY SAFETY PRECAUTIONS TO BE USED WHEN SERVICING ELECTRONIC
EQUIPMENT CONTAINING HIGH VOLTAGES.
SAFETY NOTICE
GB
3138 106 10474
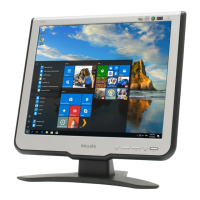
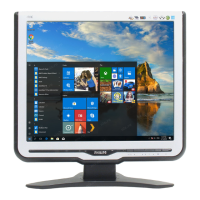
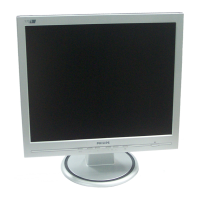
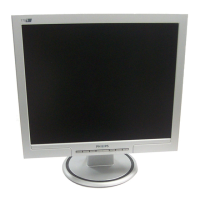
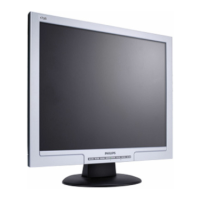
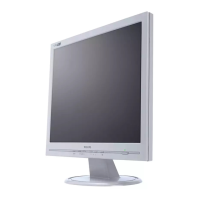
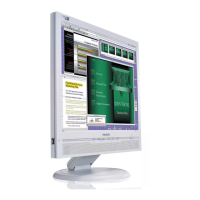
17 inch TFT LCD Colour Monitor
«
170C6FS/00
170C6FS/93
170C6FS/78

Questions and Answers

  • D
    Douglas MoyerAug 17, 2025
    How to fix a Philips Monitor with no picture?
    • T
      Tiffany LawsonAug 17, 2025
      If your Philips Monitor displays no picture, ensure the power cord is securely plugged into both the power outlet and the back of the monitor. Also, verify that the power button on the monitor's front is switched to the ON position. Confirm that your computer is powered on and that the signal cable is correctly connected. Inspect the monitor cable for any bent pins. Finally, check if the Energy Saving feature is activated.
  • C
    Carrie MckeeAug 19, 2025
    What to do if my Philips Monitor has no picture and the power LED is amber?
    • A
      Amanda LeblancAug 19, 2025
      If your Philips Monitor displays no picture and the power LED is amber or yellow, ensure the monitor cable is properly connected to your computer. Check the cable for bent pins. Also, make sure the computer is turned on.
  • D
    Donna CarpenterAug 22, 2025
    How to adjust brightness on Philips 170C6FS/00 Monitor?
    • G
      garciajohnAug 22, 2025
      If the screen of your Philips Monitor is too bright or too dark, adjust the contrast and brightness settings in the OSD Main Controls.
  • J
    Jessica LeblancAug 25, 2025
    Why is the AUTO button not working properly on my Philips 170C6FS/00 Monitor?
    • K
      Kevin RobertsAug 25, 2025
      If the AUTO button on your Philips Monitor isn't working correctly, it might be because the Auto Function is designed for standard Macintosh or IBM-compatible PCs running Microsoft Windows. It may not function properly if you are using a nonstandard PC or video card.
  • S
    Susan WheelerAug 27, 2025
    How to correct the display position on a Philips Monitor?
    • L
      lolsonAug 27, 2025
      If the display position on your Philips Monitor is incorrect, try pressing the Auto button. If further adjustment is needed, use the Horizontal Position and/or Vertical Position settings in the OSD Main Controls.
  • M
    Miss Jenny BrownAug 30, 2025
    Why does the image vibrate on my Philips Monitor screen?
    • B
      Brittany WatersAug 30, 2025
      If the image on your Philips Monitor vibrates, check that the signal cable is properly connected to the graphics board or PC.
  • L
    Lauren WoodSep 2, 2025
    How to fix vertical flicker on a Philips 170C6FS/00 Monitor?
    • W
      William WoodSep 2, 2025
      If a vertical flicker appears on your Philips Monitor, first, press the Auto button. If the issue persists, eliminate the vertical bars using the More Settings of Phase/Clock in OSD Main Controls.
  • B
    Brittany PorterSep 4, 2025
    How to fix horizontal flicker on a Philips 170C6FS/00 Monitor?
    • B
      brandichapmanSep 4, 2025
      To resolve a horizontal flicker on your Philips Monitor, start by pressing the Auto button. If the problem continues, use the More Settings of Phase/Clock in OSD Main Controls to eliminate the vertical bars.
  • V
    Victoria LamSep 7, 2025
    Why does an after-image appear on my Philips Monitor?
    • R
      Rebecca MichaelSep 7, 2025
      If an image remains on the screen of your Philips Monitor for an extended period, it may become imprinted and leave an after-image. This usually disappears after a few hours.
  • B
    Brittany WhiteSep 10, 2025
    Why does an after-image remain after the power has been turned off on my Philips 170C6FS/00?
    • C
      Catherine WarrenSep 10, 2025
      The appearance of an after-image on your Philips Monitor, even after it has been turned off, is a characteristic of liquid crystal displays. It is not due to a malfunction or deterioration and will disappear over time.

Summary

Important Safety Notice

General Safety Precautions

General guidelines on safe handling and repair practices to minimize risks.

Laser Safety Information

Specific warnings and precautions for servicing products containing lasers.

Technical Data

Pin Assignment

Details the pinout for the 15-pin D-sub connector for signal cable.

Connection to PC

Installing Your LCD Monitor

Guide for physical setup and front/rear view product description.

On Screen Display

The OSD Tree

Visual representation of the OSD menu structure and options.

Factory Mode

Access Factory Mode

Step-by-step guide on how to enter the monitor's factory mode.

Pixel Defect Policy

Pixel Defect Tolerances

Specifies acceptable levels for different types of pixel defects.

Smart Management

SmartControl

Software interface for adjusting monitor performance and viewing hardware info.

Display Adjustment

Alignment procedure

Step-by-step guide for calibrating display alignment using test patterns.

Mechanical Instructions

Step1. Remove the base

Instructions on how to detach the monitor's base.

Safety test requirements

HI-POT TEST INSTRUCTION

Requirements and method for performing Hi-Pot electrical safety testing.

System Block Diagram

Scaler Board Block Diagram

Functional block diagram of the scaler board.

Scaler Schematic Diagram - 1

Control Schematic Diagram & C.B.A

Power Board Block Diagram - Delta

Exploded View

Spare Parts Lists

Mechanical Parts

List of mechanical components with their part numbers.

Warning Message Table

Trouble Shooting

Common Problems

Troubleshooting steps for common issues like 'No Picture' and 'Screen says'.

Repair Tips

1. Servicing of SMDs (Surface Mounted Devices)

Cautions and procedures for handling and soldering Surface Mounted Devices.

Repair Flow Chart

Firmware Upgrade for CPU

System and equipment requirements

Lists necessary hardware and software for the firmware upgrade.

DDC Instructions

DDC Data Re-programming

Explains the process of re-programming DDC IC and main EEPROM.

General Product Specification

2.1 LCD

Specifications related to the LCD panel itself.

TELEVISION;MONITOR SAFFTY GUIDELINES FOR THE PROFESSIONAL SERVICE TECHNICIAN

Safety Checks

Essential safety checks to perform after service to ensure customer safety.

X-radiation

Safety measures to prevent X-radiation exposure during service.

Leakage Current Hot Check

Procedure for checking AC leakage current with the unit plugged in.

Philips 170C6FS/00 Specifications

General IconGeneral
BrandPhilips
Model170C6FS/00
CategoryMonitor
LanguageEnglish

Related product manuals