23
DDC Instructions
HUDSON 8
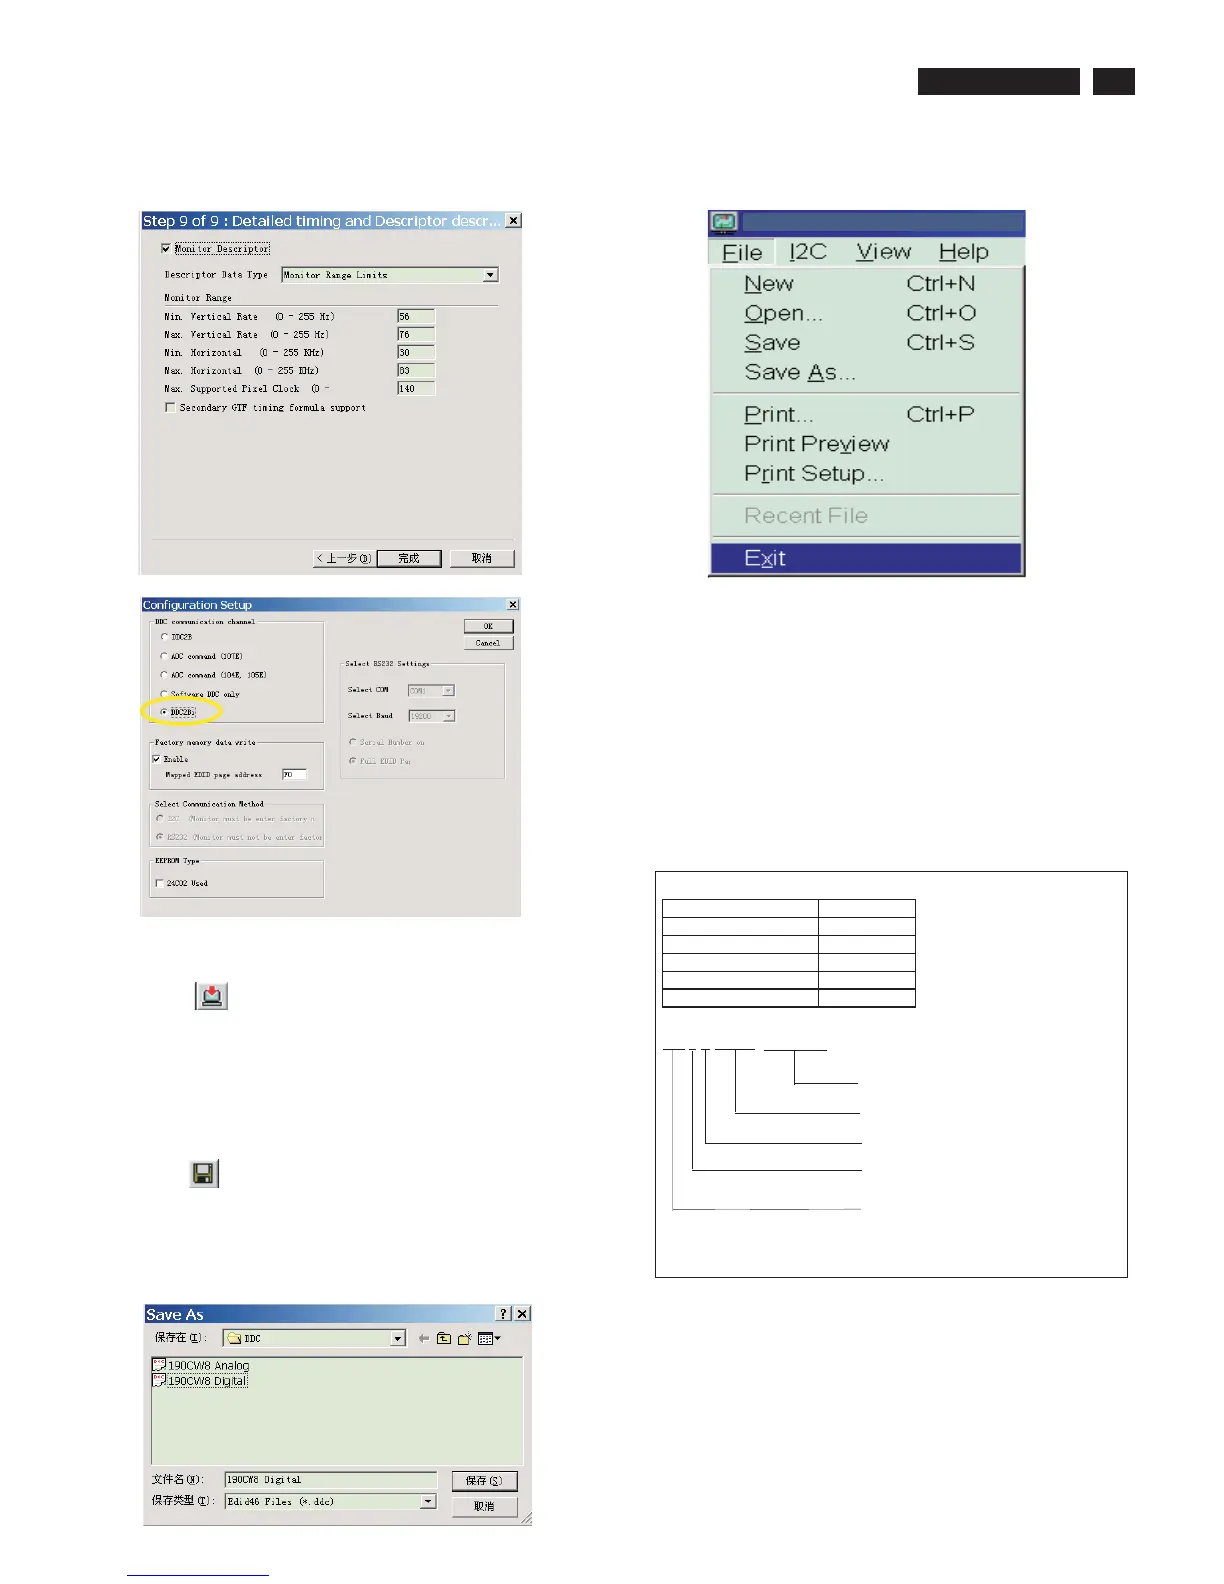
8. Click Next , bring up Fig. 39.
In this step, please confirm the Descriptor Data Type is Monitor
Range Limits, and all the items are same as below.
Fig.39
Fig.40
Step 5: Write DDC data
1. Configuration should be as Fig. 40. And press OK.
2. Click
(Write EDID) icon from the tool bar to write DDC data.
Then wait for 20-30 seconds ,DDC data will be finished Writing.
3. Turn off the monitor, press “INPUT” button and hold it , then press
power button to turn on the monitor.(If the power indicator light flicker
twice, it means the S/N has been refreshed into the EEPROM.)
Step 6: Save DDC data
Sometimes, you may need to save DDC data as a text file for using in
other IC chip. To save DDC data, follow the steps below:
1. Click
(Save) icon (or click "file"-> "save as") from the tool bar
and give a file name as shown in Fig. 41.
ThefiletypeisEDID46file(*.ddc)whichcanbeopeninWordPad.
By using WordPad, the texts of DDC data & table (128 bytes, hex code)
can be modified. If DDC TEXTS & HEX Table ar completely correct, it
can be saved as *.ddc flie to re-load it into DDC IC for DDC Data
application.
Fig.41
2. Click Save.
Step 7: Exit DDC program
Pull down the File menu and select Exit as shown in Fig. 42.
Fig.42
Step 8: Turn off the monitor, exit the factory mode.
Serial Number Definition
BOM Code
Panel Supplier CODE
AUO 1
CPT 2
LPL(LG) 3
QDI 4
CMO 5
BZ1A0625000001
SERIAL NO
YEAR/WEEK
SERVICE VERSION CHANGE CODE
BOM CODE(BILL OF MATERIAL)CODE
SITE CODE(PRODUCTION CENTER)
BZ CODE(AR-CZECH REPUBLIC
VN-HUNGARY(SZR),BZ-SUZHOU
DS-DONGGUAN)



 To Next Page