Service Modes, Error Codes, and Fault Finding
EN 36 Q522.2HE LA5.
2010-Jun-30
5.9.5 Display option code
Caution: In case the SSB has been replaced, always check
the display option code in SAM, even if a picture is shown. With
a wrong display option code it is possible that a picture is
shown, but that in certain conditions unwanted side-effects
could occur.
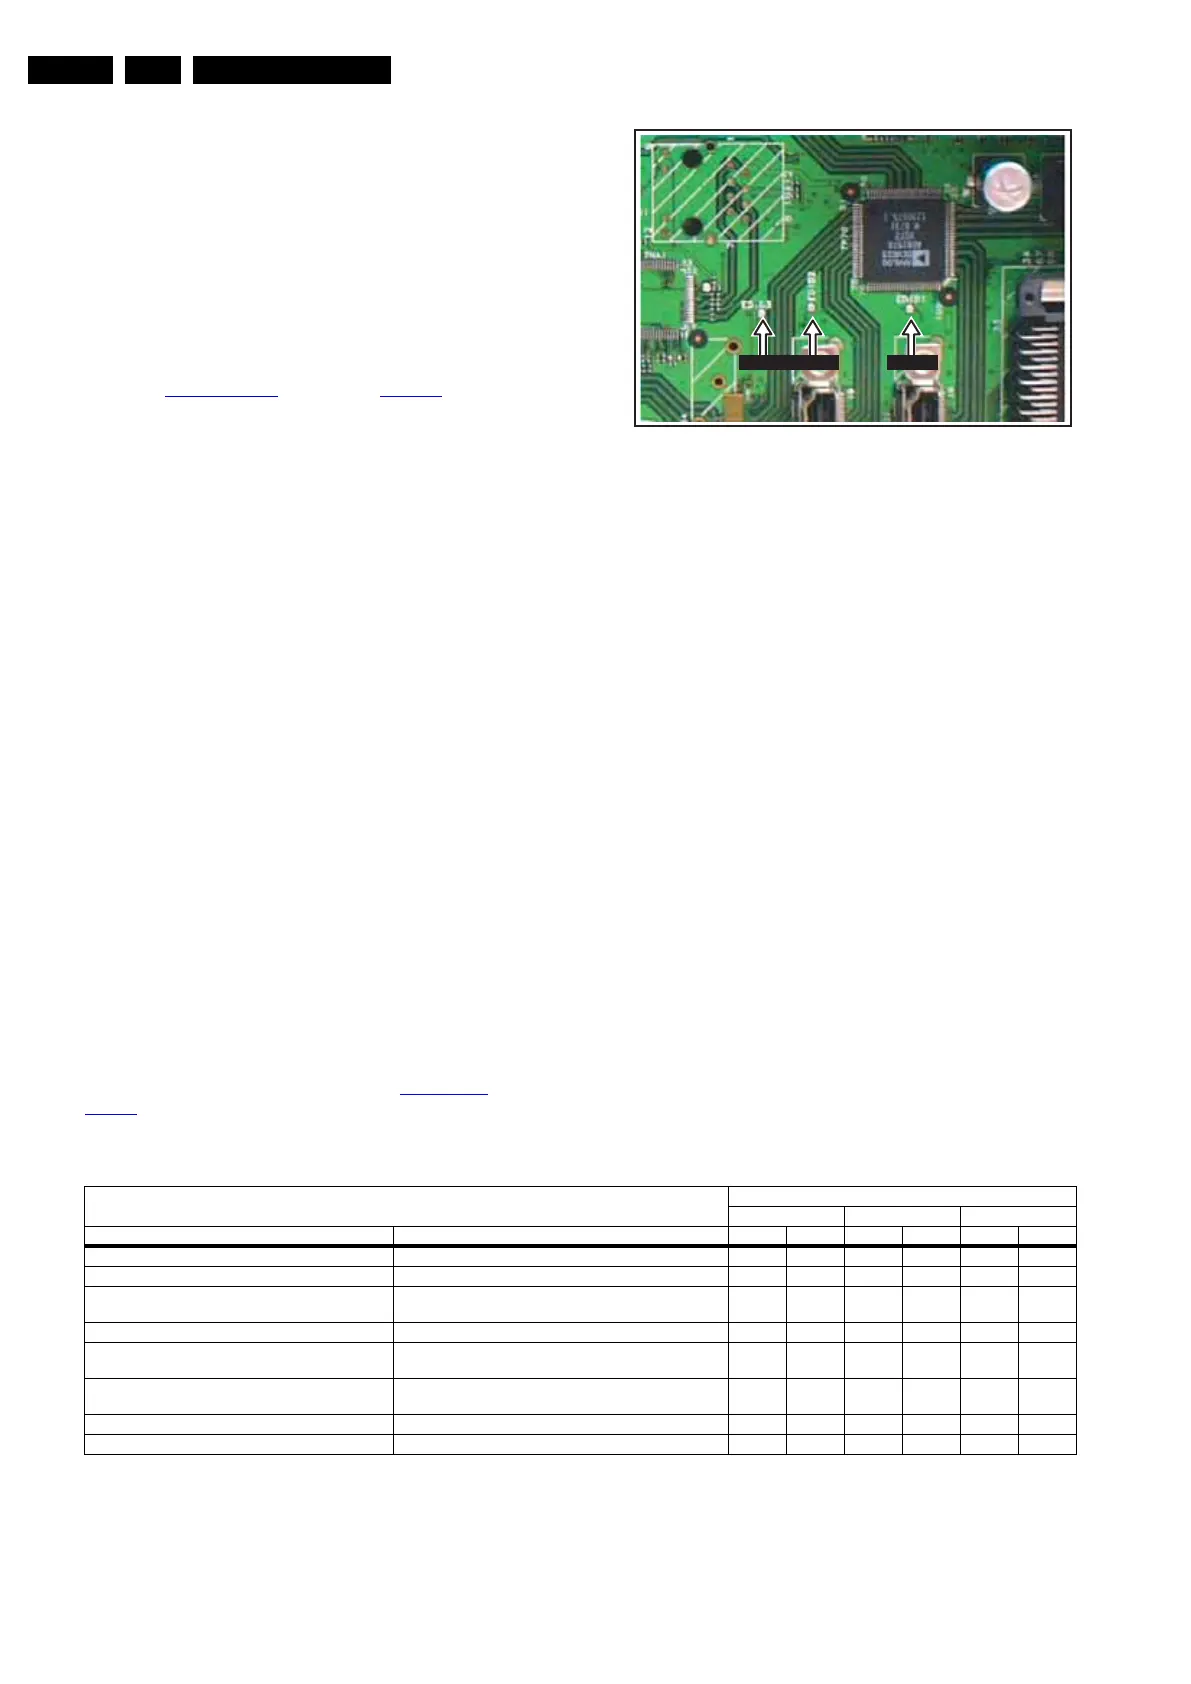
5.9.6 Upgrade EDID NVM
To upgrade the EDID NVM pin 7 of the EDID NVM must be
short circuited to ground. Therefore some test points (EDID1,
EDID2 and EDID3) are foreseen next to the HDMI connectors
(see figure EDID-NVM pins
). See section ComPair for further
instructions.
Figure 5-16 EDID-NVM pins
5.10 Software Upgrading
5.10.1 Introduction
The set software and security keys are stored in a NAND-
Flash, which is connected to the PNX85xx via the PCI bus.
It is possible for the user to upgrade the main software via the
USB port. This allows replacement of a software image in a
stand alone set, without the need of an E-JTAG debugger. A
description on how to upgrade the main software can be found
in the DFU.
Important: When the NAND-Flash must be replaced, a new
SSB must be ordered, due to the presence of the security
keys!!! (copy protection keys, MAC address, ...).
Perform the following actions after SSB replacement:
1. Set the correct option codes (see sticker inside the TV).
2. Update the TV software (see the DFU for instructions).
3. Perform the alignments as described in chapter 8 (section
“Reset of Repaired SSB”).
4. Check in CSM if the HDMI keys are valid.
5.10.2 Main Software Upgrade
The software image resides in the NAND-Flash, and is
formatted in the following way (refer to table NAND flash
content):
Table 5-2 NAND flash content
• The above overview of the NAND Flash shows the content
of the different partitions. It also shows which part of the
one-zip file erases and programs which part of the NAND
Flash.
• Remark: the above does not mean that the HDMI keys can
be reprogrammed with the “UpgradeAll.upg” file from the
one zip file. This can only be done in a secure environment
(e.g. the factory).
• The “UpgradeAll.upg” file is only used in the factory.
• The “FlashUtils.upg” file is only used by service centra
which are allowed to do component level repair on the
SSB.
H_17650_089.eps
160108
EDID 3 EDID 2 EDID 1
NAND Flash content
One ZIP
Fuse UPG Upgrade all UPG Flash Utils UPG
Partition Content Erase Program Erase Program Erase Program
JFFS2 partition 1 (application read write data) Channel table, EPG data,... X X X
JFFS2 partition 0 (Application read only once data) HDMI keys, back up display file, … X X
JFFS2 partition 0 (Application read only upgradeable
data)
wizard pictures, display file, cabinet file, upgrade assistant, … X X X
SQUASHFS partition Main software (Mips), Linux structure (root file system) X X X X
BFFS partition 2 (DVD OK) Default software upgrade application TriMedia software boot
batch file 2
XXXX
BFFS partition 1 (DVD cursor down) Back up software upgrade application boot batch file 1 Linux
kernel JETT: needed for ComPair
XXXX
BFFS partition 0 Jaguar Boot loader boot batch file 0 X X
Block 0 mBTM partition table X