10
English
Step 4: Connecting additional
components
You can connect other audio and audio/visual components
to the DVD system in order to use the Home Cinema
Audio System’s surround sound capabilities.
IMPORTANT!
– For connection to additional components, the
audio/video cables are not supplied.
– When making connections, make sure that the
color of cables matching the color of jacks.
– Always refer to the instruction manual of the
connected equipment to make an optimal
connection.
– Some DVD discs have anti-copying devices, so
you will not able to record the disc through a VCR.
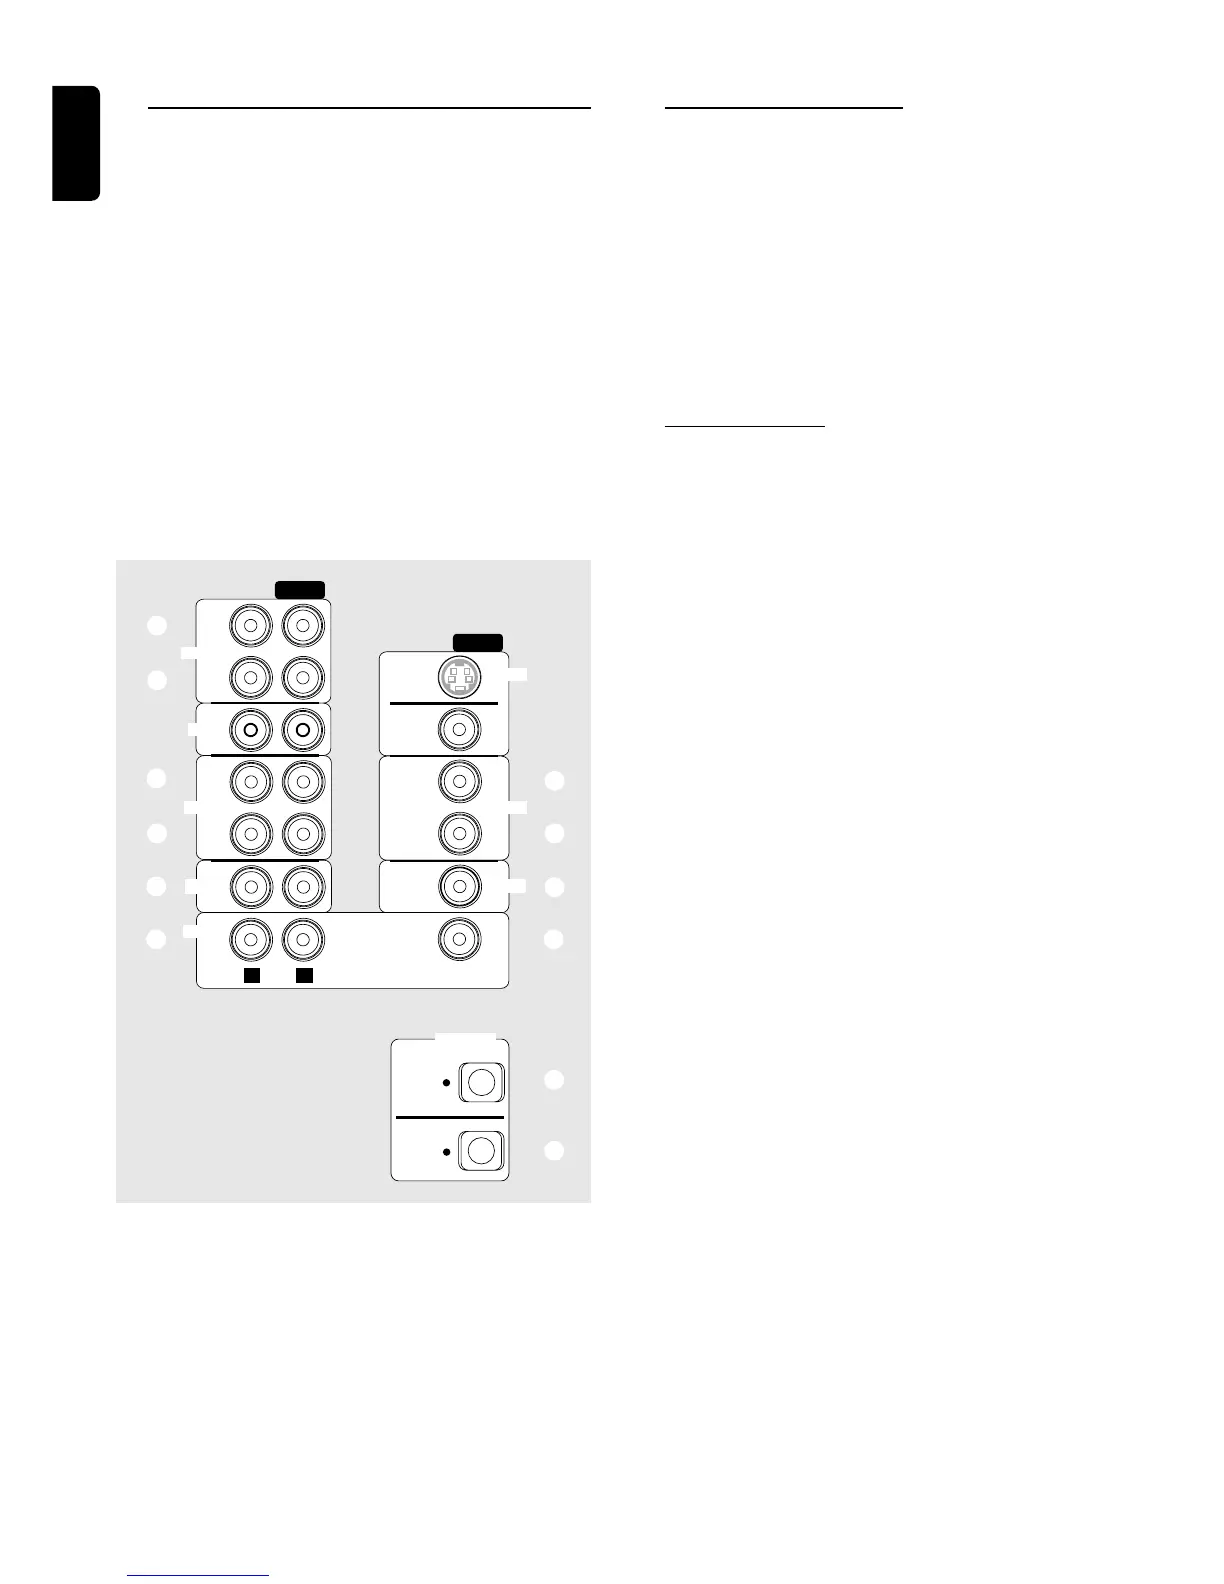
Connecting a CD Recorder
For analogue recording A
● Use the audio cables to connect AUDIO-CDR OUT
(L/R) jacks to the corresponding AUDIO IN jacks on the
CD Recorder.
For listening to the analogue playback B
● Use the audio cables (not supplied) to connect
AUDIO-CDR IN (L/R) jacks to the corresponding
AUDIO OUT jacks on the CD Recorder.
Before start operation, press CDR on the remote
control to activate the input source.
Connecting a VCR
Use audio/video cables to connect a VCR to the DVD
system.
For recording C
1 Connect AUDIO-VCR OUT (L/R) jacks to AUDIO IN
on the VCR.
2 Connect VIDEO-VCR OUT jack to VIDEO IN jack on the
VCR.
For viewing D
1 Connect AUDIO-VCR IN (L/R) jacks to AUDIO OUT
on the VCR.
2 Connect VIDEO-VCR IN jack to VIDEO OUT jack on the
VCR.
Before start operation, press VCR on the remote
control to activate the input source.
Note:
– Make sure you connect the VCR to both the IN and OUT
sets of jacks.
IN
OUT
IN
AUDIO
CDR
OUT
TV IN
VCR
SAT
S-VIDEO
OUT
MONITOR
OUT
SUB
WOOFER
PRE-OUT
OUT
IN
IN
VIDEO
RL
DVD
VCR
SAT
AUX
C
A
B
D
C
D
E
F
G H
DIGITAL
OUT
SAT
IN
OPTICAL
F
I
CONNECTIONS