9EN
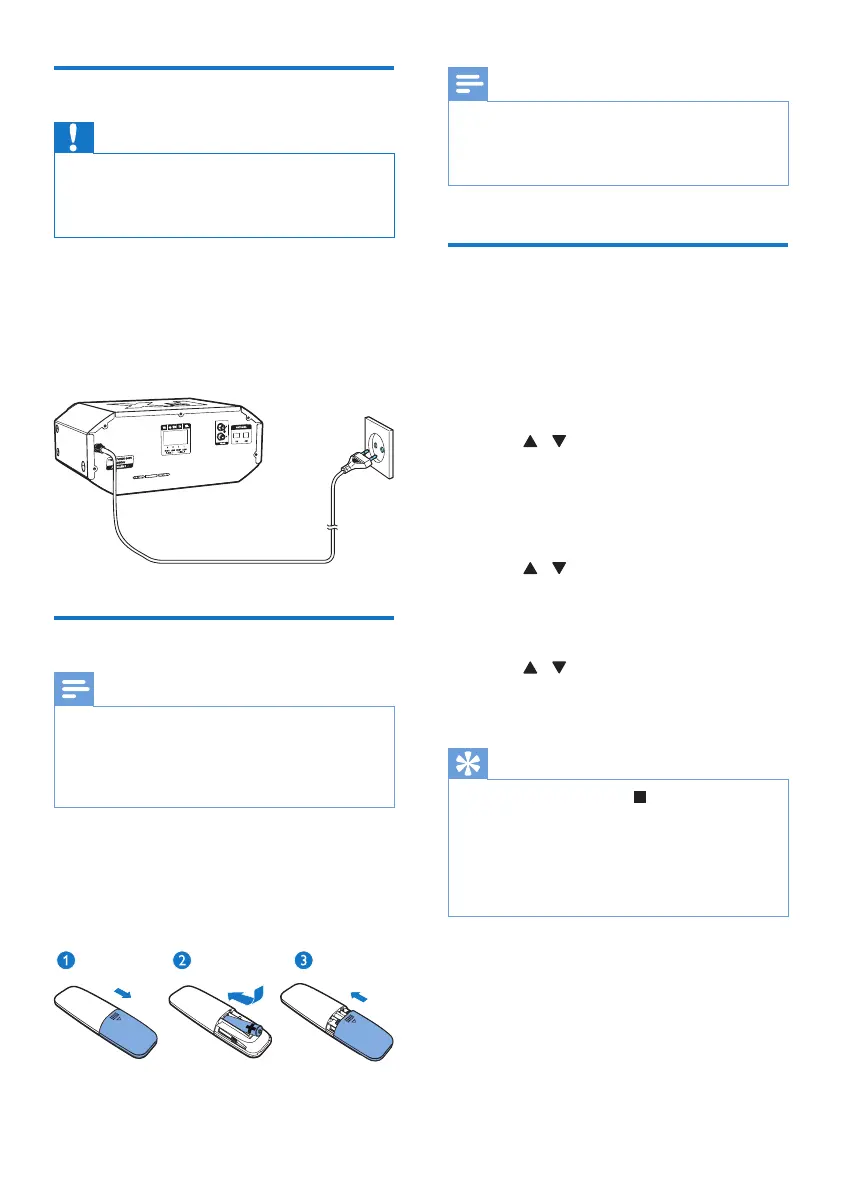
Connect power
Caution
• Make sure that the power supply socket used can
support at least 10A current loading.
• Before connecting the AC power cord, make sure that
you have completed all the other connections.
1 Adjust the voltage selector on the back of
the main unit to match your local power
supply.
2 Connect the AC power cable to the wall
socket.
Prepare the remote control
Note
• Risk of explosion! Keep batteries away from heat,
sunshine or re. Never discard batteries in re.
• Danger of explosion if the battery is incorrectly
replaced. Replace only with the same or equivalent
type.
1 Open the battery compartment.
2 Insert one AAA battery with correct
polarity (+/-) as indicated.
3 Close the battery compartment.
Note
• If you are not going to use the remote control for a
long time, remove the battery.
• Batteries contain chemical substances, so they should
be disposed of properly.
Set clock
1 In standby mode, hold CLOCK/DISPLAY
for more than two seconds to activate
clock setting.
» The 12 hour or 24 hour format is
displayed.
2 Press / repeatedly to select 12 hour
or 24 hour format.
3 Press CLOCK/DISPLAY to conrm.
» The hour digits are displayed and begin
to blink.
4 Press / repeatedly to set the hour,
then press CLOCK/DISPLAY to conrm.
» The minute digits are displayed and
begin to blink.
5 Press / repeatedly to set the minute,
then press CLOCK/DISPLAY to conrm
the set clock.
Tip
• During setting, you can press to exit clock setting
without saving the earlier operation.
• During setting, if no action is taken within 90 seconds,
the device exits clock setting automatically without
saving the earlier operation.
• During playback, you can press and hold CLOCK/
DISPLAY to view the set clock.


 To Next Page