Do you have a question about the Philips HD3720 and is the answer not in the manual?
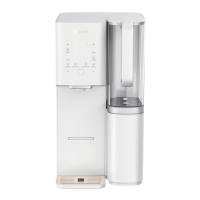
The right door of the appliance.
Button to release a component.
Plate responsible for cooling.
Place to store the power cord.
Warning about using a damaged mains cord and replacement.
Instruction to check appliance voltage against local mains voltage.
Warning against using a damaged plug, cord, or appliance.
Conditions for use by persons with reduced physical, sensory, or mental capabilities.
Warning to keep the appliance and cord away from children.
Instruction to ensure children do not play with the appliance.
Caution against covering the appliance to prevent overheating.
The appliance is intended for indoor use only.
Warning against storing the keg in a freezer due to potential damage.
Caution to avoid direct sunlight or temperatures > 30°C to prevent explosion risk.
Warning not to remove connection top or pierce the keg.
Caution to follow instructions and safety warnings on the keg.
Put appliance on horizontal, even, stable surface with 10cm free space.
Push excess cord into the storage compartment at the back.
Insert the plug into the wall socket.
Instruction to install the drip tray for the HD3720 model.
Always clean the tap unit with water and washing-up liquid before assembly.
Remove the protection cap and tube from the keg.
Rinse the tube connection hole and connection to the body of the appliance.
Turn tap unit upside down and rinse the keg connection.
Ensure the tube release button and clamps move correctly.
Push the tap unit firmly onto the keg connection top until it clicks.
Make sure release buttons stick out equally on both sides.
Insert the flexible tube into the tap body.
Slide the release button to the right to open doors.
Lift the two blue locking levers completely.
Tilt the keg with tap unit and place it onto the cooling plate.
Push down the blue locking levers until horizontal to secure the keg.
Appliance automatically cools the keg after installation.
Note on chilling time for uncooled kegs at ambient temperature.
Shows temperature, beer level, and freshness (HD3720 only).
Color indication (Red/Green) for beer temperature readiness.
Shows the amount of beer left in the keg in eight steps.
Indicates how long the beer remains fresh, counting down from 30 days.
How to adjust the freshness indicator when storing an opened keg.
Meaning of green/red dashes for tap unit/keg status.
Shows appliance status: on, cooling, ready (HD3610 only).
Instructions to follow for pouring a perfect beer.
Steps for cleaning beer glasses to ensure a good head.
Meaning of flashing red light for tap unit/tube placement.
Hold the glass by the bottom or middle to keep it clean.
Open the tap in one quick, smooth movement for proper flow.
Adjust glass angle and distance to spout to vary foam head size.
Fill the glass until the foam almost flows over the rim.
Dry the bottom of the glass before serving.
Use a clean beer mat for serving the beer.
Pick up the glass in the middle and serve on the beer mat.
Details on different beer pouring traditions for various regions.
Press release button to open doors fully.
Lift the two blue locking levers completely.
Tilt the keg towards you and take it out of the appliance.
Keg is empty when only foam comes out of the spout.
Always unplug the appliance before cleaning.
Clean the outside of the appliance with a damp cloth.
Clean the tap unit, drip tray, and cover with hot water and detergent.
Do not dispose with household waste; follow country's rules for electrical products.
Ensure the appliance is unplugged before starting removal.
Open doors, remove back cover and four screws.
Pull the cooling fan out of the appliance.
Remove the aluminium plate and detach the cooling element.
Contact Philips for information or problems via website or call centre.
Conditions that invalidate the guarantee (e.g., improper use, damaged kegs).
If problems persist, contact us online or by phone.
Bring the tube and keg when taking the appliance for service.
Ensure locking levers are horizontal before closing doors.
Unplug, defrost, and dry the appliance or keg.
Check tap unit, tube placement, and door closure; reinstall or contact service.
Fan works continuously due to constant chilling.
Difficulty placing tap unit, release buttons, or keg with tap unit.
Tube cannot be removed or is difficult to place into tap unit.
Red light flashes indicating tap unit/tube placement issue.
Green dash or green/red dash with flashing light indicates placement issues.
Ensure tap handle is opened completely for proper volume indication.
Check keg status, tube fitting, tap unit placement, and tap opening.
Check beer temperature, keg shaking, and glass cleanliness.
Check keg open date and expiry date.
Ensure glasses are clean and beer is at the correct temperature.
Check unopened keg for damage; open kegs cannot be reused.
Keep appliance plugged in, check expiry date, clean tap unit.
Check door closure, ambient temperature, fan outlet, and prechill keg.
| Suitable for | 5 L kegs |
|---|---|
| Temperature indicator | Yes |
| LCD screen | No |
| Removable tap handle | Yes |
| Non-slip feet | Yes |
| Detachable drip tray | Yes |
| Power | 70 W |
| Capacity | 5 L |
| Voltage | 220-240 V |
| Material | Plastic |
| Color | Black |