Precautions concerning batteries
• Be sure to insert the batteries with
correct positive “ ” and negative “ ”
polarities.
• Use batteries of the same type.
together.
• Either rechargeable or
non-rechargeable batteries can be
used. Refer to the precautions on their
labels.
removing the battery cover and the
battery.
• Do not drop the remote control.
• Do not allow anything to impact the
remote control.
• Do not spill water or any liquid on the
remote control.
-Bass
Decrease the soundbar’s bass volume.
+Bass
Increase the soundbar’s bass volume.
⑤ (Previous / Next)
Skip to the previous or next track in
USB/ BT mode.
(Play / Pause)
Start, pause or resume play in USB/ BT
mode.
VOL+ / VOL- (System volume)
Increase /decrease system volume level.
⑥ Optical
Switch your audio source to the optical
connection.
⑦ AUX/USB :
Switch your audio source to the
AUX/USB connection.
⑧ - Treble
Decrease the soundbar’s treble volume.
⑨ +treble
Increase the soundbar’s treble volume.
8 EN
Prepare the remote control
• The provided remote control allows the
unit to be operated from a distance.
• Even if the remote control is operated
(6m), remote control operation may be
impossible if there are any obstacles
between the unit and the remote
control.
• If the remote control is operated near
other products which generate infrared
rays, or if other remote control devices
using infra-red rays are used near the
unit, it may operate incorrectly.
Conversely, the other products may
operate incorrectly.
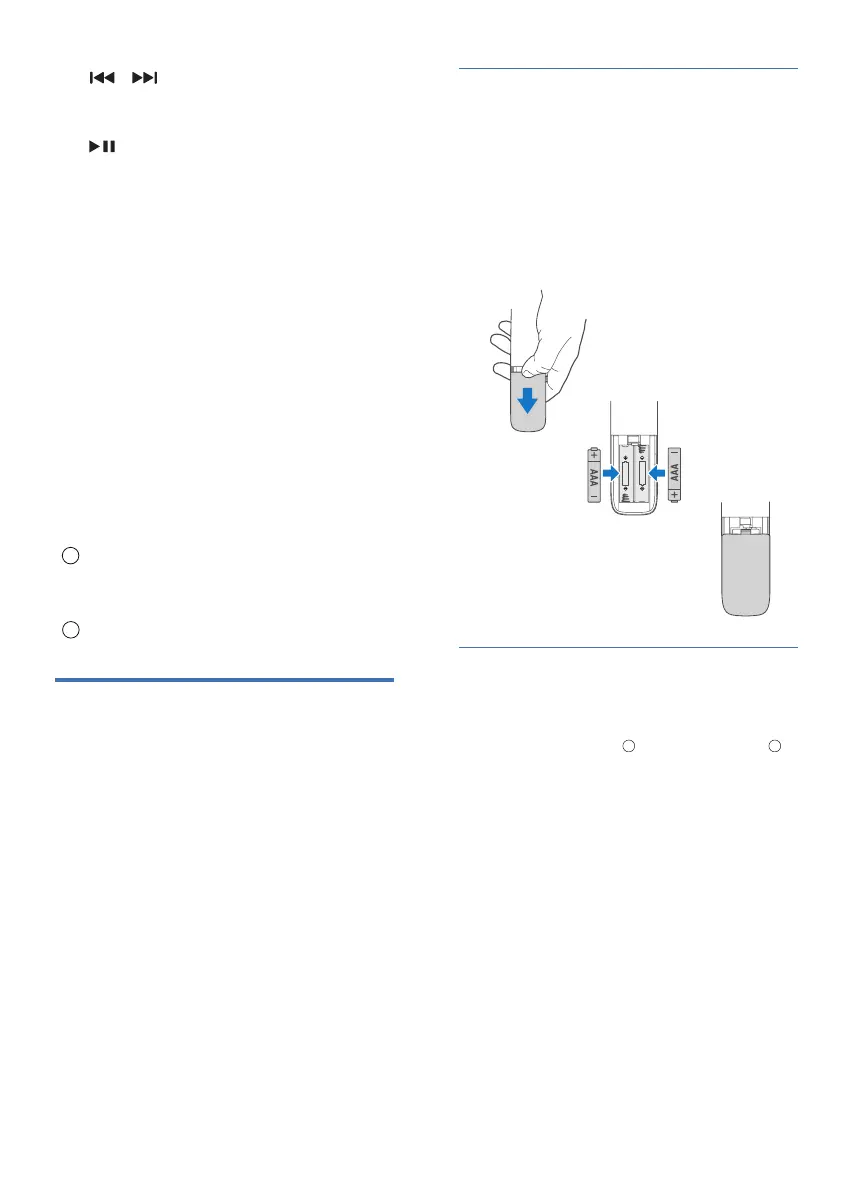
Replace the remote control battery
Slide to remove the battery compartment
cover, insert 2 AAA batteries (1.5V) with
correct polarity, then slide the battery
compartment cover back into position.
• Make sure the (+) and (–) ends of the
batteries match the (+) and (–) ends
indicated in the battery compartment.
/
10
11
-
+