Indicators
All indicators on the HearIt All receiver, transmitter and charger speak the
same language. A steady illumination gives an indication that the function is
ready whereas blinking generally indicates that something is wrong.
LED indicators: Blinking: Generally means warning
Red/Green: Power and battery status
Blue: Wireless Bluetooth functions
White: Wireless WDA function
The receiver must be turned on and charged before use, and the charger
connected as described in the installation/setup chapter. Ensure in addition that
headphones are connected and hearing aids are set in T- or MT-position.
Operation
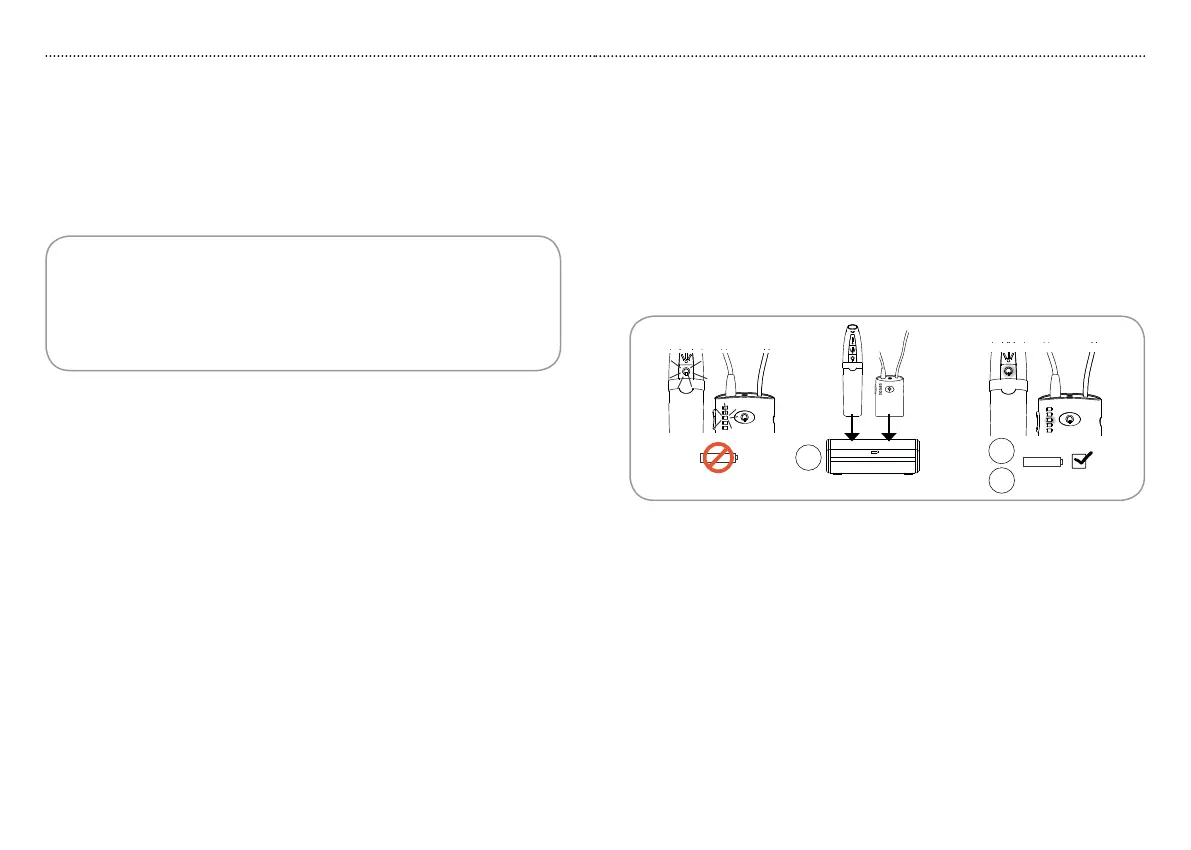
Charging
If transmitter indicator T1 or receiver indicator R5 flash red during operation
or units do not turn on when desired, it is time to charge the transmitter and/
or receiver. You can charge each unit separately or charge both at the same
time. Place the transmitter and/or receiver in slots C1 and C2 respectively.
Receiver indicator 1. R5 and transmitter indicator T1 will light red while
charging.
Once charging is complete, receiver indicator 2. R5 and transmitter
indicator T1 will light green.
Operation
T1
Charger
R5
C1
C2
2
1
3
No power
Charged
1716
Please note:
Ensure that the power supply is connected to the charger and that the •
power supply adaptor is firmly attached to an active wall power outlet
(charger indicator C3 is constant green or flashing blue/green).
Transmitter and receiver cannot be overcharged if they are left in the •
charger after completed charging.