Page 19 of 28
PF32 camera in slave TCSPC mode where the timing synchronisation signal is provided by an
optical detector (fast photodiode, for example) with an appropriate output.
With the SYNC signal connected to the camera, open the Java software. As before, program the
FPGA by clicking on “Choose bitfile”, then select “PF32_USB3.bit”. Check that the sync rate
displayed on the start tab matches the expected value. In the box “Select mode of operation” select
“TCSPC (laser master)” then click “Configure”. Navigate to the TCSPC tab.
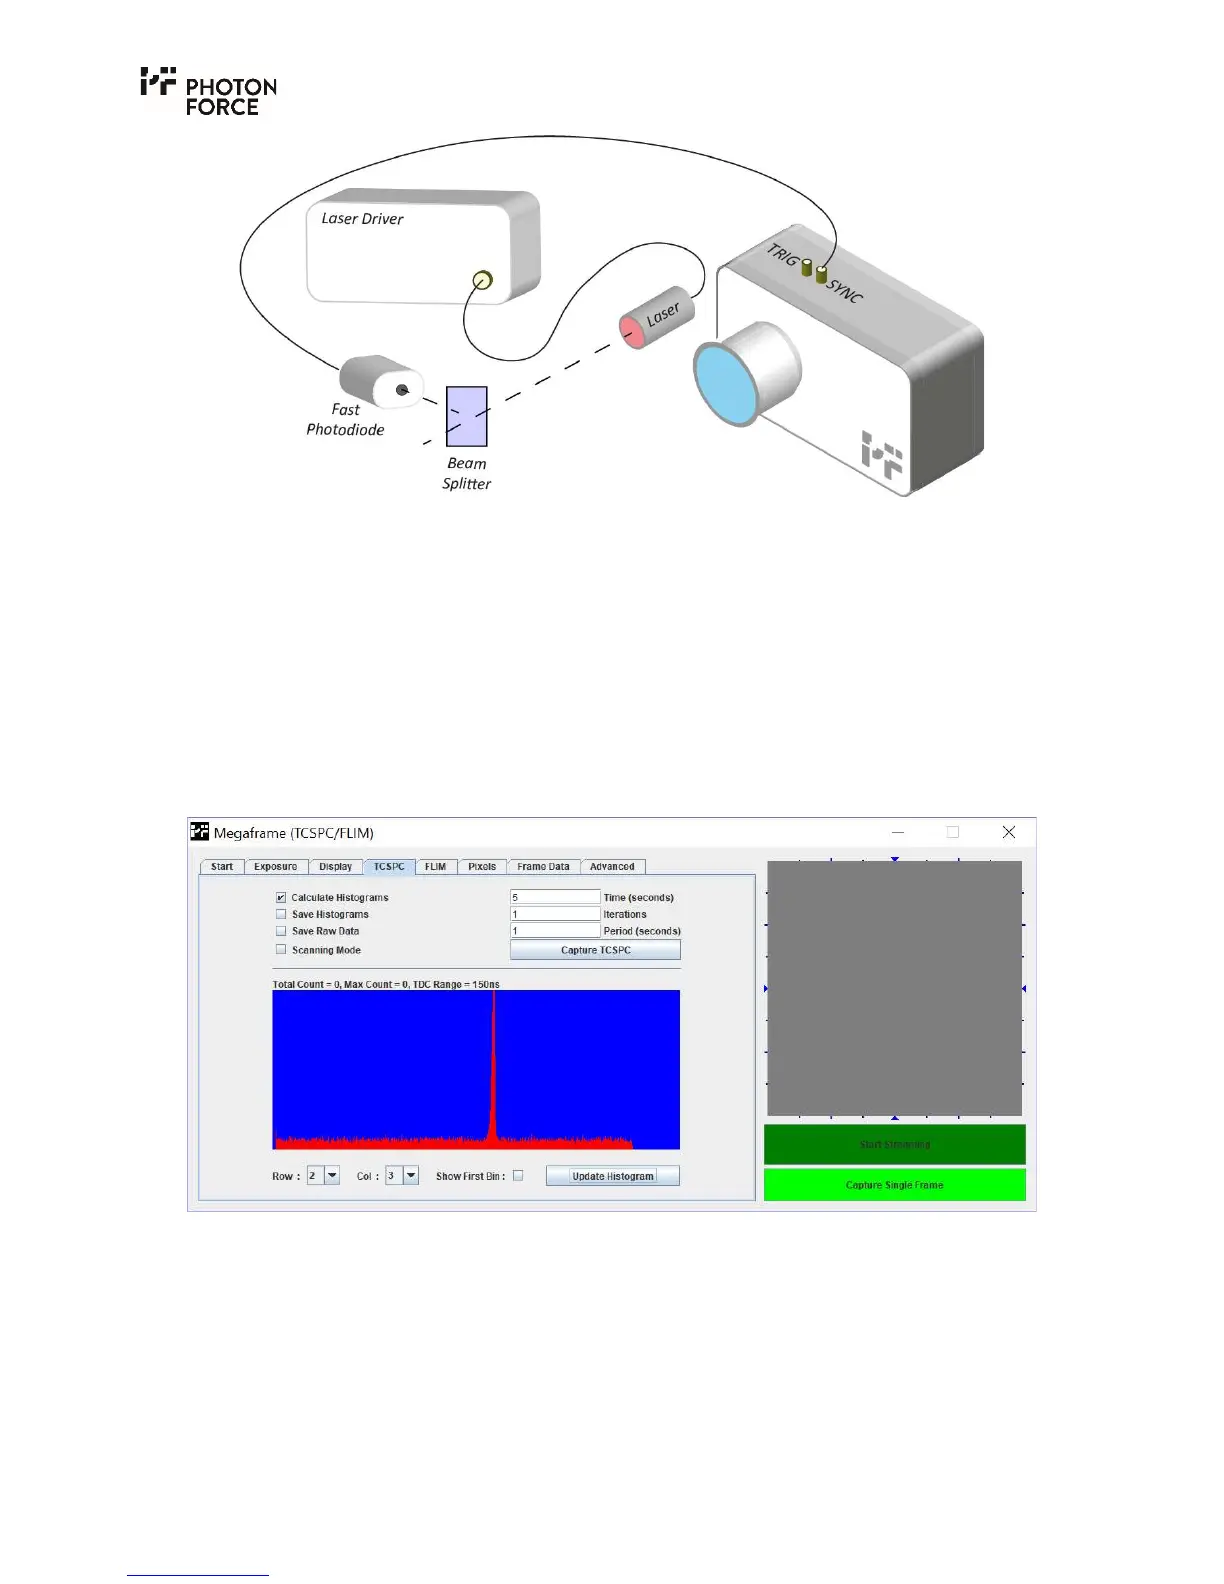
The simplest test to observe time-correlated data is to direct the pulsed light source, safely and
diffusely, at a wall or scattering surface and image this surface with the camera. Within the TCSPC
tab, click on “Capture TCSPC”. The default measurement time is 5 seconds, after which, the
measurement will stop. Next, select which pixel’s histogram you wish to see by selecting a “Row”
and “Col” value and click “Update Histogram”. Below is an example of a TCSPC histogram.
PF32 Java application displaying a captured histogram.