64
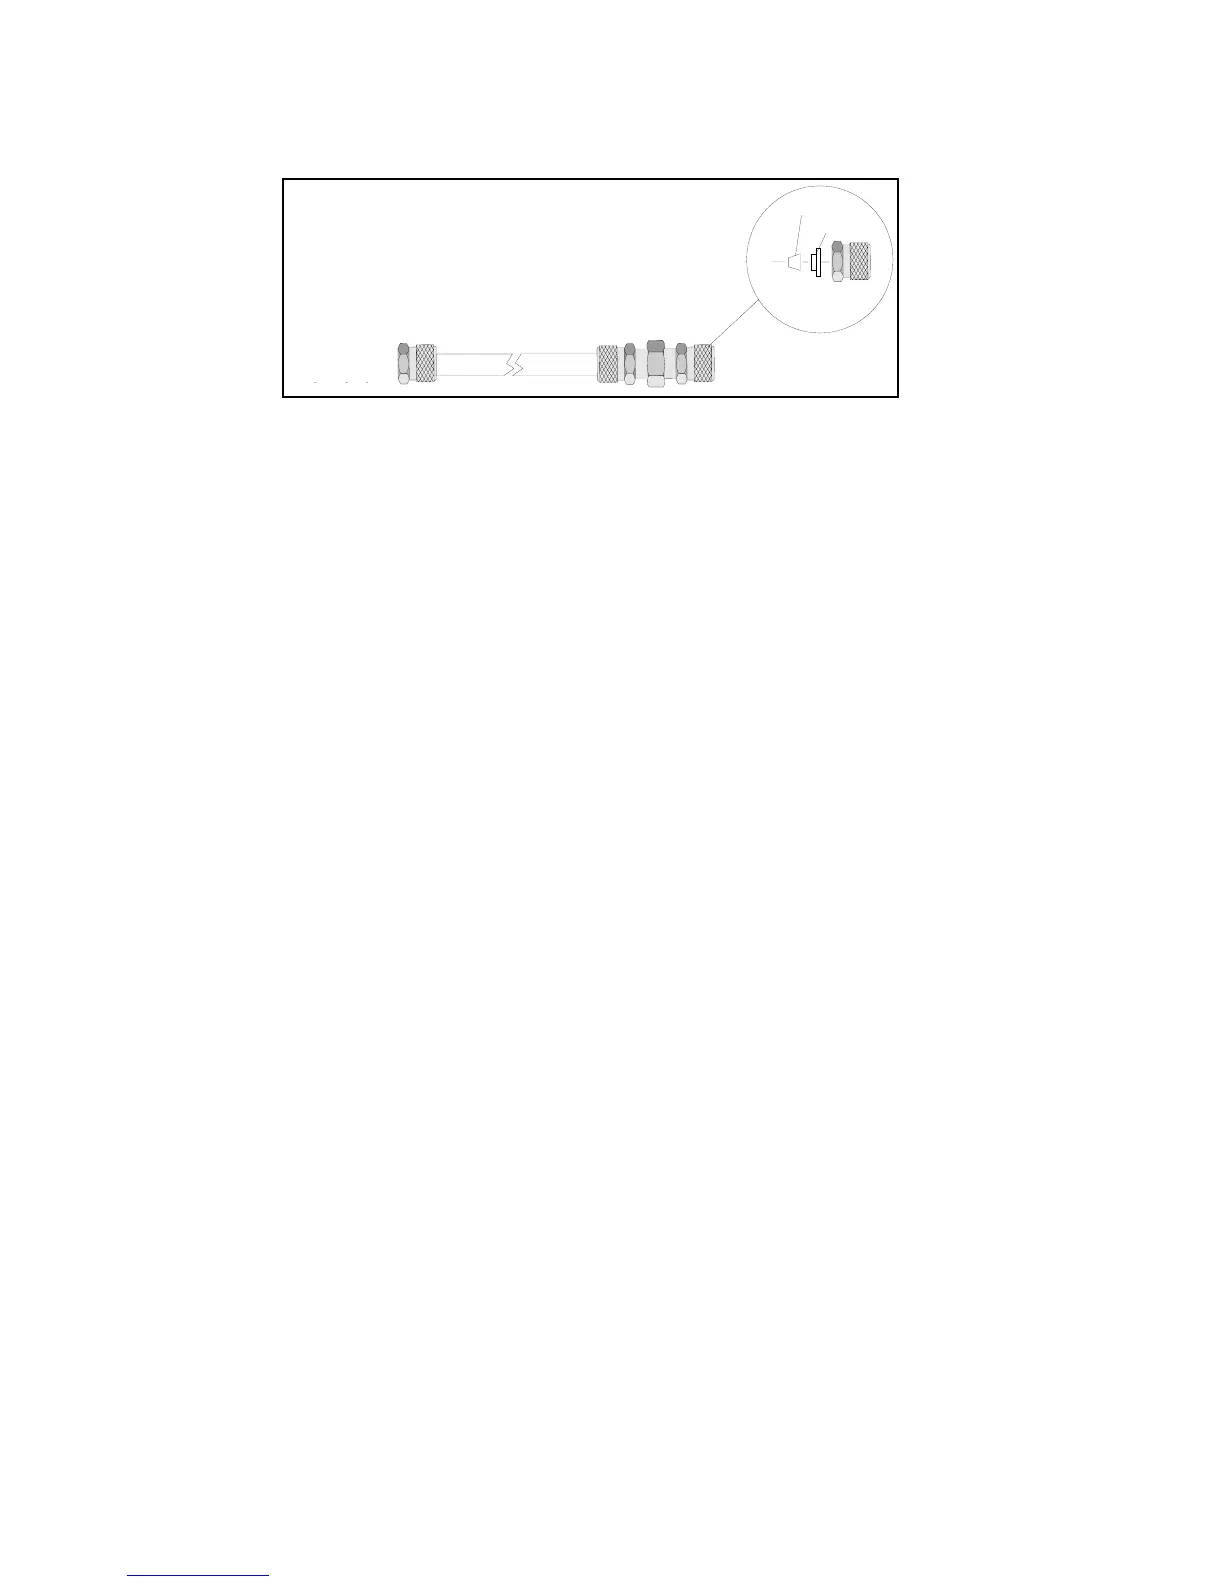
Figure 18. Gas Bag Adapter
3. Loosen the knurled nut on the reducing union of the gas bag adapter.
NOTE: Do not remove the nut from the union, as the Teflon ferrules contained inside the nut
may be lost.
4. Insert the tube stub from the gas bag into the knurled nut. Tighten the
knurled nut and ensure the tube stub is secure. If the gas bag is not
secure, ensure you have inserted the tube stub far enough into the
knurled nut. Do not over-tighten the fitting.
NOTE: Over-tightening the Teflon ferrules will result in damage to the ferrules!
5. The union should be connected to the gas bag adapter. If it is not, then
tighten the nut on the adapter tube to the union.
6. Flush and fill the gas bag. Remove the knurled nut on the adapter tube
from the regulator.
8. Repeat this procedure, if necessary, to prepare a bag of zero air.
NOTE: Do not use the same gas bag or for the bag of zero air. You will contaminate the bag
of zero air.
Calibrating the 2020PROPlus with a Gas Bag
1. Ensure the short sample probe is connected to the 2020PROPlus inlet. If
you are using the long probe for sampling, then ensure the long probe is
connected to the 2020PRO
Plus.
NOTE: Ensure the sample probe is free of any contamination as this will affect the
calibration
2. Press the CAL key.
3. Follow the instructions on the display and connect the 2020PRO
Plus to zero
air sample bag or leave the instrument unconnected so it can sample clean
ambient air. Then press the “Next” key. The 2020PRO
Plus will take 60-90
seconds to set the zero point for calibration.
1/8" to 3/16"
Union
1/8" Nut
Insert Gas
Bag Tube Stub
1/8" Adapter
Tubing
To Regulator
or 2020
Teflon
Ferrules
Front
Back
To Regulator
or the


 To Next Page