8
Customer support team: +44 (0) 333 220 6054
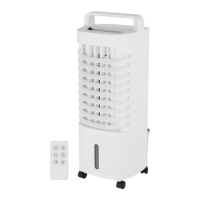
Control Panel Layout:
1. Low speed indicator
2. Medium speed indicator
3. High speed indicator
4. Humidifier On/Off indicator
5. Normal mode indicator
6. Natural mode indicator
7. Sleep mode indicator
8. 1h/2h/4h/8h timer indicator
9. Oscillation On/Off indicator
10. Power On/Off button
11. Wind speed button (low, medium, high)
12. Cooling / humidifying button
13. Wind mode function button
14. Timer function button (1-2-4-8 hours)
15. Oscillation On/Off button
Remote Control Layout:
1. Power On/Off
2. Humidifying On/Off
3. Oscillation On/Off
4. Timer Set
5. Mode Selection
6. Speed Selection
1 2
3 4
5 6
Before First Use:
1. Remove the parts from the packaging.
2. Assemble as instructed.
3. Your appliance is now ready for normal
use.
4. Dispose of the packaging in a responsible
manner.
Installing The Batteries:
1. To begin using your fan, start by installing
the battery into the remote control..
2. To install the battery, first detach the
battery cover from the remote. To do
this, place a thumb or small object on
the grooved area on the underside of the
battery cover and push it gently to the
side, while simultaneously pulling the
compartment away from the body of the
remote.
3. Insert 1 x CR2032 battery into the
battery compartment, taking care to
ensure the positive polarity is facing
upwards.
4. Once the batteries are in place, slide the
battery cover back into the remote. It will
automatically lock into place and secure
the battery inside.
10
1 2 3 4 5 6 7 8 9
11 12 13 14 15