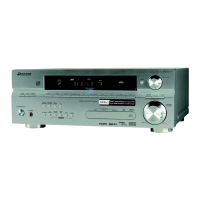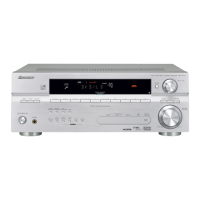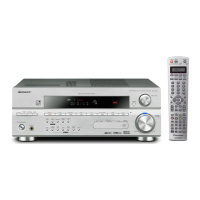
Do you have a question about the Pioneer 915 and is the answer not in the manual?
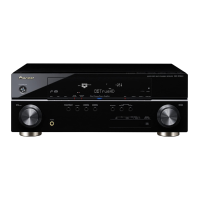
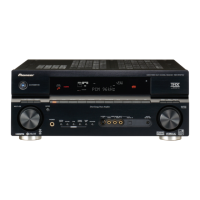
| Type | AV Receiver |
|---|---|
| Channels | 5.1 |
| HDMI inputs | 4 |
| HDMI outputs | 1 |
| Dolby Digital | Yes |
| DTS | Yes |
| Component video inputs | 2 |
| Composite video inputs | 3 |
| Analog audio inputs | 4 |
| Signal-to-Noise Ratio | 98 dB |
| Digital audio inputs | 2 optical, 1 coaxial |
| Input Sensitivity | 200mV |
Details of purchase on file for insurance claims like loss or theft.
Get complimentary product tips, updates, and service bulletins.
Provide input to help design better products that meet customer needs.
Registered customers can opt-in to receive a monthly newsletter.
Locate, record, and secure the equipment's serial number for your security.
Read all safety and operating instructions before operating the product.
Keep safety and operating instructions for future reference.
Adhere to all warnings on the product and in the operating instructions.
Follow all operating and use instructions.
Clean the product only with a polishing or soft dry cloth.
Do not use attachments not recommended by the manufacturer.
Do not use the product near water or moisture.
Use only with recommended carts, stands, or tables to prevent falls.
Move product and cart combinations with care to prevent overturns.
Ensure proper ventilation by leaving space around the unit to prevent overheating.
Operate only from the type of power source indicated on the marking label.
Install the appliance in a stable location.
Unplug the power cord when the appliance is left unused for a long period.
Ensure proper grounding or polarization of plugs for electrical safety.
Route power cords to prevent them from being walked on or pinched.
Ground outdoor antenna or cable systems for protection against voltage surges.
Unplug unit and disconnect antenna during lightning storms to prevent damage.
Do not overload wall outlets or extension cords to prevent fire or shock.
Do not insert objects or spill liquids into the product's openings.
Refer all servicing to qualified personnel; do not attempt self-service.
Unplug unit and refer to qualified personnel if cord, plug, or unit is damaged.
Ensure service technicians use manufacturer-specified replacement parts.
Ask technician to perform safety checks after service or repairs.
Do not mount product to a wall or ceiling unless specified by manufacturer.
Site unit away from heat sources like radiators or stoves.
Learn about home theater systems and surround sound effects.
Verify all supplied accessories are received with the product.
Proper precautions for inserting and handling batteries to prevent hazards.
Guidelines for choosing a suitable, stable location for receiver installation.
Ensure adequate space around the unit for proper heat dispersal and ventilation.
Quick setup guide for connecting system for surround sound playback.
Instructions for connecting speakers to the receiver terminals, including impedance.
Step-by-step guide to configure speaker setup, room size, and listening position.
Auto MCACC setup measures acoustics to optimize speaker settings and equalization.
Troubleshooting tips for common issues during Auto MCACC Setup.
General guidelines for connecting cables, avoiding bends that cause noise.
Using component video cables for superior picture quality and progressive-scan video.
Explains the VSX-915 video converter feature for composite and S-video outputs.
Step-by-step guide for connecting a DVD player and TV to the receiver.
Connects DVD Audio/SACD player's 5.1 channel analog outputs to receiver inputs.
Connects satellite receivers, digital TV tuners, and other set-top boxes.
Connects components like CD-R, MD, DAT, or tape recorders to the receiver.
Information about the receiver's WMA9 Pro decoder capability for audio playback.
Connects video recorders (VCRs, DVD-recorders, HDD recorders) via analog or digital interfaces.
Delivers superior picture quality using component video, supports progressive-scan.
Accesses front panel video connections including standard, S-video, and optical inputs.
Connects AM loop and FM wire antennas for improved reception.
Connect external FM or AM antennas to enhance reception quality.
Guide for connecting speakers, including front, center, surround, and subwoofer terminals.
Tips for optimal speaker placement to achieve the best surround sound effect.
Information on the receiver's AC outlet for powering connected equipment, with limitations.
Links Pioneer components using SR CONTROL jacks for unified remote operation.
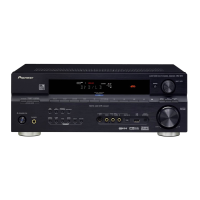
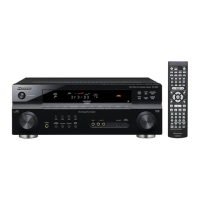
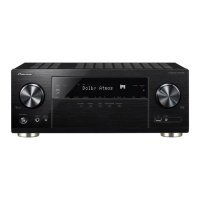
Identifies and explains the controls and indicators on the receiver's front panel.
Describes buttons used for navigating and operating the System Setup menu.
Explains the various indicators and symbols shown on the receiver's front panel display.
Button on remote to control the receiver unit itself.
Button on remote to select the desired input source.
Button on remote to control the receiver unit itself.
Button on remote to select the desired input source.
Details factors affecting remote control performance and optimal usage range.
Receiver automatically detects source and selects multichannel or stereo playback.
Guides on enjoying any source in surround sound, depending on speaker setup.
Explores various modes like ADV. MOVIE, ADV. MUSIC for enhanced listening experiences.
Adjusts Center Width, Dimension, and Panorama for Dolby Pro Logic IIx Music.
Adjusts center image for wider stereo effects in Neo:6 Music mode.
How to select STEREO or DIRECT modes for front speaker playback.
Using EQ settings from MCACC or manual setup for optimized sound.
Selects between analog, digital, or automatic signal input based on source component.
Enables 6.1/7.1 channel decoding or generates surround back channels for 5.1 sources.
Creates a virtual back channel through surround speakers for emulated 6.1 encoding.
Features for enhancing bass/treble at low volumes or improving movie sound at low levels.
Localizes dialog in the center channel to make it stand out from background sounds.
Adjusts bass and treble levels using front panel controls.
Guides on selecting and playing audio/video from various connected components.
Selects multichannel analog inputs for surround sound playback from decoders or DVD players.
Sets a timer to switch the receiver to standby after a specified duration.
Accesses detailed settings for speaker systems, room acoustics, and input assignments.
Configures the use of surround back speaker channels for various setups.
Fine-tunes speaker settings and Acoustic Calibration EQ after automatic setup.
Adjusts the overall balance of speaker levels for optimal sound staging.
Sets speaker distances to ensure proper sound depth and separation with delay compensation.
Measures room acoustics to neutralize ambient characteristics for a flat equalization.
Automatically adjusts frequency balance using test tones after MCACC setup.
Copies existing EQ settings to custom slots for manual adjustment reference.
Manually adjusts EQ settings for custom frequency balance and channel levels.
Reviews configured ALL CH, F.ALIGN, and custom EQ settings.
Fine-tunes speaker configuration, size, number, and crossover settings.
Specifies speaker size, number, and type (LARGE/SMALL/NO) for each channel.
Sets the frequency cutoff point for sending bass sounds to subwoofer or LARGE speakers.
Adjusts the overall balance and individual channel levels of the speaker system.
Sets speaker distances to ensure proper sound depth and separation with delay compensation.
Steps for tuning FM and AM radio broadcasts using automatic and manual methods.
Adjusts frequency one step at a time using TUNE +/− buttons.
Quickly scans for radio stations by pressing and holding TUNE +/−.
Uses MPX button to switch to mono reception for weak FM signals.
Enters station frequency directly using number buttons for quick access.
Memorizes up to 30 radio stations in three banks (classes) for easy recall.
Assigns custom names (up to 4 characters) to saved station presets for easier identification.
Recalls saved radio stations by selecting class and preset number.
Guides on recording audio or video from tuner or connected sources.
Assigns receiver remote control to operate other components using manufacturer codes.
Manually selects component preset codes stored in the remote control.
Teaches the remote to learn commands from another component's remote control.
Resets a programmed remote button to its factory default setting.
Clears all preset codes and programmed buttons from the remote control.
Allows controlling one component via remote without affecting receiver operation.
Checks which preset code is assigned to a MULTI CONTROL button.
Lists remote buttons and their functions for controlling TVs and DTV devices.
Details remote control functions for various components like CD, MD, VCR, DVD players.
Configures speakers connected to surround back terminals for stereo playback in another room.
Selects speaker system output (A, B, or A+B) for Second Zone setup.
Connects high/low frequency drivers to separate amplifiers for improved performance.
Uses two speaker cords per speaker for reduced interference and potentially better sound.
Adds external amplifiers to channels via pre-outs to power speakers.
Connects receiver to a Pioneer plasma display for features like auto input switching.
Enables features like on-screen display and auto input switching with SR+ cable.
Assigns digital and component video inputs to specific functions or sources.
Maps digital inputs (coaxial, optical) to components like DVD, CD, TV, DVR.
Maps component video inputs to sources like DVD, TV, DVR for proper signal output.
Accesses custom settings for dynamic range, dual mono, LFE, and plasma display control.
Adjusts dynamic range for Dolby Digital/DTS soundtracks at low volumes.
Selects which channel (CH1, CH2, or both) to play for dual mono encoded soundtracks.
Attenuates ultra-low bass tones to prevent distortion from speakers.
Configures receiver's SR+ mode settings for interaction with Pioneer plasma displays.
Provides solutions for common problems like no power, no sound, or no image.
Resets all receiver settings to factory defaults using front panel controls.
Switches between 6 Ohm and 8 Ohm speaker impedance settings for compatibility.
Lists detailed technical specifications for amplifier, audio, video, and component sections.
Safety warnings regarding handling and care of the power cord to prevent hazards.
Instructions for safely cleaning the receiver's exterior surfaces.