PAUSE
1. Press the PAUSE button
while the
tape is
playing (during playback or
recording).
2. The tape stops. The play functon button re-
mains in the "on'* state*
3.
Press the PAl^E button again
and the
tape
resumes its running.
The PAUS£
button does not work during fast for-
ward or rewind,
SETTING
THE TAPE SPEED (Fig.
9)
1.
Set the recording tape speed
or check
the play-
back
tape speed (IScm/s, or 9.5cm/s).
2. Turn the SPEED switch to
tiie appropriate
position.
19cm/s:
Press switch twice (released position
A)
9.6cm/$:
Press switch once (depressed
position
_)
Setting the tape speed to 9.5cni/s enables you
to douUe the record^ tbne,
ccmipared
wtth a
19cm/s
tape speed,
ADJUSTING THE PLAYBACK SPEED
Using the PITCH CONTROL
knob, you can change
the
tape speed to within
±6%
of that speed vrtiidi
has been
selected
by
the SPEED switch (19cm/B,
9.5cm/s}, Turning this
control
to
the left from
the
central position
slows down the tape speed
and
lowers the musical
steps. Turning it right round to
the left
lowers the musical steps by a semitone.
Conversely,
turning the contrnl
to the
right, in*
creases the
tape speed and raises the musical steps.
Turning it fully to
the
ri^t raises
the murical steps
by a
semitone.
If you listen to the
playback
sound and adjust this
control^ you
can easily
harmonize
the muacal steps
of the music you
want to perform.
Mcmnal^, this c<Hitrol is kept to the central por-
tion durii^c
playback.
TAPE
TRACKS
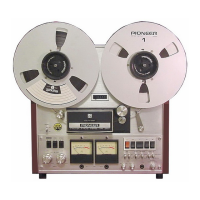
The RT-701 is a 4-track»
2-chaimel
t^ deck. A
track is that
sMp
of the
tape
which Is recorded
(magnetized). Channel refers to the recording/
playback system.
First,
L
channel signals
are
recorded on track 1 and R channel signals are
recorded on track 3< When the tape has
been taken
up and the reels
changed over, the L channel and
R channel signals
are recorded on tracks 4 and
2,
respectively. The signals recorded from the same
track
are
fed
to
the channels when the tape is
played back.
OFF
or,
o
1
a
TApe
oc
Fig.
9
r-. T
c t
riH> '
I If
Pitch control knob
Fig. 10
Recording
Playback
ErsM
twad head
hwd
(ED
Signsl vs.
Track
Lj
channel signal
Track 1
channel signal
Track
3
^
L,
channel signal
Track
4
R,
channttl signal Track
2
Fig. 11
 Loading...