Connect console Panel:
Put the console near
your phone cord
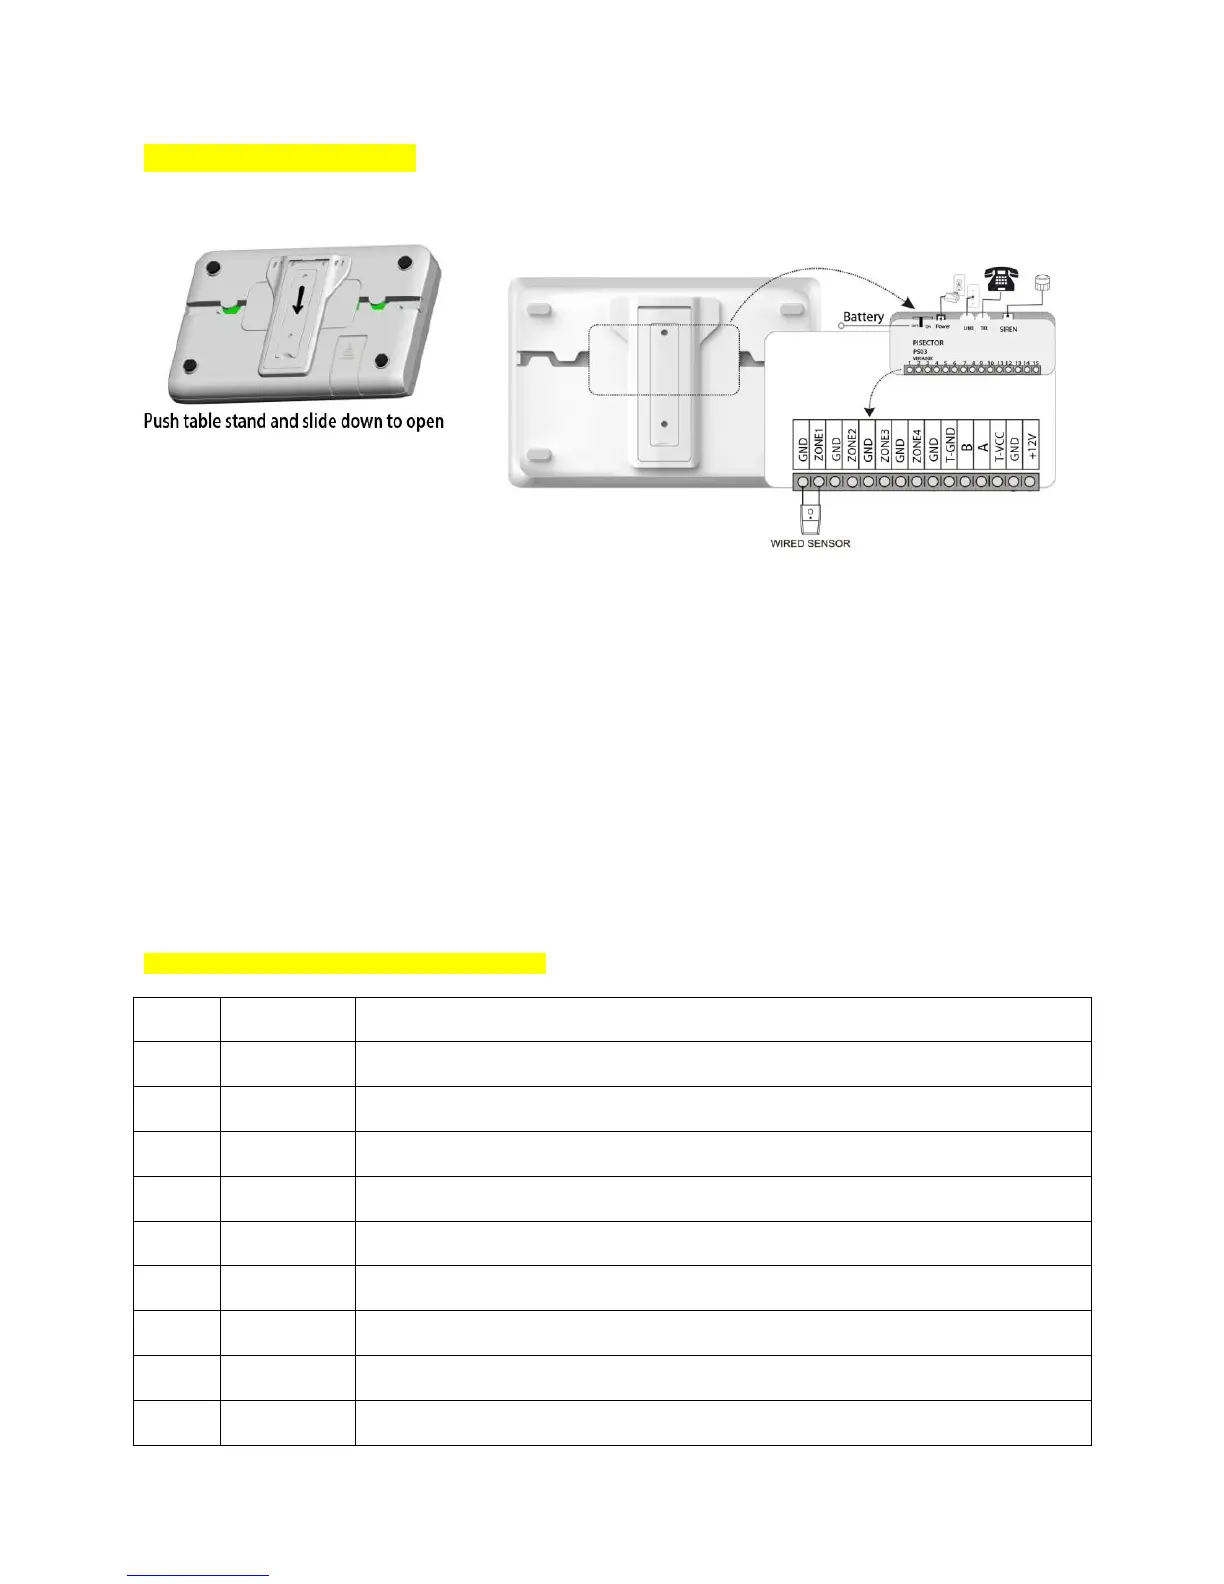
Remove the table stand
and cover on back side of console
Connect the phone cord to LINE Port on back of console (if you have no landline, you can
use OBi110/ MagicJack / Vonage / Ooma VoIP service to connect your Router / Modem then connect console
to the VoIP device )
Connect the regular telephone device to TEL port on back of console
Route the phone cord through the channel toward the side of the console
Connect the power adapter (12V 1A) to POWER port on back of console
Route the power adapter cord through the channel toward the side of the console
Plug the power adapter into nearby electrical wall outlet that is not controlled by a
switch
Keep the Battery Switch at ON position for internal backup battery charging.
If you have an existing sensor, connect it as shown in the figure on the right.
Wired Port - Function interface of the main unit
Wired sensor 1: support both NO and NC (Auto create Zone 47)
Wired sensor 2: support both NO and NC (Auto create Zone 48)
Wired sensor 3: support both NO and NC (Auto create Zone 49)
Wired sensor 4: support both NO and NC (Auto create Zone 50)