EasyManua.ls Logo

Pit Boss Navigator User Manual

Pit Boss Navigator
10 pages
To Next Page IconTo Next Page
Page #1 background imageLoading...
Page #1 background image
MODEL / MODÈLE / MODELO / MODELL / MODELLO : PB1150G
PART / PIÈCE / PARTE / TEIL / PARTE : 10616
  |  '
   |  |   
 
  
IMPORTANT, READ CAREFULLY, RETAIN FOR
FUTURE REFERENCE. MANUAL MUST BE
READ BEFORE OPERATING!
   
  
IMPORTANT, PRENEZ CONNAISSANCE DE
CE DOCUMENT ET CONSERVEZ-LE POUR
RÉFÉRENCE ULTÉRIEURE. VOUS DEVEZ LIRE
CE GUIDE AVANT D’UTILISER LE BARBECUE!
   
  
IMPORTANTE, LEER DETENIDAMENTE,
CONSERVAR PARA REFERENCIA FUTURA.
LEA EL MANUAL ANTES DEL USO!

 
WICHTIG: AUFMERKSAM LESEN UND GUT
AUFBEWAHREN BITTE UNBEDINGT VOR
GEBRAUCH DIE BEDIENUNGSANLEITUNG
SORGFÄLTIG DURCHLESEN!
   
  
IMPORTANTE: LEGGERE ATTENTAMENTE E
CONSERVARE PER RIFERIMENTO FUTURO.
LEGGERE IL MANUALE PRIMA DELL'USO.
            ,
  .       
  ,     .     
         .
    ’    ’ 
’          .  
        ,  
    .      
     '     .
             
     .      ,
   ,      .
           
 ,            
.
        ,   
,     .  
    ,   
  .        ,
       
     .
  '   '  '  
      .    
     ,    .  
    '        
          .
For outdoor and household use only. Not for commercial use.
Réservé à l'usage extérieur et résidentiel uniquement. Non destiné à un usage commercial.
Solo para uso doméstico y en el exterior. No apto para uso comercial.
Bitte nur im Freien und privat nutzen. Nicht für die gewerbliche Anwendung geeignet.
Solo per uso domestico ed esterno. Non per uso commerciale.
Question and Answer IconNeed help?

Do you have a question about the Pit Boss Navigator and is the answer not in the manual?

Pit Boss Navigator Specifications

General IconGeneral
Grill TypePellet Grill
MaterialSteel
Fuel TypeWood Pellets
WheelsYes
Temperature Range180°F to 500°F
Temperature ControlDigital
IgnitionAutomatic
Hopper CapacityVaries by model (typically 18-31 lbs)
Weight150 lbs

Summary

Parts and Specifications

Electric Requirements

Specifies voltage, frequency, wattage, and grounding for the appliance.

Assembly Preparation

Assembly Instructions

Securing Feet to Support Legs

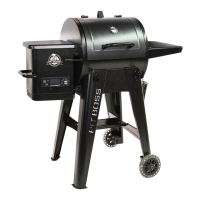
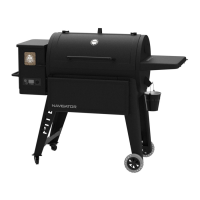
Attaches trim pieces to front and back legs for caster wheel mounting.

Securing Support Plates and Caster Wheels

Mounts support plates to legs and inserts caster wheels into bottom.

Securing Support Plates and Wheels

Attaches support plates to legs and installs wheels using axle pins and cotter pins.

Securing Support Plates to Legs for Wheels

Secures long support plates to legs intended for wheels, ensuring outward facing.

Securing Support Plates to Legs for Casters

Attaches long support plates to legs for caster wheels using screws.

Mounting Main Barrel to the Cart

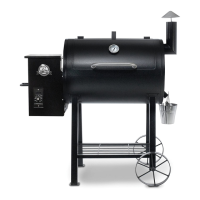
Attaches the main barrel assembly to the cart using screws, washers, and locking washers.

Securing Support Plates to the Grill

Secures long support plates to the main barrel using screws.

Installing the Lid Stopper

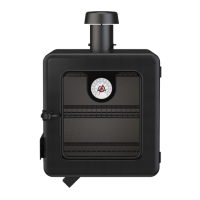
Attaches the lid stopper to the top of the main barrel using a pre-installed screw.

Installing the Lid Handle

Attaches the lid handle and bezels to the barrel lid using screws.

Placing the Diffuser Plate

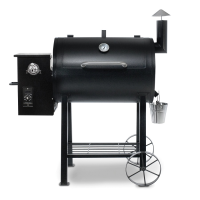
Installs the diffuser plate inside the main barrel, aligning with burn pot screws.

Installing Flame Broiler Components

Installs the flame broiler main plate and slider for adjustable heat control.

Installing Flame Broiler Adjusting Bar

Inserts the adjusting bar through the barrel and connects to the slider for heat adjustment.

Installing the Side Shelf

Attaches the side table to the main barrel using screws and locking washers.

Securing Front Shelf Brackets

Secures front shelf support brackets to the front support legs with screws and washers.

Installing the Front Shelf

Places the front shelf onto the secured front shelf support brackets.

Installing Grill Cooking Components

Places cooking grids and upper warming rack onto the ledges inside the main grill.

Installing the Grease Bucket

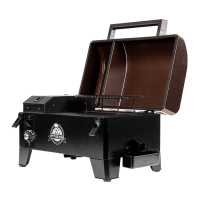
Attaches the grease bucket to the spout hook on the end of the main barrel.

Connecting to a Power Source

Ensures temperature dial is OFF before plugging into a grounded 220-240V outlet.
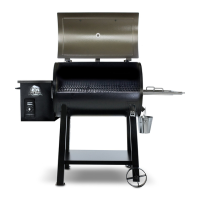
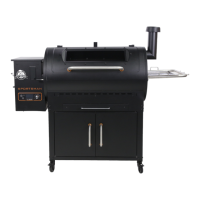
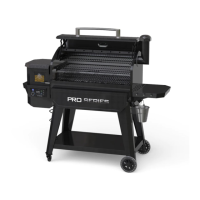
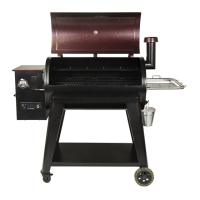
Related product manuals