11
11.
Parts Required:
1 x Long Hopper Handle
(#5-2)
4 x ¼–20x⅝" Screw
(#C)
1 x Short Hopper Handle
(#5-1)
2 x #10–24x½" Screw
(#D)
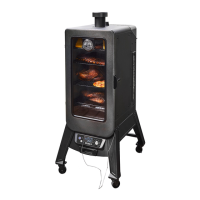
Installation:
• Mount the hopper handle onto the back side of the hopper using four
screws (#C). Note correct position in illustration 11A, with handle on top.
• Mount the hopper lid handle onto the back side of the hopper lid using
two screws (#D). Note 11B.
12.
Parts Required:
1 x Chimney Cap
(#3)
1 x Chimney Stack
(#4)
4 x #10–24x½" Screw (
#D)
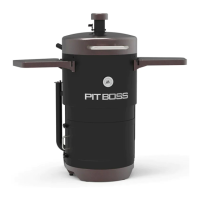
Installation:
• Locate the chimney opening on the top of the main cabinet. From the
outside, secure the chimney to the top panel using four screws. The
screw will fasten to the self-clinching nut on the inside of the cabinet.
Next, twist the chimney cap onto the top.
NOTE: Adjust the chimney cap to affect the airflow inside the main
grill. If cooking at low temperature, keep the cap more open.
13.
Parts Required:
1 x Lid Stopper
(#6)
2 x #10–24x½" Screw (
#D)
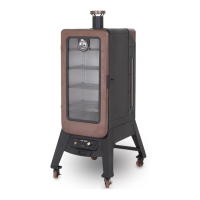
Installation:
• Install the lid stopper onto the top of the main cabinet near the hopper
lid, using one screw on the top side and one screw on the inside edge
between the hopper lid hinges.
14. ,
Parts Required:
1 x Cabinet Door Handle
(#8)
1 x Cabinet Door Latch
(#9)
4 x #10–24x½" Screw (
#D)
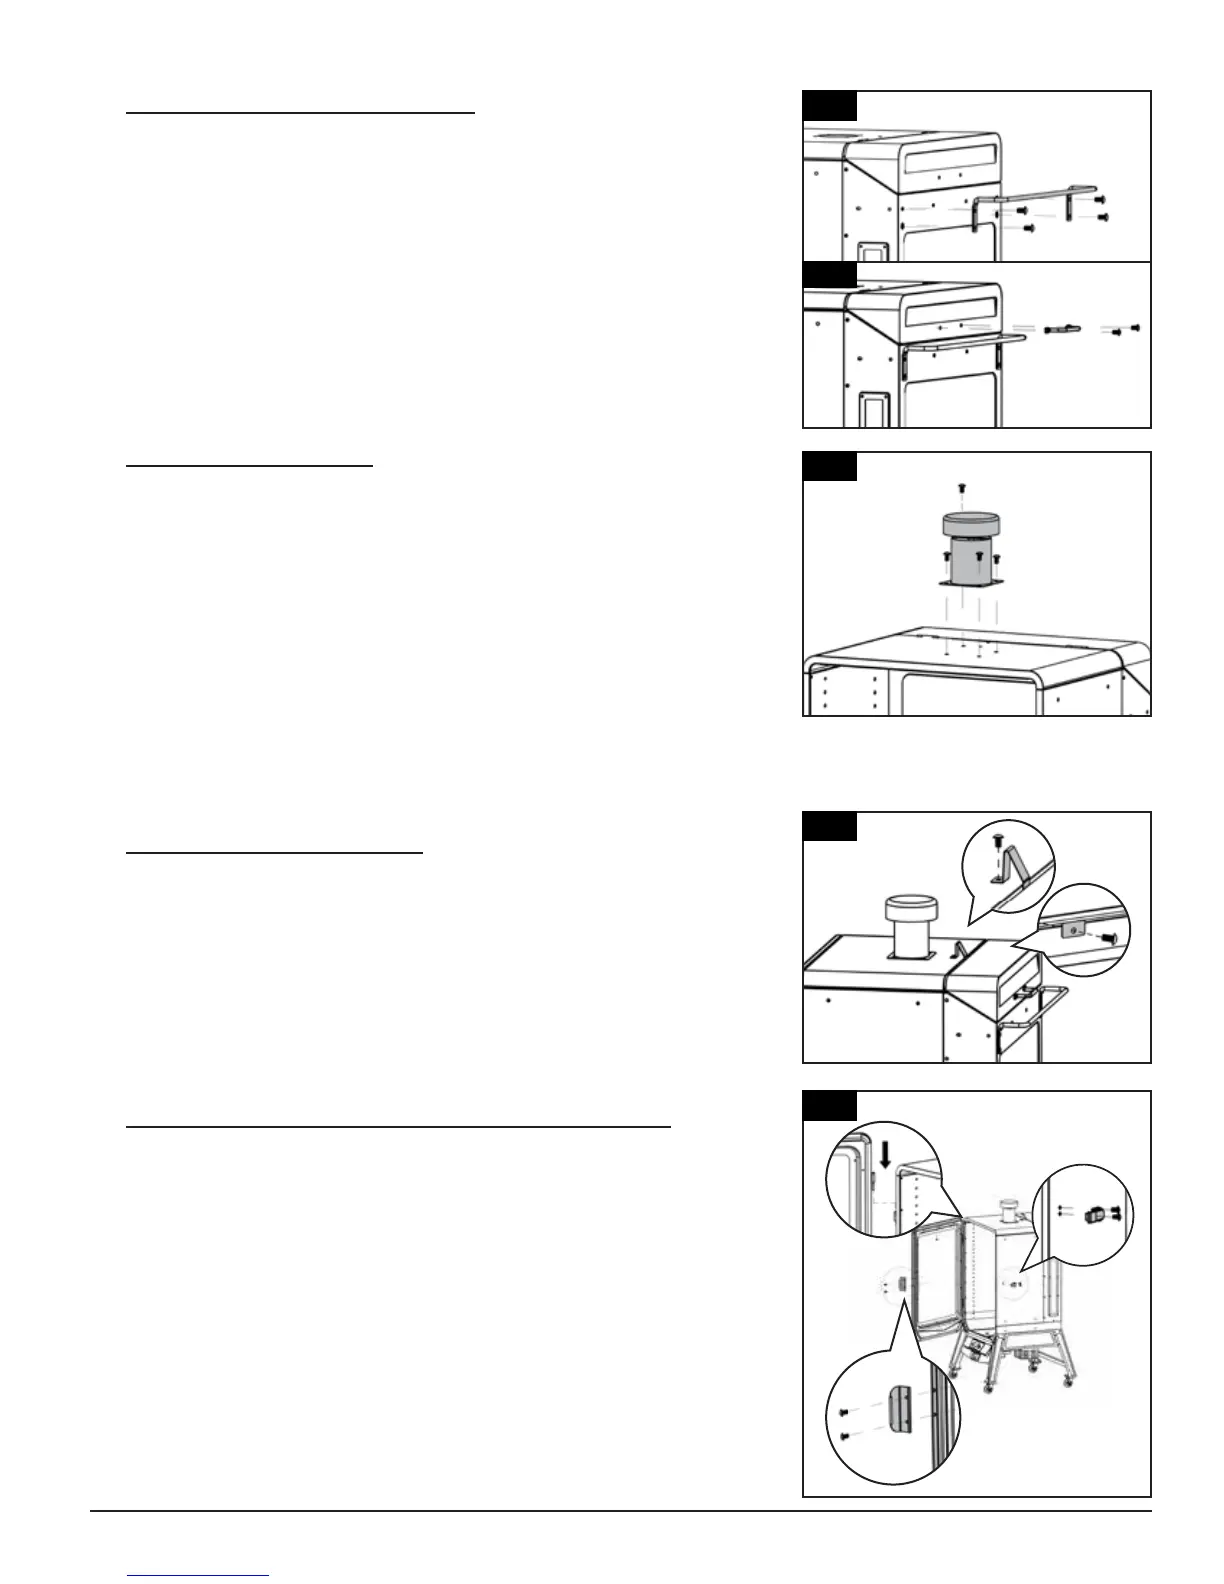
Installation:
• First, remount cabinet door to the main cabinet by aligning and
securing both hinges. Ensure the door is mounted correctly by testing
it opens freely. Note 14.
• Mount the cabinet door handle onto the front side of the cabinet door using
two screws. Note correct direction in 14. Mount the cabinet door latch onto
the exterior side of the main cabinet using two screws. Note 14.
11
12
11
14
14
14
14
13
51
52

 Loading...