Background
In this third sketch, you will spin a servo motor back and forth between two
different positions at a set speed. The motor will operate at 25% speed. This
behavior will continue until the Stop/Reset button is pressed.
Servo motors allow for a lot more precision in movement than DC motors do.
Execute the Code
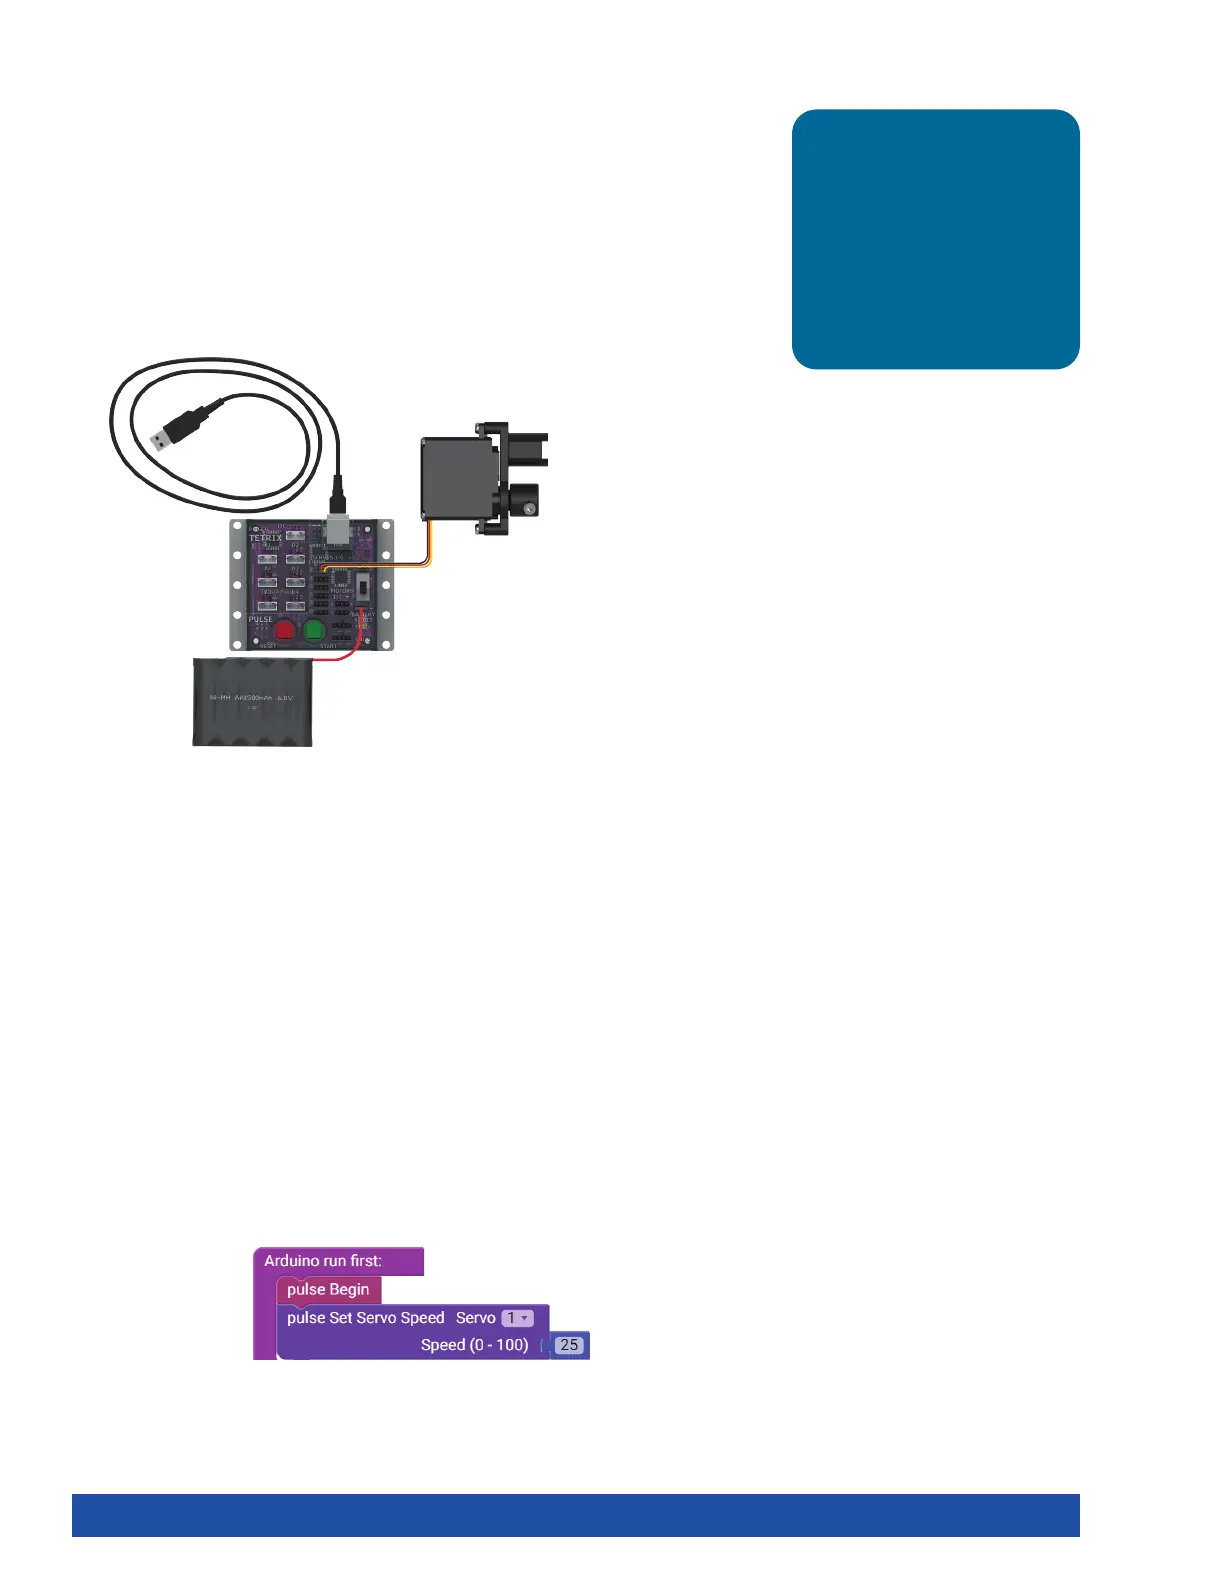
Before you can upload the sketch to the PULSE, remember to check your
connections. Keep in mind that you added a new connection with the motor. Plug
the end of the wire that extends from a servo motor into the Servo 1 port.
Upload the sketch. The green LED will light up, indicating that the code is ready
to execute. When this has happened, press the green Start button on the PULSE
controller.
Observe the direction and duration of the servo motor rotation. Did the motor’s
behavior match the intended program? Press the Stop/Reset button when you are
ready to stop the motor.
Further Investigate
In this sketch, you will use two new PULSE blocks: pulse Set Servo Speed and pulse
Set Servo Position. Both blocks have two parameters, but they are different.
The two parameters of the pulse Set Servo Speed block are servo channel and servo
speed.
In the example, Servo 1 will spin at 25% power while it rotates to the position
commanded by the pulse Set Servo Position block. This block is in the setup portion
of the setup-loop block because it needs to be listed once at the beginning of the
program (Figure 35).
Tip: What’s the difference
between a DC motor and a
servo motor? A DC motor
has two wires and can rotate
continuously. A TETRIX servo
motor has three wires and
can be placed into different
positions but can’t rotate
beyond 180 degrees.
Figure 35
34 Getting Started Activities