Experiment with the Line Finder Sensor on different surfaces and different heights
to see how the sensor reacts.
Extension Activity
With the example as a reference, try creating a new sketch to use your Line Finder
Sensor. Remember what you learned from your previous activities and think of
additional creative actions to perform based on the condition of the Line Finder
Sensor.
Real-World Link
There are many uses for a robot that can follow a line. Automated robots are being
developed to follow lines to deliver materials within hospitals. In the future, they
could also move materials around warehouses or transport goods.
Careers: materials engineer, electromechanical technician, software developer
STEM Connections
• Science
Ĕ Light
Ĕ Electromagnetic spectrum
• Technology
Ĕ Guidance system
Ĕ Automation
• Engineering
Ĕ Microcontroller
Ĕ Embedded system
• Math
Ĕ Angles
Ĕ Lines
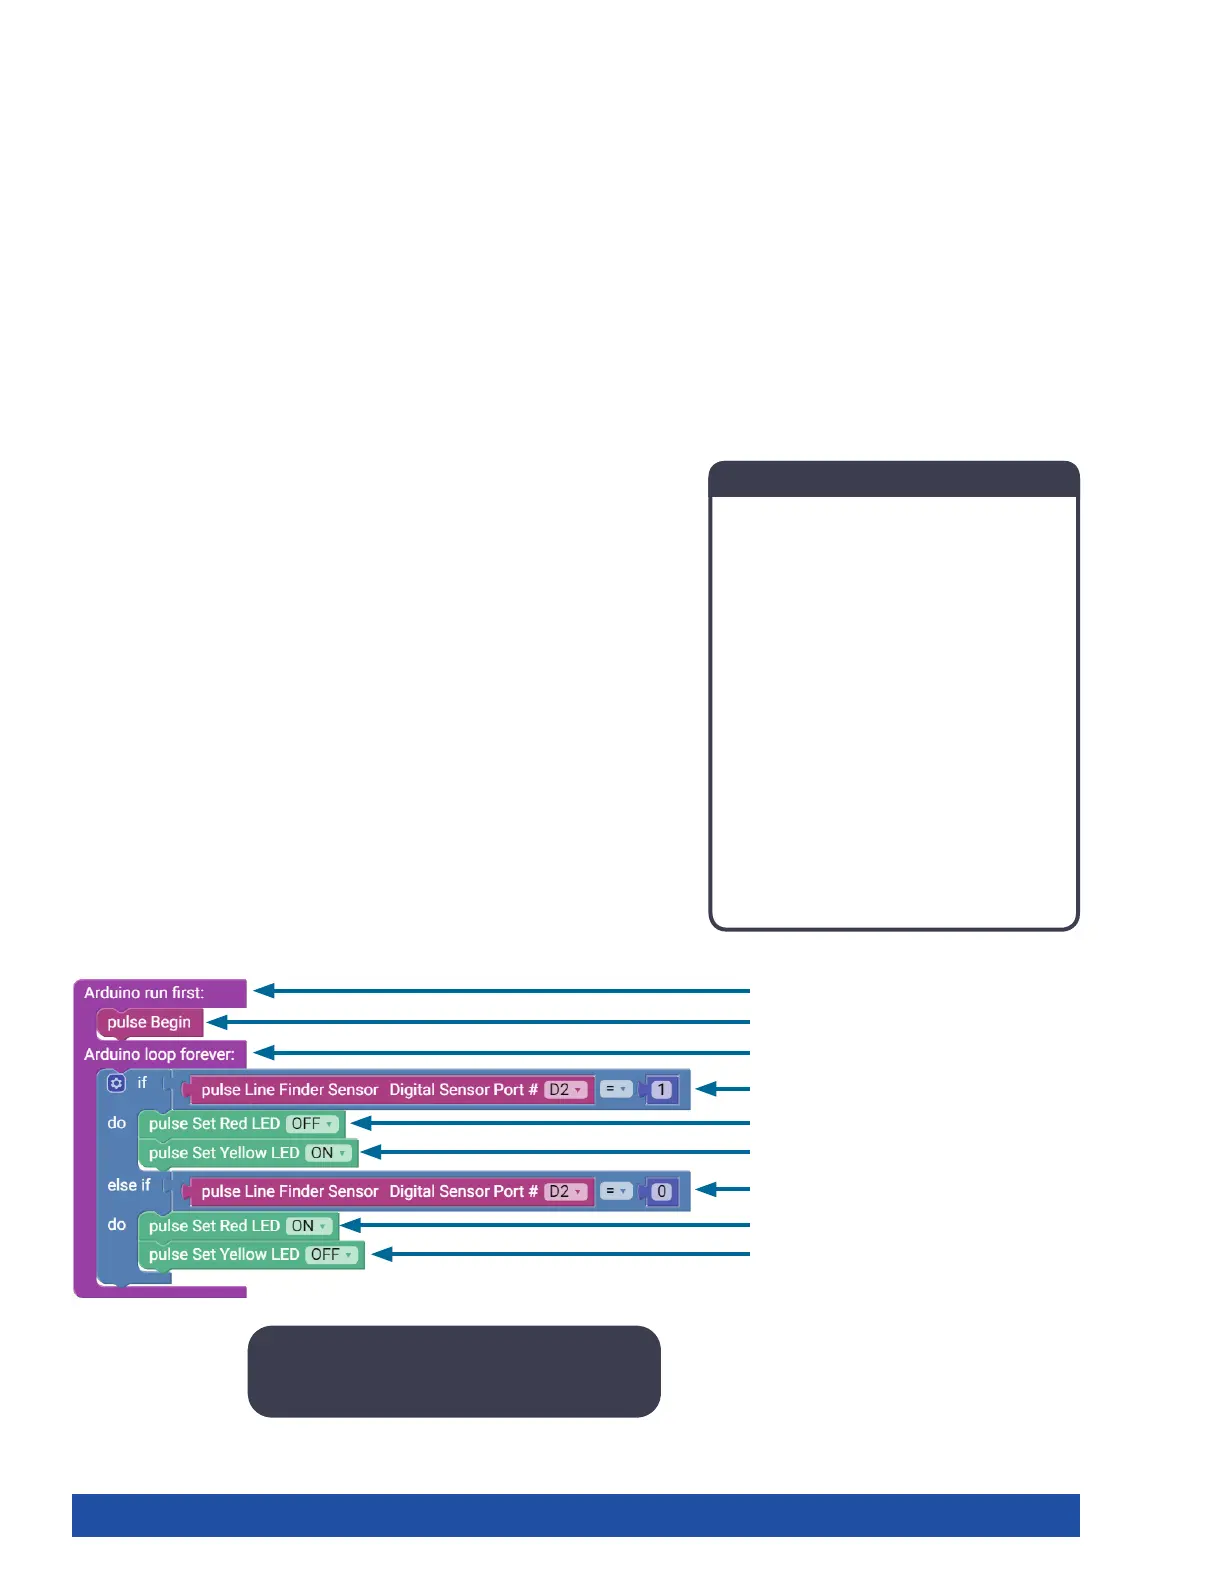
Block-Text Correlation
void setup() {
pulse.PulseBegin();
void loop() {
if (pulse.readLineSensor(2) == 1) {
pulse.setRedLED(LOW);
pulse.setYellowLED(HIGH);
} else if (pulse.readLineSensor(2) == 0) {
pulse.setRedLED(HIGH);
pulse.setYellowLED(LOW);
Note: All the actions completed in the if () or
if/else () loops are contained within braces.
Arduino Source Code
#include <PULSE.h>
PULSE pulse;
void setup() {
pulse.PulseBegin();
}
void loop() {
if (pulse.readLineSensor(2) == 1) {
pulse.setRedLED(LOW);
pulse.setYellowLED(HIGH);
} else if (pulse.readLineSensor(2) == 0) {
pulse.setRedLED(HIGH);
pulse.setYellowLED(LOW);
}
}
40 Getting Started Activities