1 7
1 6
Receiver connected with the camera
F
S
K
2.4GH
z
Wirele
ss Con
t
ro
ller
Preparation for installation and use
1. Make sure your receiver has been installed in place and
to ensure that cameras and receivers are shut down.
2. First, insert the input plug of the shutter connect
cable into the receiver' s output control signal socket in
place.
The timer remote control will not be able to control the camera if
the shutter connect cable didn’t insert correctly.
3. Fix the camera on the tripod or other fixed frame.
the protective cover of external shutter socket and put the
shutter plug of shutter connect cable in place, then make
sure it has been fixed firmly.
Open
For most of camera shutter socket, there is a mis-plug interface,
please note insert direction so as to avoid damage to shutter
socket.
4. Turn on the receiver' s power and then the camera' s
power.
Shooting control
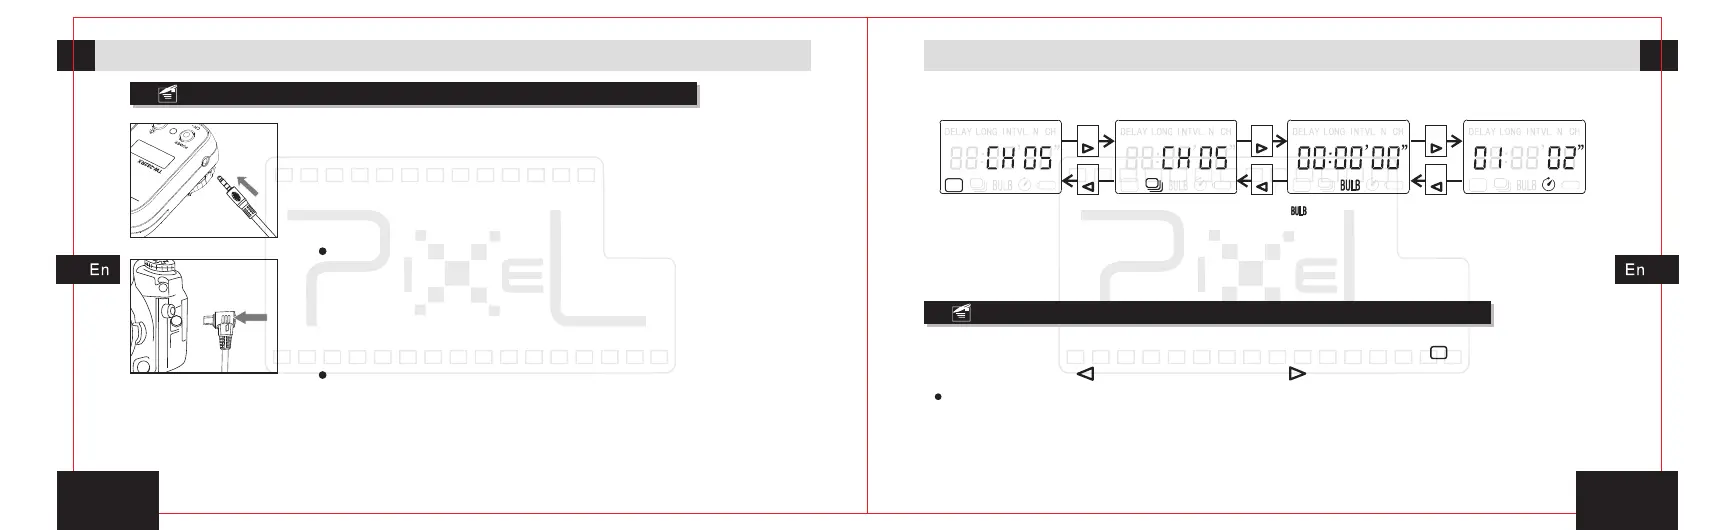
Sketch map for selecting function mode:
[ ]shooting functionSingle shooting function
Press
Press
Press
Press
Press
Press
Continuous shooting
within one sec function
Delay shooting function
The instruction is under the premise that the receiver and camera have been
connected tightly, and turned on the power of camera and receiver. The detail
instruction of remote shooting will be showing as follow.
Single shooting
1. In the power-on state, set the single shooting icon [ ] by pressing the
left move button[ ]or right move button[ ].
In the sleeping state, press any key to wake up transmitter to enter single shooting mode.
2. Half-press the release button and transmitter will send signal for focusing,
the green indicator will lit on the transmitter and receiver, and the camera is in
the focusing state until the release or full-press the button.