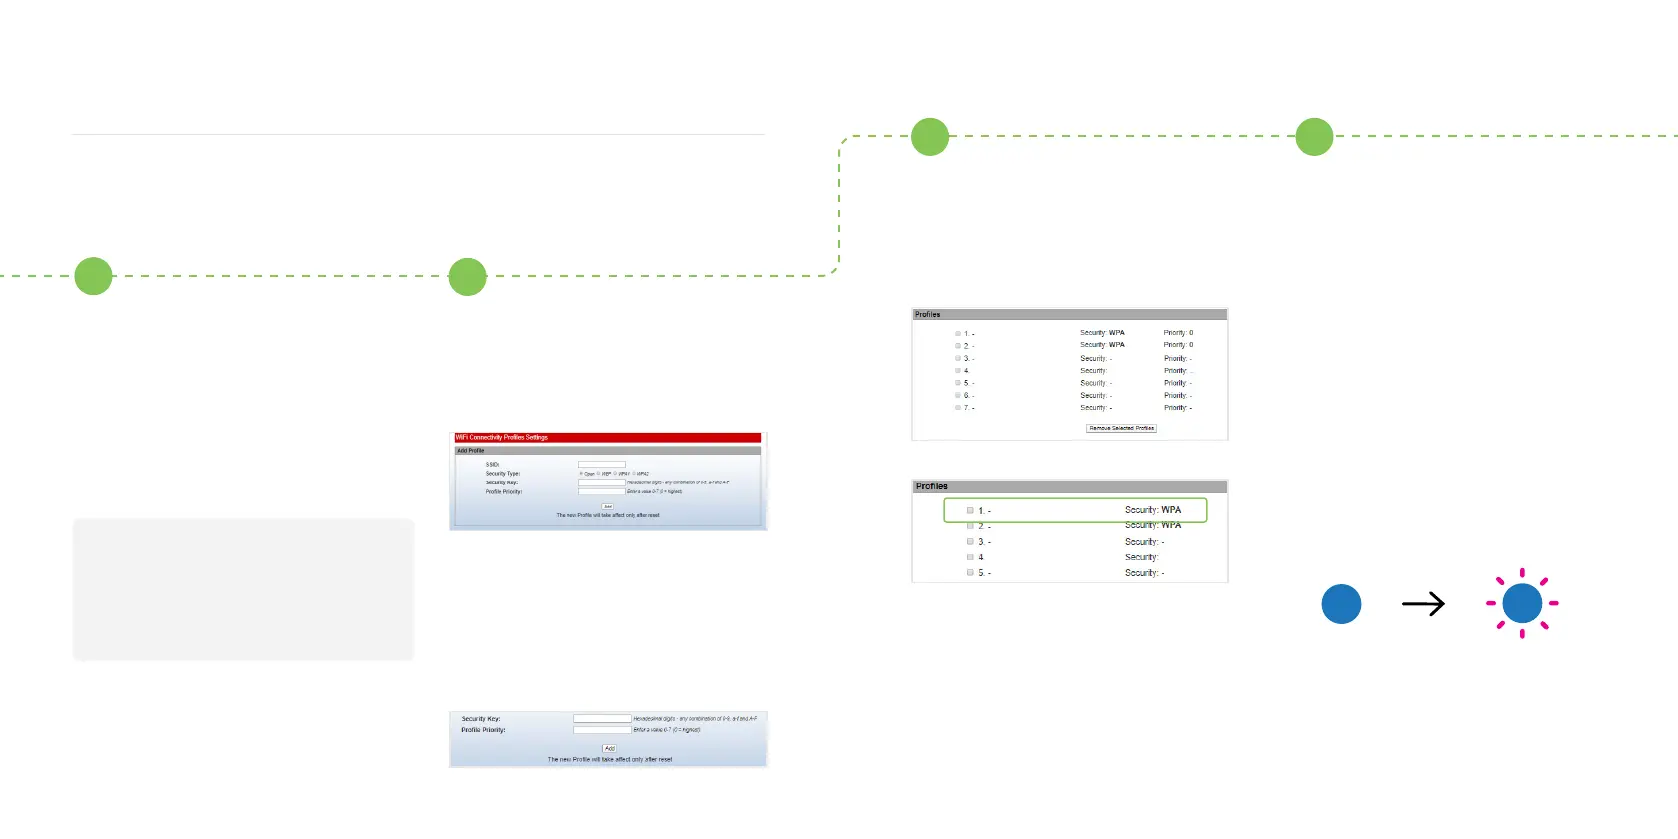
Type the name of your hotspot in
the SSID eld and select WAP2 for
security type.
Type the password for your
hotspot in the Security key eld
and set priority to 1 and press
Add . The page should refresh.
Scroll down and check that your
hotspot has been added to the
prole list.
4B
5B
6B
1615
If you do not have a second smart device follow these steps:
Follow this nal step to connect
your Solo to your phone hotspot.
Turn on the hotpsot again by
following the steps on page 09
and reset your Solo’s Wi-Fi by
turning the Solo o and on
again at the switch on the fuse
box/consumer unit.
The LED status light on the Solo
should turn blue ashing pink if
the connection to the hotspot is
successful.
Note: Once connected, the Pod Point Solo will show
up in your “connected devices list” (Android only),
iOS devices do not yet support this feature, instead,
a banner will show up at the top of your screen
stating that the smart device has been connected.
7
Hotspot
PP3GWi
Hotspot
PP3GWi
Using a temporary mobile hotspot
Open you web browser, type in
one of the following IP addresses
- please try the sequence below
and use all full stops. If the rst IP
address does not work, please try
the next one.
192.168.1.1/proles_cong.html
Or
192.168.101.1/proles_cong.html