Do you have a question about the Point Mobile PM260 and is the answer not in the manual?
Provides general safety guidelines for using the PM260 handy terminal.
Details safety instructions and warnings related to the device's power supply.
Explains safety precautions and warnings concerning the Class 2 laser product.
Step-by-step instructions for installing the main battery pack into the terminal.
Guidance on charging the main and backup batteries before first use.
General guidelines for safe battery pack use, storage, and disposal.
Instructions on how to power on the device and what to expect during startup.
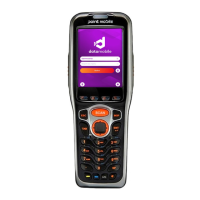
Outlines the key features included in the PM260 handy terminal.
Lists the technical specifications of the PM260 Handy Terminal.
Diagram and explanation of the PM260's front panel components and controls.
Diagram and explanation of the PM260's back panel components.
Diagram and explanation of the PM260's left side panel buttons.
Diagram and explanation of the PM260's right side panel buttons.
Diagram and explanation of the PM260's top panel components.
Diagram and explanation of the PM260's bottom panel connectors.
Explains the terminal's intelligent battery technology with main and backup batteries.
Guidance on maintaining power supply and checking battery status.
Instructions for performing soft and hard resets on the terminal.
Describes the function of basic keys like ALPHA, Backspace, Escape, and Enter.
Introduces the IT5300SR 2D image engine and its capabilities.
Lists all 1D, 2D, Composite, OCR, and Postal bar code symbologies supported.
Instructions on how to activate the image engine using the Scan key.
Details the Full-area Imaging decode mode and omni-directional aiming.
Step-by-step guide for decoding a bar code using the Scan Demo.
Introduces the N4313 laser engine and its capability to read 1D bar codes.
Lists all 1D bar code symbologies supported by the laser engine.
Instructions on how to activate the laser engine using the Scan key.
Step-by-step guide for decoding a bar code using the Scan Demo.
Introduces ScanWedge for sending scan data to foreground applications as keystrokes.
Explains how to enable ScanWedge by tapping its icon in the command bar.
Overview of communication options including ActiveSync and wireless radios.
Instructions for connecting the terminal to a workstation using a USB cable.
Details on synchronizing the terminal with a host workstation using ActiveSync.
Details the available 802.11b/g/n and Bluetooth radio options.
Guidance on connecting the terminal to a wireless network via its onboard radios.
Information about the terminal's 2.4 GHz WLAN radio and its configuration.
Steps to enable the Bluetooth radio and check its status icon.
Guide on connecting the terminal to other Bluetooth-enabled devices.
Instructions for pairing the terminal with other Bluetooth devices using a passkey.
| Operating System | Android |
|---|---|
| RAM | 4 GB |
| Storage | 64 GB |
| NFC | Yes |
| Display | 5.0 inches |
| Connectivity | Wi-Fi, Bluetooth, 4G LTE |
| Battery | 4000 mAh |
| Durability | 1.5m drop resistance |
| Barcode Scanner | 1D/2D Barcode Scanner |