ELECTRICAL 5 - 36
November 2007 GEM Service Manual
REMOVAL
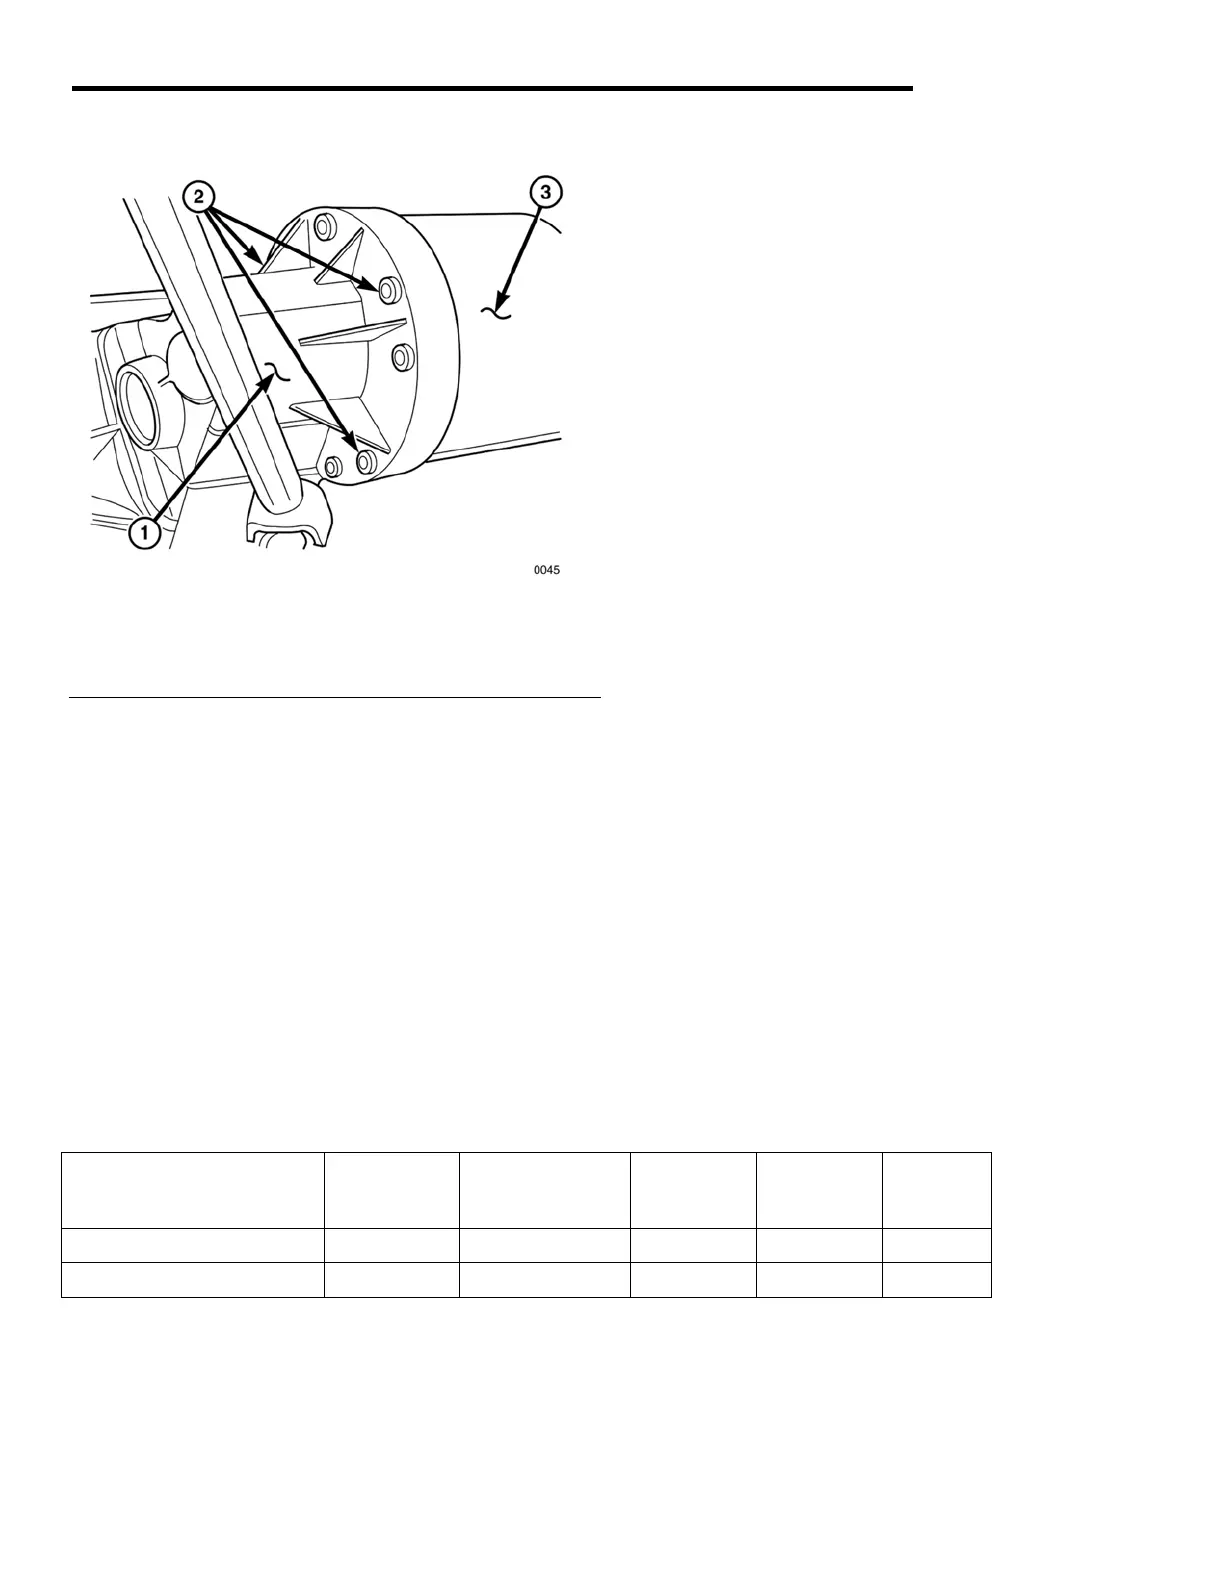
Fig. 21 Motor to Differential Attachment
1 - Differential
2 - Mounting Bolts (3)
3 - Motor
1. Open the hood assembly.
2. Switch the master disconnect switch to OFF.
3. Raise and support the vehicle using a suitable
hoist (if necessary).
4. Remove the front wheel and tire assemblies for
improved access (not necessary).
5. If equipped, remove black plastic air scoop to gain
access to motor (e6 and eLXD).
6. Disconnect power wires from top and rear of
motor with 1/2-inch wrench, noting connections
and locations (see figure 20).
7. Disconnect 3-wire pigtail (speed sensor -
tachometer) (see figure 20).
8. Disconnect the 2-wire pigtail (temp sensor) (see
figure 20).
9. Remove 3 bolts from differential side of motor
(see figure 21) with 7/16-inch wrench or socket,
taking care to support motor, which weighs 30-40
pounds
10. Remove motor, noting the orientation of power
posts for reassembly, and then pull straight out.
INSTALLATION
1. Make sure to put a resilient bumper inside motor
spline socket. The cupped end of the bumper will
face outward. Be sure bumper is all the way in the
spline socket.
2. Put a very light coating of Valvoline Special Moly
Ep grease or equivalent on the splined differential
shaft (not necessary). (Too much grease will
cause motor problems.)
3. Install motor, making sure power posts on motor
face the same direction as before.
4. Install 3 motor/differential mounting bolts with
7/16-inch wrench or socket. Make sure to add one
drop of Loctite® to each motor/differential bolt.
Torque bolts to 65 in-lb.
5. Connect power wires to top and rear of motor with
1/2-inch wrench,
6. Install air scoop if previously removed.
7. Install the front wheel and tire assemblies. Tighten
wheel lug nuts just snug.
8. Lower vehicle to floor.
9. Torque wheel lug nuts to 65 ft-lb.
10. Turn the master disconnect switch ON.
11. Close the front hood assembly
Description Thread
Size
Use Loctite®
242
In-Lbs Ft-Lbs N-m
Motor to differential – Yes 65 – –
Wheel lug nuts 12 mm No – 65 88