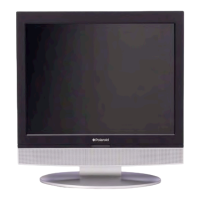
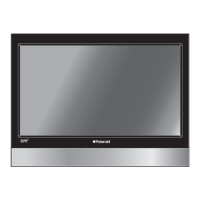
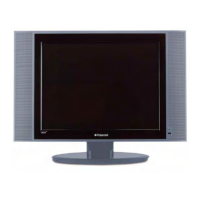
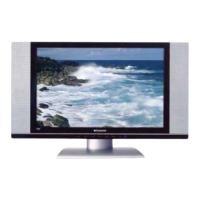
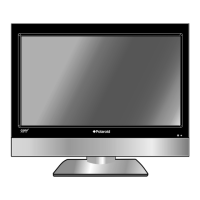
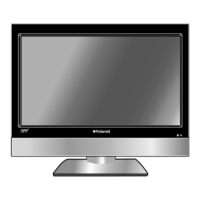
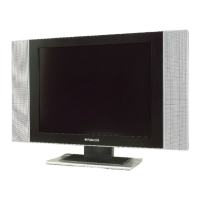
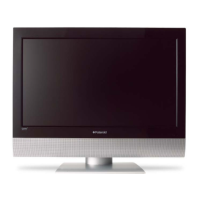
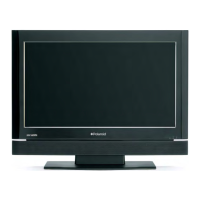
This document describes the Polaroid 15" LCD Television, models FLM-1514, FLM-1514B, FLM-153B, and FLM-1517. It functions as an LCD display and TV receiver in a single system, offering multiple modes and high-quality display properties.
Function Description
The device is a 15-inch color TFT liquid crystal display (LCD) television. It integrates an LCD display with a TV receiver, allowing it to function as both a monitor and a television. The television supports various input modes, including Component, VGA, TV, Composite, and S-VIDEO, making it versatile for different signal sources. It features a built-in stereo amplifier with 2x3w speakers, providing high-quality sound.
Usage Features
Multiple Modes:
The TV supports several operational modes:
- Component mode: For high-quality video input.
- VGA mode: Allows connection to a personal computer, turning the TV into a computer monitor.
- TV mode: For receiving broadcast television signals.
- Composite mode: For standard video input.
- S-VIDEO mode: For enhanced video input compared to composite.
High Quality Property:
The 15-inch color TFT LCD screen is designed to clearly display data. It's important to note that it is normal for a TFT screen to exhibit some light or dark spots.
Special Functions:
- Sleep Time Setting: The TV supports a sleep timer function, allowing users to set a specific time after which the TV will automatically turn off.
- Multi-audio and Multi-video modes: The device supports multiple audio and video modes, offering more selection options for users.
- Auto TV Searching Function: When connected to a TV antenna, the TV can automatically search for and store available TV programs.
The TV can be connected to external audio and video signal sources, as well as a PC, expanding its utility beyond just a television.
Front Panel Controls:
The front panel includes several buttons for easy operation:
- INPUT button: Cycles through input modes (Component, VGA, TV, Composite, S-VIDEO).
- MENU button: Enters or exits the setup menu.
- CH ▲/▼ buttons: Selects channels in TV mode and navigates through setup menu options.
- VOL ◄/► buttons: Adjusts volume in TV mode and navigates through setup menu options.
- POWER button: Toggles standby mode.
- Remote Sensor: Receives signals from the remote control.
Rear Panel Connections:
The rear panel provides various input/output jacks:
- Component Input / L/R Audio Input Jack: For Component video (YPbPr) and associated L/R audio.
- S-VIDEO Input Jacks: For S-VIDEO input.
- VIDEO/L/R Audio Input Jack: For Composite video and associated L/R audio.
- DC 9.5V/12V In Jack: For connecting the power adapter.
- VGA Input Jack: For connecting to a personal computer's VGA output.
- PC AUDIO Input Jack: For connecting to a personal computer's audio output.
- TV Signal Input Jack: For connecting an external NTSC TV signal (antenna/cable).
Remote Control:
A comprehensive remote control is provided for convenient operation. Key remote functions include:
- INPUT button: Same as the front panel button.
- 0~9 Number buttons: For direct channel selection.
- LAST button: Returns to the previously viewed channel in TV mode.
- MUTE button: Toggles speaker output.
- Direction buttons (▲▼◄►): Navigates menus and adjusts settings.
- OK button: Confirms selections.
- INFO button: Displays current status information.
- VOL +/- button: Increases or decreases volume.
- SLEEP button: Selects sleep time.
- CC button: Displays or cancels closed captions in TV or CVBS mode.
- MTS button: Activates MTS (Multi-channel Television Sound) function in TV mode.
- POWER button: Same as the front panel button.
- ENT button: Confirms selected TV channel during channel selection.
- MENU button: Enters the LCD setup menu.
- EXIT button: Exits the setup menu.
- CH +/- button: Selects channels in TV mode.
Connecting to External AV Signal Source:
To connect an external AV signal source (like a recorder, vidicon, satellite receiver, or game player), use the appropriate audio and video cables to the rear panel jacks. After connection, power on both the TV and the external source, then press the INPUT button to switch to the corresponding mode (Composite, S-VIDEO, or Component).
Connecting to PC:
To use the TV as a computer monitor, connect a VGA cable from the PC's VGA output to the TV's VGA input jack, and an audio cable from the PC's audio output to the TV's PC AUDIO input jack. It is recommended to set the PC's resolution to 1024x768@60Hz. After connecting, power on both devices and press the INPUT button to switch to VGA mode.
Connecting to TV Signal:
Connect a TV antenna or CATV cable to the TV Signal Input Jack on the rear panel. After powering on, press the INPUT button to switch to TV mode. Channels can be selected directly using the number buttons on the remote, with confirmation via the ENT button for certain channel number formats. The TV also supports an Auto Scan function to automatically search for and memorize programs.
The TV offers various settings accessible through the MENU button:
- Image Setting: Adjusts display properties such as Scheme (Normal, Vivid, Sports, Nature), Brightness, Contrast, Hue, Saturation, and Sharpness. An Advanced Setup option is available in Component and VGA modes.
- Audio Setting: Controls audio properties including Volume, Bass, Treble, Balance, and MTS (Auto, Mono, Stereo, SAP).
- Sleep Setting: Configures the sleep timer (15Min, 30Min, 45Min, 60Min, 75Min, 90Min, 105Min, 120Min, or Off).
- Parental Setting (V-CHIP): Allows for parental controls, including changing the PIN (default is 1111), clearing all settings, and setting TV Rating, Movie Rating, CA Eng Rating, CA Fr Rating, and Parental Lock.
- Setup Setting: Includes Tuner/Channel settings, Language selection (English, French, Spanish), Factory Reset, and CC Mode (Closed Captions: CC OFF, CC1, CC2, CC3, CC4, TEXT1, TEXT2, TEXT3, TEXT4).
- Tuner/Channel: Allows for Auto Scan, Channel System selection (Antenna, Cable, HRC, IRC), Program Organizer (Channel Name, Add Program, Delete Program), and Fine Tune.
- Auto Scan: Automatically searches and memorizes TV programs.
- Prog Organizer: Manages channels, including naming, adding, and deleting programs. Adding a program cancels the skip function, while deleting activates it.
- Fine Tune: Allows for manual fine-tuning of channels.
Maintenance Features
Remote Control Battery Installation:
The remote control uses two 1.5V AAA batteries. Ensure correct polarity when inserting them. The battery compartment is accessed by gently pushing the back cover. Under normal use, batteries should last about six months. If the remote is not used for a long time, remove the batteries.
Remote Control Usage Notes:
- Point the remote control unit towards the remote sensor on the TV, within approximately 7 meters and a 60-degree angle from the front of the unit.
- Avoid pointing bright lights directly at the remote control sensor.
- Do not place objects between the remote control unit and the sensor.
- Avoid operating this remote control unit simultaneously with other equipment's remote controls.
Important Safety Instructions:
- Read and follow all instructions and warnings.
- Do not use the apparatus near water.
- Clean only with a dry cloth.
- Ensure proper ventilation; do not block openings or place the product on soft surfaces that may obstruct airflow.
- Do not install near heat sources.
- Use only manufacturer-specified attachments/accessories.
- Use caution when moving the cart/apparatus combination to prevent tip-over.
- Unplug the apparatus during lightning storms or when unused for long periods.
- Refer all servicing to qualified service personnel.
- Do not expose the apparatus to dripping or splashing liquids, and do not place liquid-filled objects on it.
- Do not touch the color TFT LCD screen directly by hand.
Power Supply:
Plug the two-prong power cord into an AC100-240V outlet. If the plug doesn't fit, turn it over and reinsert. Disconnect the plug from the outlet if the unit will not be used for a long time. Ensure all connections are made before plugging in the power cord.
Troubleshooting:
The manual provides a troubleshooting guide for common issues:
- No sound: Check system connections, ensure speakers are not muted, and set the correct sound mode in TV mode.
- No picture/picture moves up and down: Ensure the unit is turned on, connections are correct, power adapter is connected, external AV signal source connections are correct, picture menu items are set correctly, video type input signal corresponds to the unit, and the unit is in the correct video type.
- Remote control not working: Check for obstructions, ensure the remote is pointed at the player, verify batteries are inserted with correct polarity, and ensure batteries are not weak.
Note about External Interference:
Static or other external interference may cause abnormal behavior. If this occurs, unplug and re-plug the power cord to reset the player. If problems persist, disconnect power and consult a qualified technician.
Note about Picture Compression:
If black bars appear on the sides of the LCD screen and the picture is compressed, adjust the settings of your cable/satellite set-top box. Consult its manual or contact your cable/satellite company for instructions.